Learning how to dry herbs is one of those small apartment-garden skills that pays you back all year. A few stems of thyme from a balcony pot, a bunch of mint from a sunny windowsill, or extra rosemary from a neighbor can turn into a tidy jar of seasoning instead of fading in the fridge. The trick is not speed alone. Good drying herbs need gentle heat, steady airflow, and enough patience to let moisture leave without cooking away the scent.
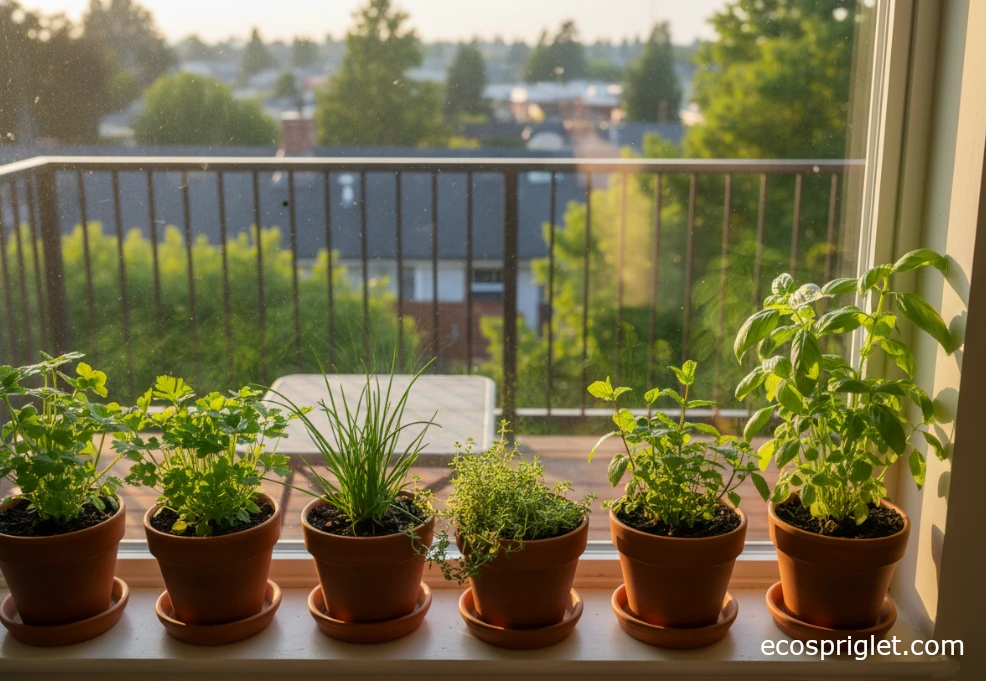
I like drying small batches because apartment herb harvests rarely arrive in giant farm-basket quantities. You might have enough basil for dinner, three sprigs of thyme, and a handful of oregano that needs attention before the next rain. That is perfect. Small batches dry more evenly, take up less counter space, and make it easier to catch problems early. Below, I’ll walk through air drying, dehydrator drying, oven drying, herb-by-herb decisions, doneness checks, common mistakes, and storage so your dried herbs taste like something you actually grew.
Start With Clean, Flavorful Herbs
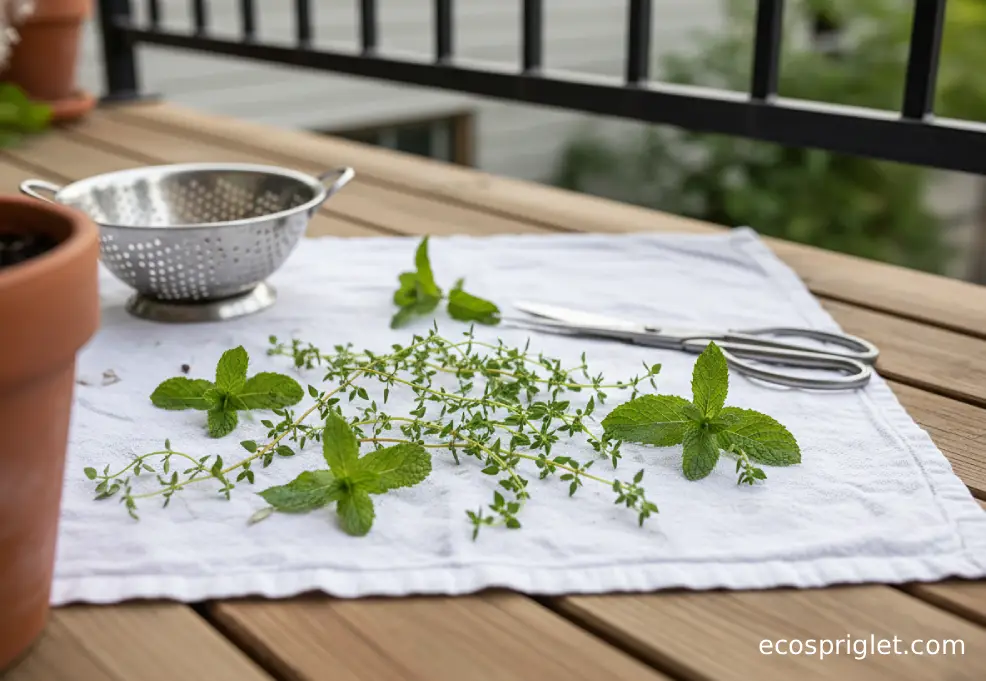
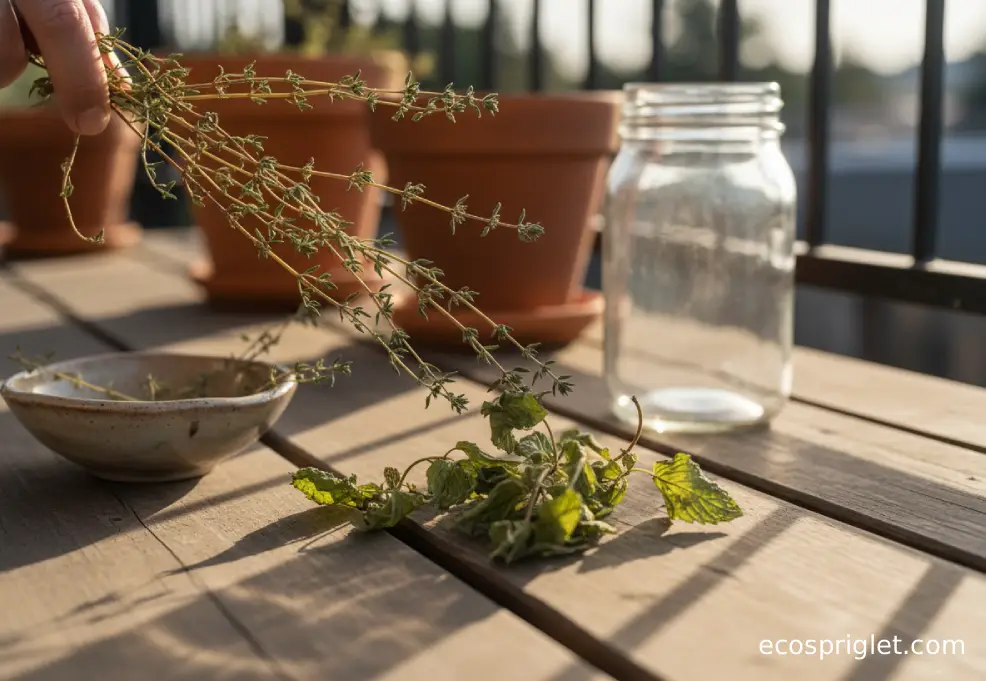
The best dried herbs start before anything goes near a rack or oven. Harvest on a dry morning after the dew has evaporated, and aim for leafy stems just before flowering when the flavor is usually strongest. The National Center for Home Food Preservation recommends gathering herbs early after dew dries, avoiding bruised leaves, and keeping cut herbs out of direct sun after harvest.
For balcony growers, this usually means taking a small bowl outside around mid-morning, snipping only healthy stems, and bringing them in right away. If the herbs are dusty, splashy from potting mix, or store-bought, rinse them under cool running water, then dry them very thoroughly with a towel or salad spinner. The FDA advises washing produce under running water and drying it with a clean cloth or paper towel; it also notes that perishable fresh herbs should be refrigerated at 40°F or below when they are not being used right away.
Do not dry yellowing, slimy, insect-chewed, or muddy leaves. Drying concentrates flavor, but it does not magically rescue tired herbs. I usually sort with two piles: beautiful leaves for drying, rougher bits for the compost pail. If washed herbs still feel damp after 10 minutes on a towel, give them more time. Extra surface moisture makes mold more likely during air drying and can make oven or microwave batches cook instead of dry.
Air Drying Works Best for Woody Stems
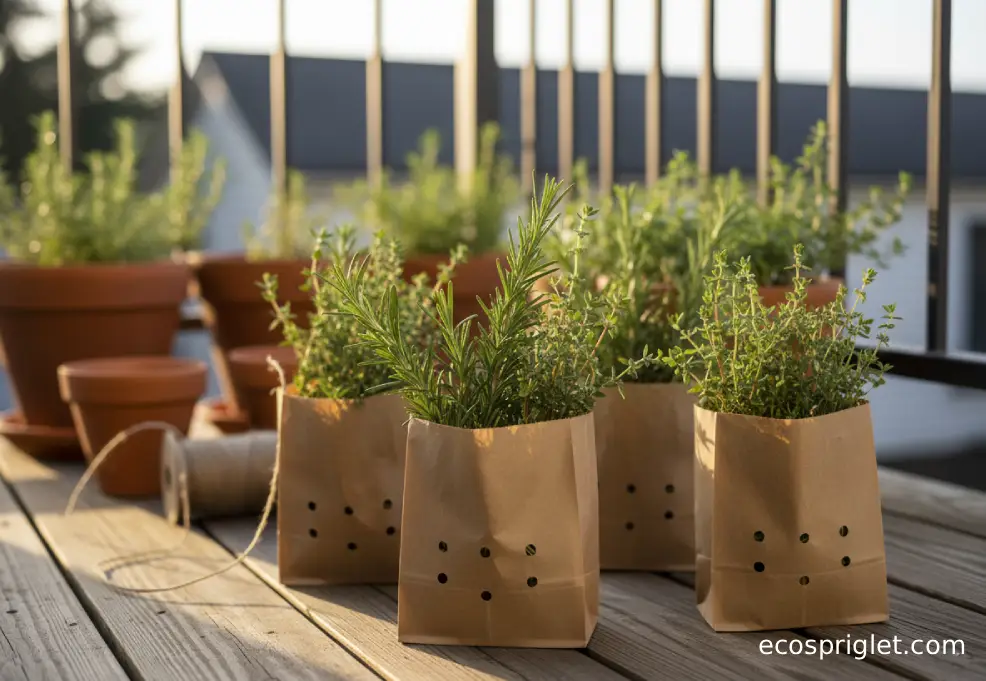
Air drying is the simplest method, and it is especially friendly to sturdy herbs like thyme, rosemary, sage, parsley, and summer savory. The basic idea is warm, dry air moving around small bundles until the leaves crumble and the stems snap. NCHFP specifically recommends small bundles for sturdier herbs and notes that indoor drying usually keeps better color and flavor than outdoor air drying.
I learned the “small bundle” rule the hard way during my first Portland balcony summer. I tied a fat handful of mint like a bouquet, hung it in the kitchen, and found a musty center three days later. Now I keep bundles about pencil-thick at the stems and give them space.
- Use 4 to 6 stems per bundle for woody herbs, or fewer if the stems are leafy and dense.
- Hang bundles in a warm, dry, well-ventilated room, not in a sunny window.
- Slip tender or seed-bearing herbs into paper bags with several small ventilation holes to catch dropped leaves and reduce dust.
- Check every 2 to 3 days; if the bundle smells musty, spread the leaves on a rack or switch to a dehydrator.
Sun drying sounds romantic, but it is not the best choice for culinary herbs. NCHFP says sun drying is not recommended for herbs because they can lose flavor and color.
University of Minnesota Extension also separates indoor air drying from sun drying and points out that sun or solar drying can be hard to control because heat, airflow, humidity, and time vary so much.
Use a Dehydrator When Apartment Air Is Humid
A dehydrator is not required, but it is wonderfully predictable if your apartment runs humid, your windows stay closed, or you are drying tender leaves that mold easily. NCHFP recommends dehydrator drying for high-quality herbs because temperature and air circulation are controlled, with a typical herb setting of 95°F to 115°F and up to 125°F in more humid areas. It also notes that drying time can vary from 1 to 4 hours, so periodic checks matter.
Arrange herbs in a single layer with stems and leaves not piled on top of each other. I usually leave thyme and rosemary on the stem, then strip the leaves after drying. For mint, oregano, and lemon balm, I remove the best leaves first because dense stems slow everything down. If you are working from a tiny kitchen, put the dehydrator near an outlet with a little clearance around the vents rather than wedging it into a corner.
Start checking delicate leaves after the first hour. If they still bend softly, keep going. If they shatter into dust when touched, the batch may be over-dried but still useful in soups or rubs. Apartment note: dehydrators make a low fan sound and release herbal scent into the room. That is charming with thyme, less charming with large batches of mint at midnight, so I run mine earlier in the day.

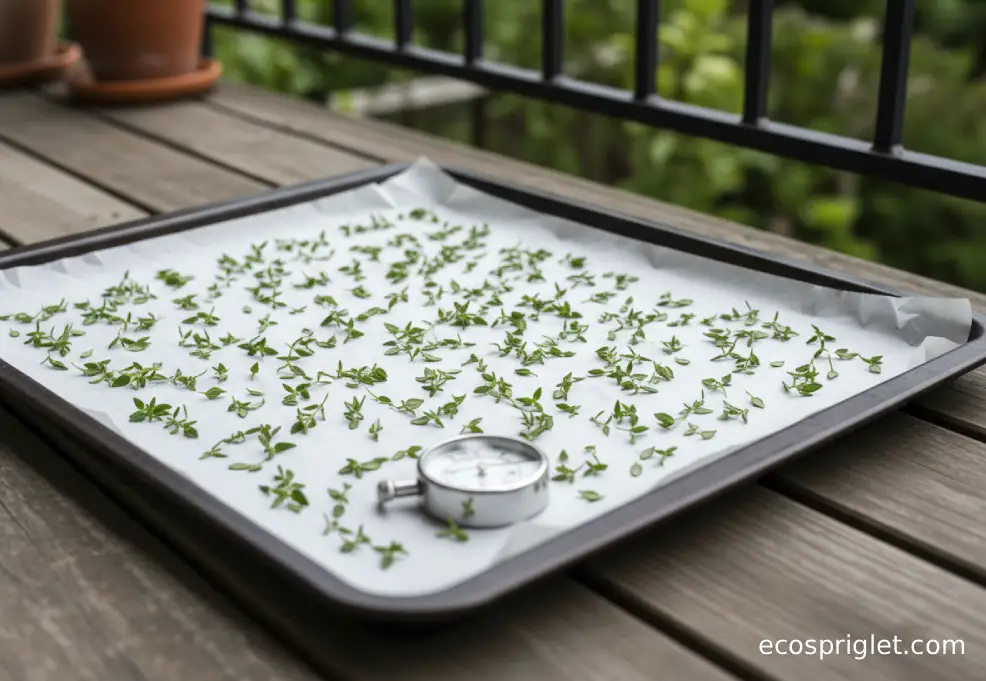
The Oven Method for Small Apartment Batches
If you want to dry fresh herbs without buying another appliance, the oven can work for small batches, but it asks for attention. Herbs are delicate. Illinois Extension notes that 90°F to 110°F is ideal for oven-drying herbs when that low range can be maintained, while NCHFP suggests a very cool oven for individual leaves, even using the warmth from an oven light in some electric ranges. Many modern ovens do not hold temperatures that low, so the goal is gentle warmth, airflow, and frequent checking rather than blasting the tray.
- Set the oven to its lowest setting and use an oven thermometer near the tray.
- Spread leaves or small sprigs in one thin layer, with pieces not touching much.
- Prop the door slightly open only if it is safe in your home, especially away from children and pets.
- Turn or stir leaves every 30 minutes and begin checking closely after 1 hour.
- Stop when leaves crumble easily; many herb oven batches take about 3 to 4 hours when the temperature stays low.
For anyone comparing how to dry herbs in the oven with air drying, the trade-off is simple: the oven is faster, but flavor and color can fade if the heat creeps too high. University of Minnesota Extension warns that ovens need low temperatures for drying foods and that turning up the heat can cook the outside before the inside dries, which may lead to later mold.
Dry Thyme, Rosemary, Mint, and Basil Without Guesswork
Different herbs dry at different speeds because leaves, stems, and moisture levels vary. Thyme is one of the easiest apartment herbs to dry because the small leaves lose moisture quickly and strip cleanly from the stem once crisp. Rosemary is similar, though its thicker needles often need more time. Mint, oregano, tarragon, lemon balm, and basil hold more moisture, so they need quicker drying or looser handling to avoid mold. NCHFP calls out tender-leaf herbs as higher-moisture plants that may mold if not dried quickly.
| Herb | Best Small-Space Method | Practical Cue |
|---|---|---|
| Thyme | Air dry or dehydrator | Dry on the stem, then rub leaves off when stems snap. |
| Rosemary | Air dry or dehydrator | Keep bundles small so the woody stems do not trap damp air. |
| Mint | Dehydrator, tray drying, or paper-bag air drying | Remove the best leaves from stems if your apartment is humid. |
| Basil | Dehydrator or freezing for best color | Air-dried basil often darkens; freeze some if fresh flavor matters most. |
Basil deserves its own expectation check. University of Minnesota Extension says basil can be air dried in a warm, dry, well-ventilated room for about a week, but also notes that basil leaves may turn an unpleasant brown color when air-dried and that freezing is often a better method for basil quality.
Know When the Herbs Are Truly Dry
The doneness test is more reliable than the clock. Herbs are dry when leaves crumble easily between your fingers and stems break when bent. NCHFP gives the same cue for dried herbs and recommends packaging only after leaves are crispy dry.
Let warm herbs cool completely before you close them in jars. A batch can feel dry on a tray and still release a little trapped warmth or moisture once sealed. I like to do a simple overnight jar check: place a small amount in a clean glass jar, close it, and look the next morning. If you see condensation on the inside of the glass, or if the herbs feel limp again, spread them back out and dry them longer. NCHFP warns that seemingly dry foods can spoil if moisture is reabsorbed during storage and recommends checking dried foods for moisture; moldy dried foods should be discarded.
Use your nose too. Properly dried thyme should smell clean, woody, and concentrated. Mint should smell bright, not hay-like or sour. A musty smell means the herbs were too wet, too crowded, or stored too soon. Do not try to save moldy herbs by reheating them. Compost the batch, clean the jar, and start again with smaller bundles or a faster method.
Common Mistakes to Avoid
Most failed herb-drying batches come from moisture, crowding, or heat. The good news is that all three are easy to fix once you know what to watch for.
- Making bundles too thick: Keep bundles small enough that air can move through the stems. If the center feels cool or damp after a day, untie it and spread the herbs on a rack.
- Putting herbs in direct sun: Sun can bleach color and flatten flavor. Use a warm indoor spot with airflow instead. NCHFP specifically advises against sun drying herbs for flavor and color reasons.
- Storing before herbs are brittle: If leaves bend instead of crumble, they are not done. Keep drying and check again later.
- Crushing everything before storage: Whole dried leaves hold fragrance better. Illinois Extension recommends avoiding crushing leaves until you add them to recipes.
- Using high oven heat to hurry: More heat is not better. It can cook herbs, dull aroma, and leave inner moisture behind.
A microwave can dry a tiny emergency batch, but treat it as a quick tool, not your main method. Illinois Extension recommends washing and drying herbs thoroughly first, placing them between paper towels, microwaving on high for 1 to 3 minutes, and checking every 30 seconds because scorching and fire are possible. University of Minnesota Extension also calls microwave drying fast but the least desirable method because herbs can lose more essential oil.
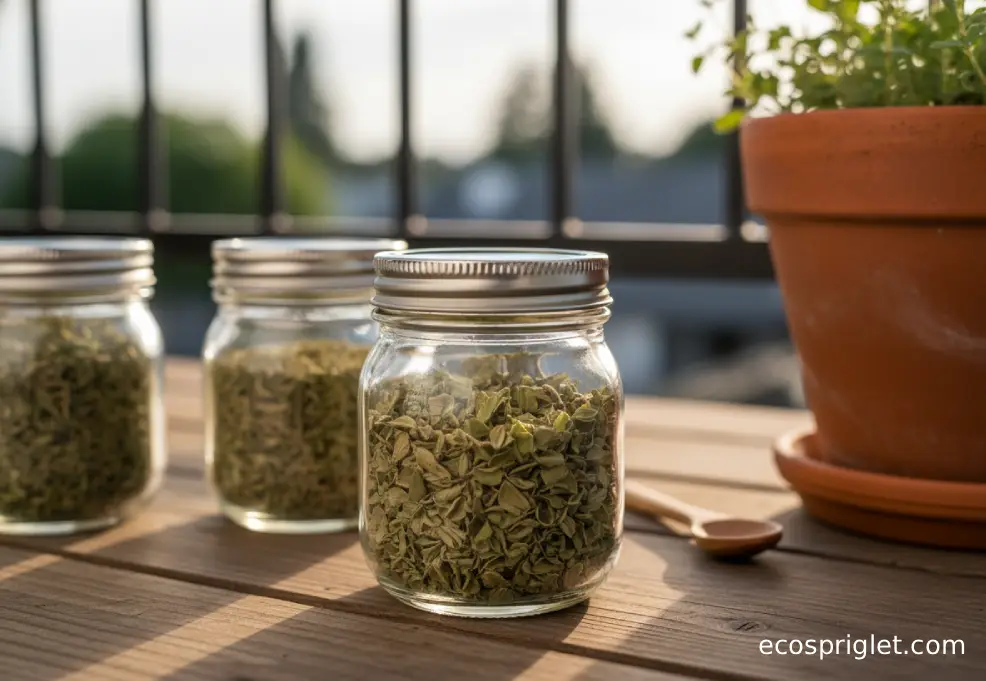
Store and Use Dried Herbs So They Stay Fragrant
Once your herbs are dry and cool, move them into airtight containers and store them in a cool, dry, dark cabinet. Glass jars are especially helpful because you can spot condensation quickly. NCHFP recommends airtight containers in a cool, dry, dark area to protect color and fragrance, and its broader dried-food storage guidance gives a quality range of about 4 months to 1 year depending on storage conditions.
Label each jar with the herb and month, even if you think you will remember. In February, dried marjoram and oregano can look suspiciously similar after a long week. Keep jars away from the stove, dishwasher, sunny windowsill, and radiator. Heat and light are quiet flavor thieves.
- Store leaves as whole as practical, then crumble them into the pan.
- Use dried herbs within 6 to 12 months for the best aroma.
- Use about 1/3 as much dried herb as fresh herb in recipes, then adjust to taste.
- Check opened jars for condensation, clumping, mold, or a stale smell.
Dried herbs are usually stronger than fresh herbs, and both NCHFP and University of Minnesota Extension recommend using roughly 1/4 to 1/3, or about 1/3, of the fresh amount when substituting dried herbs in recipes. For more small-space harvest ideas, visit our balcony herb garden guide, and for keeping tender herbs productive before harvest, see our beginner guide to growing basil.
Drying herbs at home is less about fancy equipment and more about timing, airflow, and restraint. Harvest clean stems in the morning, dry them gently, and wait until the leaves are truly crisp before storing. Air drying is perfect for small bundles of thyme and rosemary. A dehydrator earns its keep in damp apartments. The oven can help when you use the lowest heat you can safely manage and check often. Basil may ask for a little humility; sometimes freezing keeps its flavor better than drying.
My favorite part is the first winter meal that uses a jar from the balcony. A pinch of home-dried thyme in soup or crushed mint in tea reminds you that even a small terrace can stock the pantry in quiet ways. Start with one herb, one method, and one small jar. Once that works, you can build a tidy shelf of dried herbs from your own pots without wasting precious apartment space.