By Daniel Carter — I garden on a small Portland balcony, so I’ve learned to treat every banana peel and coffee filter as a little resource, not just trash. If you cook at home, you already have most of what you need to start composting: fruit peels, coffee grounds, tea leaves, crushed eggshells, and plain paper towels.
The trick is choosing a method that fits your space. A tiny balcony bin can work if you have airflow and a steady supply of dry “browns.” A worm bin can live indoors and quietly turn scraps into rich castings. Bokashi is the sealed, low-odor option for people who want to handle more types of kitchen waste before finishing it in soil.
This guide walks you through how to compost at home in a small apartment, how to keep smells and fruit flies away, and how to use finished compost safely in containers and houseplants. I’ll keep it practical: what to add, what to avoid, what to do when things get soggy, and how much compost to use so your plants benefit without getting overwhelmed.
Why Compost at Home (Even in an Apartment)
Composting is nature’s recycling, scaled down to a kitchen and a few pots. Instead of sending all your food scraps to the trash, you give microbes—or worms, depending on the method—a chance to turn that material into a useful soil amendment.
For apartment gardeners, the biggest benefit is not that you’ll produce huge amounts of compost. You probably won’t. The real benefit is that a small, steady supply of finished compost can improve tired container mixes, feed balcony herbs gently, and reduce the amount of kitchen waste that sits in the bin. The EPA’s home composting guidance also emphasizes the same basic balance apartment gardeners need: browns, greens, air, and moisture.
Finished compost should look dark and crumbly, with an earthy smell rather than a rotten one. Vermicompost, also called worm castings, is especially useful for containers because it is fine-textured and easy to top-dress. Bokashi is different: it ferments scraps in a sealed bucket, but the material still needs to be buried or mixed into soil to finish before you use it around plants.
- Less kitchen waste: Fruit peels, coffee grounds, and vegetable scraps stop filling the trash so quickly.
- Better container soil: Finished compost improves texture and supports soil life in pots.
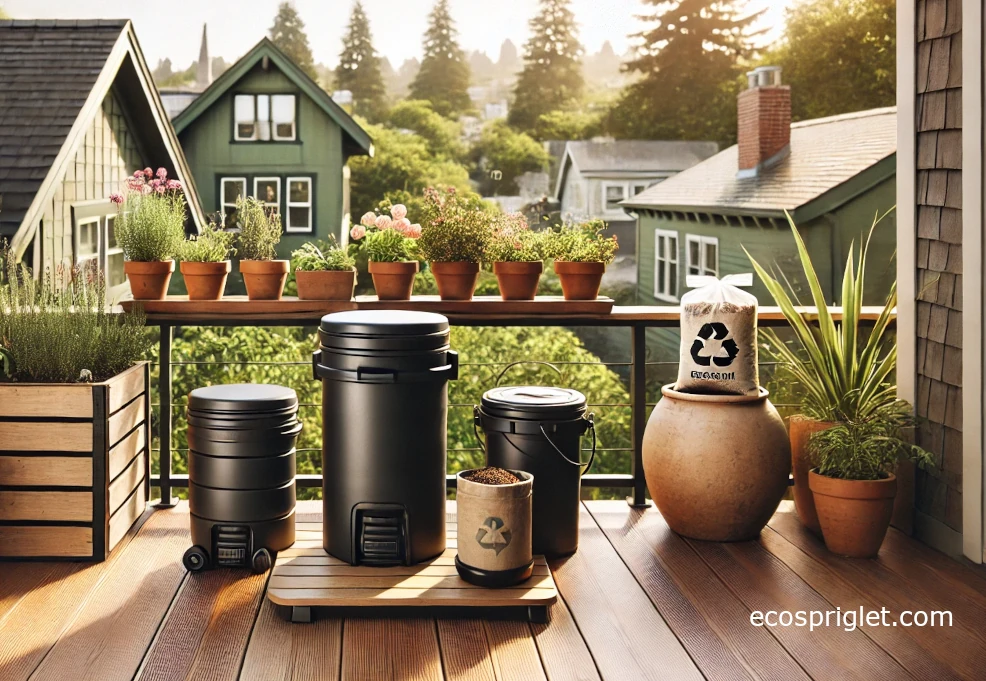
- Small-space choices: You can use a balcony mini bin, an indoor worm bin, or a sealed bokashi bucket.
The Three Apartment-Friendly Methods (Pick One)
The best composting method is the one you will actually maintain. I say that from experience. My first tiny balcony bin failed because I treated it like a magic bucket: scraps went in, but not enough dry material followed. Once I started keeping shredded cardboard beside the bin, everything became easier.
For most apartment gardeners, one of these three systems is enough:
- Mini aerobic bin: Best for a shaded balcony or patio. It needs air, chopped scraps, and plenty of dry browns. Turn it about once a week.
- Vermicomposting bin: Best indoors, under a sink, in a closet, or in a utility corner. Red wigglers process small amounts of food steadily and produce rich castings.
- Bokashi bucket: Best for a sealed, low-odor system. It ferments scraps first, including small amounts of meat or dairy, then the fermented material finishes in soil.
If you are nervous about smells, start with bokashi or worms. If you already have a balcony corner and don’t mind turning a small bin, an aerobic setup is the cheapest path. And if you mostly want compost for houseplants and herbs, a worm bin is hard to beat once it settles in.
What You Can & Can’t Compost
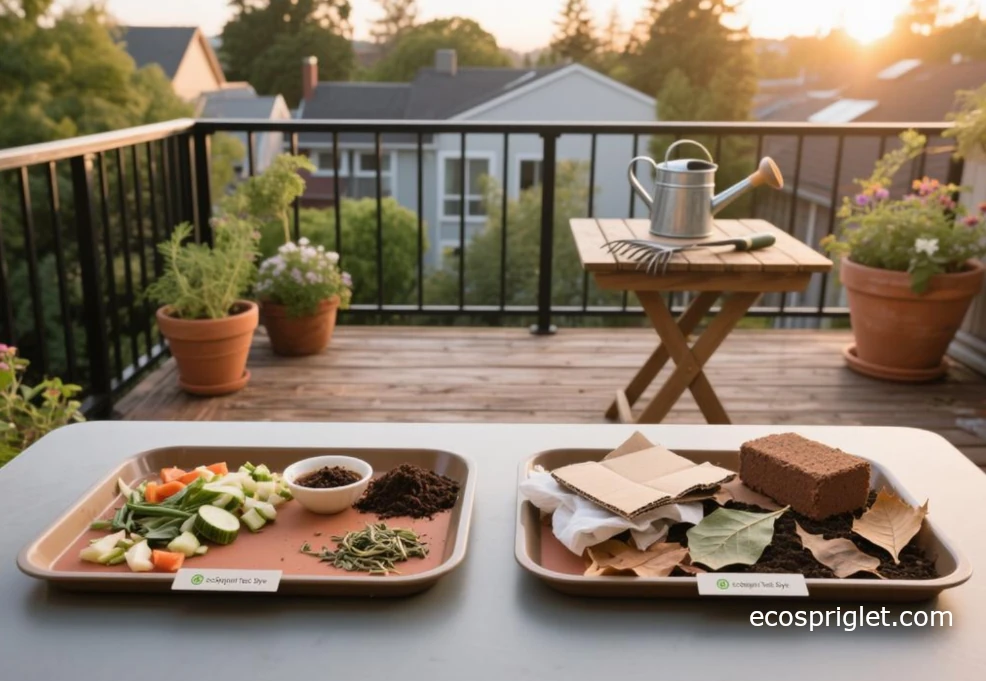
Think in two groups: greens and browns. Greens are moist, fresh, nitrogen-rich materials like fruit and vegetable scraps. Browns are dry, carbon-rich materials like shredded cardboard, paper bags, and dry leaves. In a small apartment system, browns are your odor control, moisture control, and fruit-fly control all at once.
For a mini aerobic bin or worm bin, I like to aim for roughly 2–3 parts browns to 1 part greens by volume. You do not need to measure with a cup every time. Just train your eye: every wet layer should disappear under a dry layer. If the bin smells sharp, sour, or swampy, add more shredded cardboard and mix gently.
- Good greens: Fruit and vegetable scraps, coffee grounds, paper coffee filters, loose tea leaves, and crushed eggshells.
- Good browns: Shredded cardboard, plain paper towels, paper bags, dry leaves, and small amounts of coco coir.
- Avoid in aerobic and worm bins: Oily foods, large amounts of citrus, meat, dairy, glossy paper, plastic-coated paper, and pet waste.
- Bokashi exception: Bokashi buckets can handle a wider range of food scraps, but the fermented material still needs a soil-finishing stage before plant use.
Chopping scraps makes a real difference. A banana peel cut into small pieces breaks down faster than one tossed in whole. The same goes for broccoli stems, onion skins, and thick fruit peels. Smaller pieces also make it easier to cover food fully with browns, which is one of the simplest ways to prevent fruit flies.
Choosing a Bin (Store-Bought vs. DIY)
You can buy a tidy composting system, but you do not have to. A good apartment bin is not about looking fancy. It needs the right kind of airflow, drainage, or sealing for the method you choose.
For a mini aerobic bin, airflow matters most. A lidded 5-gallon bucket or storage tote can work if you drill small vent holes around the upper sides and lid. Keep it out of hard afternoon sun, especially on a hot balcony, because a small bin can dry out or overheat quickly.
For worms, choose an opaque tote or stacking worm system with drainage and bedding space. Oregon State University Extension notes that red wigglers are the best worm for bin composting and do best in moderate temperatures, so an indoor spot is usually easier than a balcony that swings from cold nights to hot afternoons. For bokashi, the priority is the opposite of an aerobic bin: you want an airtight bucket, usually with a spigot for draining liquid.
- Store-bought: Look for tight lids, compact footprints, stacking worm trays, or bokashi buckets with a spigot.
- DIY aerobic bin: Drill ⅛–¼ inch holes around the upper sides and lid, then place the bin on a tray.
- DIY worm bin: Use two opaque totes, with the top bin draining into the lower one.
- Placement: Use a shaded balcony corner, under-sink cabinet, pantry floor, or closet floor with a boot tray underneath.

Step-by-Step Setup
Once you have a bin, do not overfill it in the first week. Small compost systems behave better when they build up gradually. A full bucket of scraps dumped into a new bin often turns wet and sour before the microbes or worms can keep up.
Aerobic Mini Bin
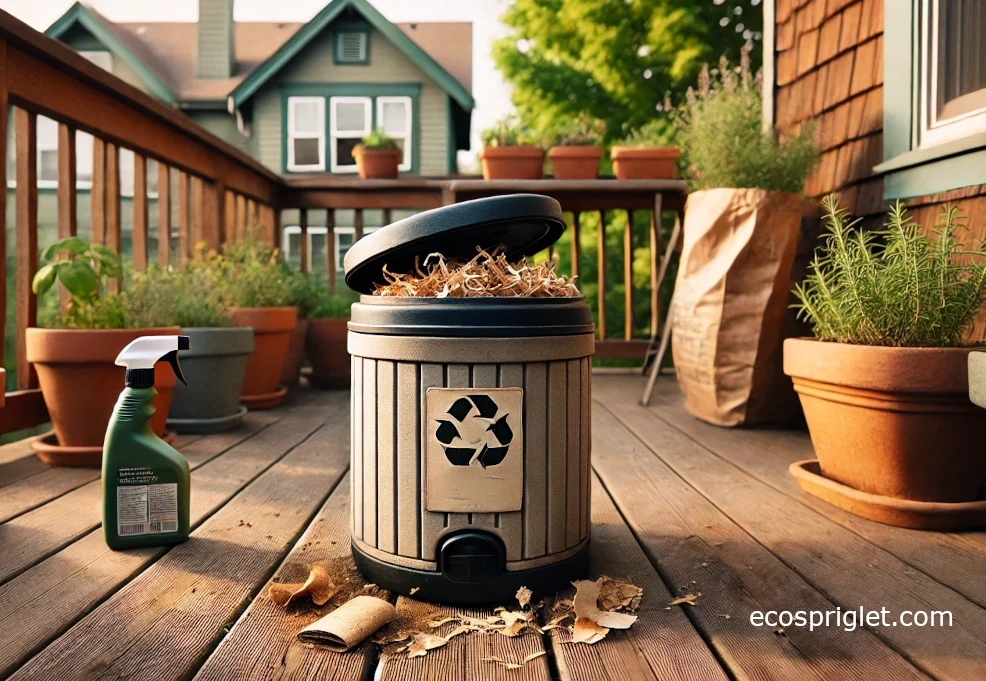
Start with 3–4 inches of dry browns on the bottom. Add a thin layer of chopped scraps, then cover that food completely with shredded cardboard, dry leaves, or torn paper bag pieces. The contents should feel like a wrung-out sponge: damp enough to support decomposition, not wet enough to drip when squeezed.
Turn the bin once a week with a hand fork. If it smells unpleasant, add more browns before you turn. If it looks dusty and nothing is changing, mist lightly and mix again.
Worm Bin (Red Wigglers)
Make bedding from shredded cardboard, a little coco coir, or a handful of finished compost. Moisten it until it feels like a wrung-out sponge, then add red wigglers. Start slowly: 1–2 cups of chopped scraps, two or three times per week, is plenty for a new small bin.
Always bury food under bedding. Worm bins fail most often when food sits exposed on top. If the bin still contains visible scraps from the last feeding, wait a few more days before adding more.
Bokashi
Add 1–2 inches of scraps, sprinkle bokashi bran, then press the layer down to push out air. Keep the bucket sealed between feedings. Drain liquid every few days and follow your kit’s instructions for disposal or dilution.
After about two weeks of fermentation, the contents are not finished compost yet. Bury them in a container of soil, a soil factory tub, or an outdoor composting area where allowed. Give that second stage another 2–4 weeks before using the material around plants.
Odor, Pest, and Moisture Control
A healthy compost bin should smell earthy, not like garbage. In a small apartment, that difference matters. The good news is that most odor problems come from the same few causes: too many wet scraps, not enough browns, poor airflow in an aerobic bin, or exposed food in a worm bin.
My own rule is simple: every time wet food goes in, dry material goes on top. I keep a paper bag full of shredded cardboard beside the kitchen scrap container. It looks boring, but it solves more problems than any fancy compost accessory I’ve bought.
- If it smells like ammonia or rot: Add a thick handful of browns, mix gently, and pause feeding for several days.
- If fruit flies appear: Bury fresh scraps under 1–2 inches of bedding or browns, and freeze scraps until feeding day.
- If the bin is soggy: Mix in shredded cardboard and leave extra airflow for a short period if your system allows it.
- If the bin is too dry: Mist lightly, mix, and check again the next day rather than soaking it all at once.
With worm bins, keep a thick bedding “blanket” on top. That top layer blocks gnats, protects worms from light, and gives you a quick visual cue. If the blanket disappears into the bin, it is time to add more dry bedding.
Timeline—How Long It Takes
Apartment composting rewards patience. A tiny bin does not have the same heat and mass as a large backyard pile, so it may work more slowly. That is normal. What matters is steady progress: scraps becoming darker, softer, and less recognizable over time.
A well-managed mini aerobic bin may produce usable compost in about 6–12 weeks during warm weather, but it can take longer in cool conditions or if the pieces are large. Worm bins often need 8–12 weeks before the first castings harvest, then become more consistent once the colony is established. Bokashi is faster in the sealed stage, usually around two weeks, but the fermented scraps still need a soil-finishing stage before they belong near plant roots.
Do not rush the final step. Immature compost can smell sour, attract pests, or tie up nitrogen as it continues breaking down. Finished compost should be dark, crumbly, and earthy. If you can still identify a lot of fresh-looking food pieces, give it more time.
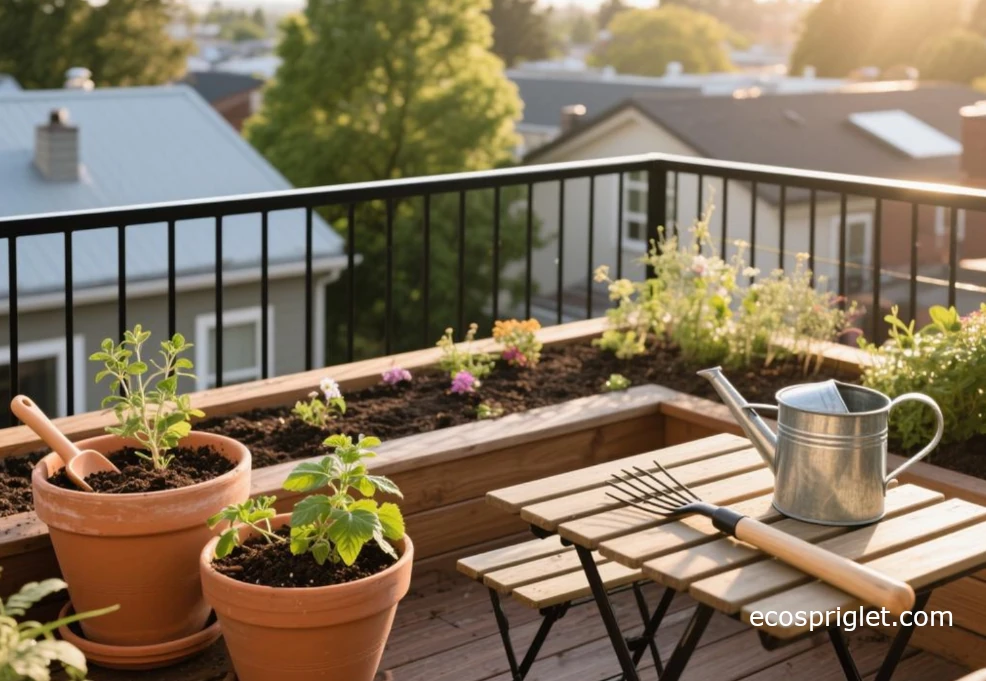
How to Use Finished Compost (Containers & Houseplants)
Finished compost is helpful, but more is not automatically better in containers. Potting mixes need air as much as nutrients. Too much dense compost can make a pot stay wet for too long, especially indoors where airflow is weaker.
For most container plants, blend finished compost into fresh potting mix at about 10–20% by volume. That means 1–2 parts compost in a 10-part mix, not half the pot. If you are refreshing old soil, it is also worth checking whether the mix is still structurally useful; I covered the warning signs in Does Potting Soil Go Bad?.
- For potting mixes: Blend 10–20% finished compost into a fresh, airy mix.
- For top-dressing: Add a ¼–½ inch layer on the surface, then water gently.
- For houseplants: Use a thinner layer and avoid piling compost against stems.
- For seedlings: Use only mature, fine compost, and keep the percentage low.
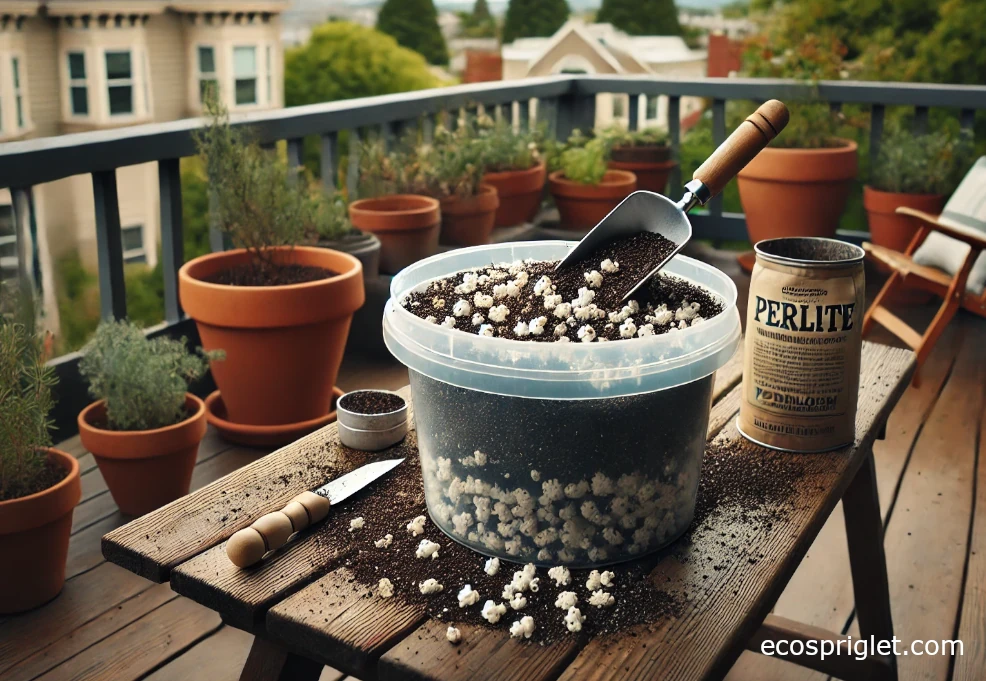
If you reuse old potting mix after a pest or disease problem, do not assume compost alone fixes it. In that case, read How to Sanitize Soil at Home before mixing the soil back into your indoor setup. And if your refreshed mix feels heavy, adding a mineral aeration ingredient can help; here is a simple primer on Perlite: What It Is.
Troubleshooting Quick Guide
Most compost problems are fixable if you respond early. I don’t throw out a small bin just because it has one bad week. I treat it like a living system that is telling me what it needs.
- Ammonia smell: Too many greens or too much nitrogen. Add dry browns, mix gently, and pause feeding for a few days.
- Sour, rotten smell: Usually too wet or not enough air. Add shredded cardboard and turn an aerobic bin more thoroughly.
- Too wet: Mix in browns, reduce juicy scraps, and check that drainage or ventilation is working.
- Too dry or very slow: Mist lightly, chop scraps smaller, and add a small fresh green layer.
- Worms escaping: The bin may be too hot, too acidic, too wet, or overfed. Add bedding, stop feeding for a week, and keep it in a moderate indoor spot.
- Bokashi white fuzz: White, threadlike mold is usually normal. Colored mold plus a foul smell means the bucket may have had too much air or too little bran.
For worm bins, temperature is especially important. Oregon State University Extension notes that red wigglers tolerate a wide range, but they perform best in moderate conditions. In real apartment terms, that usually means keeping the bin away from hot balcony sun, heaters, freezing drafts, and closed cabinets that trap heat.
Budget & Gear: Minimalist vs. Upgrade Paths
You can start apartment composting with very little gear. The minimalist version is a bucket or tote, a tray underneath, a hand fork, and a constant supply of shredded cardboard. Scissors are enough for chopping scraps. A small countertop container is convenient, but an old freezer-safe tub works just as well if you want to store scraps between feedings.
Upgrades are worth it when they remove friction. A stacking worm bin is easier to harvest than a single tote. A bokashi kit with a spigot makes draining liquid less messy. A tidy countertop scrap caddy can make the habit easier if you cook every day. But none of these upgrades replace the basics: small pieces, enough browns, correct moisture, and not overfeeding the system.
- Minimalist setup: 5-gallon bucket or tote, drilled vents for aerobic compost, boot tray, hand fork, scissors, and shredded cardboard.
- Worm-bin upgrade: Stacking trays, opaque plastic, drainage collection, and extra bedding storage.
- Bokashi upgrade: Airtight bucket with spigot, bokashi bran, and a separate soil-finishing container.
If On-Site Compost Isn’t Possible
Some apartments simply are not a good fit for on-site composting. Maybe your lease forbids balcony bins. Maybe you travel often. Maybe you have no place to finish bokashi safely. That does not mean you have to give up on food-scrap recycling.
Look for farmer’s market drop-offs, community gardens, municipal organics programs, or neighborhood compost services. Many apartment gardeners use a freezer tub for scraps, then drop them off once a week. Freezing keeps odors and fruit flies under control, and it buys you time until drop-off day.
Keep the transport routine simple: one sealed container, one weekly habit, and a quick rinse afterward. If the process feels like a chore, you will stop doing it. If it fits beside grocery shopping or a weekend walk, it becomes much easier to keep.
Safety, Rules & Courtesy
Apartment composting should be clean, contained, and respectful of shared space. That matters just as much as the compost recipe. A well-managed bin should not leak onto a balcony below, smell in a hallway, or attract pests near a neighbor’s door.
- Hygiene: Wash hands after handling scraps, compost, worms, or bin liquid.
- Building rules: Check lease, balcony, and shared-space rules before placing bins outside.
- Containment: Keep bins on trays and never let liquid drip onto floors, cabinets, or balconies.
- Food safety: Do not use immature compost for microgreens, seed starting, or indoor edible leaves.
- Balcony weight: Keep systems compact and avoid large, waterlogged containers on railings or weak surfaces.
- Pets and kids: Keep bins, bran, leachate, and decomposing scraps out of reach.
If you live in a warm building, check indoor bins more often during summer. Heat can speed decomposition, but it can also make a small system go sour faster if it is wet and overfed.

FAQs
- How do you start composting at home with no yard? Pick one small-space method: a balcony mini bin, an indoor worm bin, or a sealed bokashi bucket. Start with small amounts of scraps, keep shredded cardboard nearby, and cover wet food with dry browns.
- What is the easiest low-odor method for apartments? Bokashi and worm bins are usually the easiest to keep low-odor indoors when managed correctly. A balcony aerobic bin can also work, but it needs more airflow and turning.
- Can you compost meat and dairy? Do not add meat or dairy to a regular aerobic mini bin or worm bin. Bokashi can ferment small amounts in a sealed bucket, but the material still needs to finish in soil before plant use.
- How do I know compost is ready? It should be dark, crumbly, and earthy-smelling, with the original scraps mostly unrecognizable. If it smells sour or you still see fresh food pieces, wait longer.
- What is the fastest way to compost kitchen scraps? Chop scraps smaller, balance wet greens with dry browns, keep moisture like a wrung-out sponge, and turn aerobic compost weekly. Worm bins become fast once the worms are established.
- Can I use compost directly on houseplants? Yes, if it is fully finished. Use a thin ¼–½ inch top-dressing or mix a modest amount into potting soil. Avoid thick layers that stay wet around stems.
Quick Checklist
- Pick one method: mini aerobic bin, worm bin, or bokashi.
- Keep shredded cardboard or dry paper nearby at all times.
- Use roughly 2–3 parts browns to 1 part greens for aerobic and worm systems.
- Keep moisture like a wrung-out sponge, not dripping wet.
- Chop scraps smaller so they break down faster.
- Cover fresh food with 1–2 inches of browns or worm bedding.
- Pause feeding if the bin smells sour, wet, or overloaded.
- Use finished compost modestly: 10–20% in potting mixes or ¼–½ inch as a top-dress.
Conclusion: Start Small, Then Let the System Settle
Learning how to compost at home does not require a yard, a huge bin, or a perfect setup. It starts with one container, a handful of scraps, and enough dry material to keep the balance right. For an apartment gardener, that is good news. You can start small, learn what your bin is telling you, and adjust before anything gets messy.
If you want the simplest path, choose bokashi for sealed food-scrap handling, worms for rich castings indoors, or a mini aerobic bin if you have a shaded balcony corner. Keep the scraps chopped, cover them with browns, and remember that finished compost should smell like earth, not trash.
Once your first batch is ready, use it lightly. A thin top-dressing on herbs, a modest blend into fresh potting mix, or a spoonful around a favorite houseplant is enough to make your kitchen scraps feel useful again. Ready to keep improving your container garden? Start with your soil mix next, because compost works best when the whole pot still drains, breathes, and supports healthy roots.