A Phalaenopsis orchid can make an ordinary apartment windowsill feel surprisingly elegant. With its arching flower stems, broad green leaves, and delicate blooms, this tropical houseplant brings plenty of personality into a small space without demanding an entire room.
Also known as the moth orchid, Phalaenopsis is one of the most approachable orchids for beginners. You can find it in classic white, soft pink, deep purple, and beautiful white-and-purple combinations. Some plants produce large, dramatic flowers, while compact varieties fit comfortably on a narrow shelf.
But there’s one important thing to understand: orchids don’t grow quite like ordinary houseplants. Their roots need air, their watering routine depends on how quickly the potting mix dries, and their flowers respond to light and temperature more than to constant attention.
The good news? You don’t need a greenhouse, expensive equipment, or years of gardening experience. A bright window, an airy potting mix, and a few simple habits can keep your moth orchid healthy for years.
Here’s how to give your plant the right conditions, avoid common mistakes, and encourage another beautiful display of flowers.
Why Moth Orchids Are Perfect for Small Apartments
Phalaenopsis orchids have a reputation for looking delicate, but many modern hybrids are surprisingly adaptable. They enjoy the warm temperatures found in most homes and need much less space than many popular flowering houseplants.
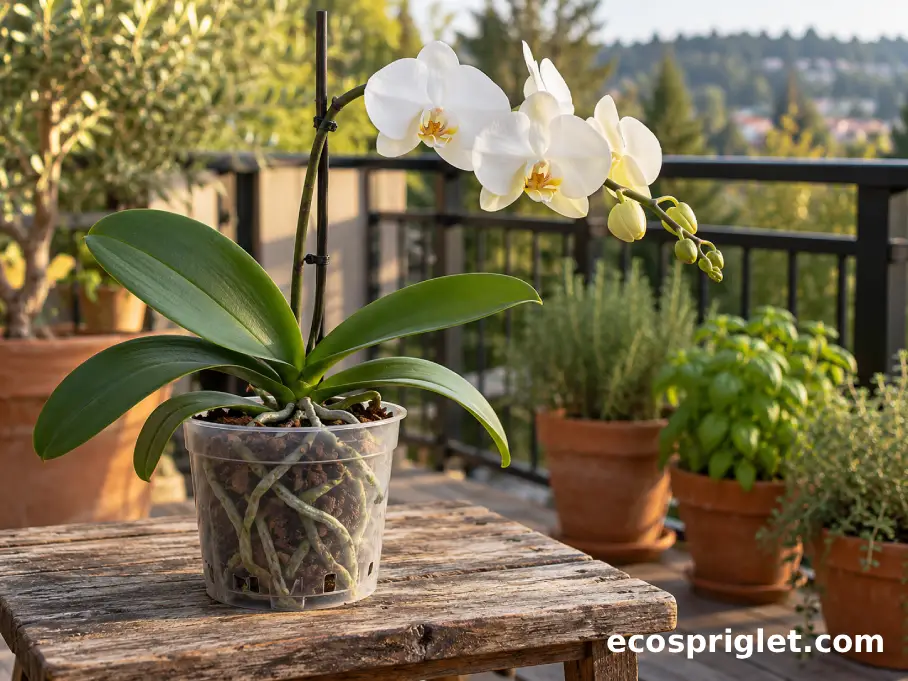
In nature, these orchids are epiphytes. Rather than growing in ordinary soil, they often attach themselves to tree branches and trunks, where their roots receive air and moisture.
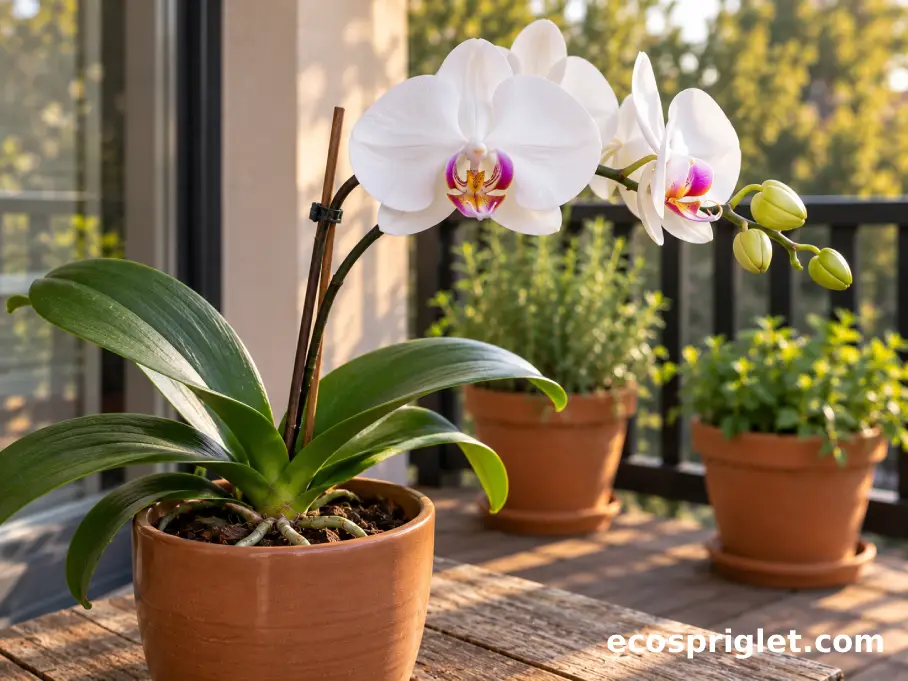
That explains something beginners frequently worry about: roots growing over the edge of the pot. Those pale, thick roots are usually perfectly normal. They help the plant absorb moisture and are part of its natural growth habit. Don’t trim healthy aerial roots just because they look untidy.
According to the University of Maryland Extension, Phalaenopsis orchids commonly produce roots outside their containers, and their flowers can last for a month or considerably longer under favorable conditions.
For an apartment, a standard moth orchid in a 4–6-inch nursery pot is often a practical starting point. Its leaves occupy relatively little horizontal space, while its flower spike creates height without needing a large planter.
Before buying one, look for firm green leaves, several healthy-looking roots, and a flower stem with some unopened buds. A plant with two or three unopened buds may give you more time to enjoy its display than one whose flowers are already beginning to fade.
One more apartment-friendly advantage: the ASPCA lists Phalaenopsis orchids as non-toxic to cats and dogs. Even so, keep plants, fertilizers, and loose potting materials away from curious pets, since chewing plant material can still cause digestive upset.
Give Your Orchid Bright Light Without Scorching the Leaves
Light is one of the biggest factors separating an orchid that merely survives from one that grows strongly and flowers again. Phalaenopsis orchids prefer bright, indirect light. An east-facing window is often ideal because it provides gentle morning sunshine without the intense afternoon heat that can scorch leaves.
A west-facing window can also work well, particularly if you use a sheer curtain during bright summer afternoons. In a south-facing room, position the plant away from harsh midday rays or filter the light through a curtain.
Don’t assume that a dark corner is suitable simply because orchids are tropical plants. They naturally grow beneath tree canopies, but they still receive substantial filtered daylight.
What Healthy Orchid Leaves Tell You
Leaf color offers useful clues. Healthy leaves are often medium or light green. Very dark green leaves may indicate insufficient light, especially when the plant produces new leaves but refuses to flower.
Yellowish patches, reddish margins, or dry bleached areas can indicate excessive light exposure. If these signs appear after moving the plant closer to a window, shift it farther from direct sunshine.
For apartments with limited daylight, a modest LED grow light may help. The American Orchid Society notes that many moth orchids grow successfully under artificial lighting. Follow the light manufacturer’s recommended distance and adjust if leaves show signs of stress.
Keep Temperatures Comfortable and Consistent
Most commonly grown moth orchids do well with daytime temperatures around 66–85°F and nighttime temperatures around 61–66°F. Try to avoid sustained temperatures below 60°F, particularly for plants carrying developing flower buds.
Keep the plant away from heating vents, cold winter window glass, and drafty balcony doors. Sudden temperature changes can cause unopened flower buds to dry up and fall off.
On my Portland terrace, I enjoy giving plants fresh air when the weather is mild. But a moth orchid is one plant I’d usually keep indoors. A bright apartment windowsill offers much more predictable conditions than an exposed balcony. If your room has only one suitable window, start there rather than buying more equipment.
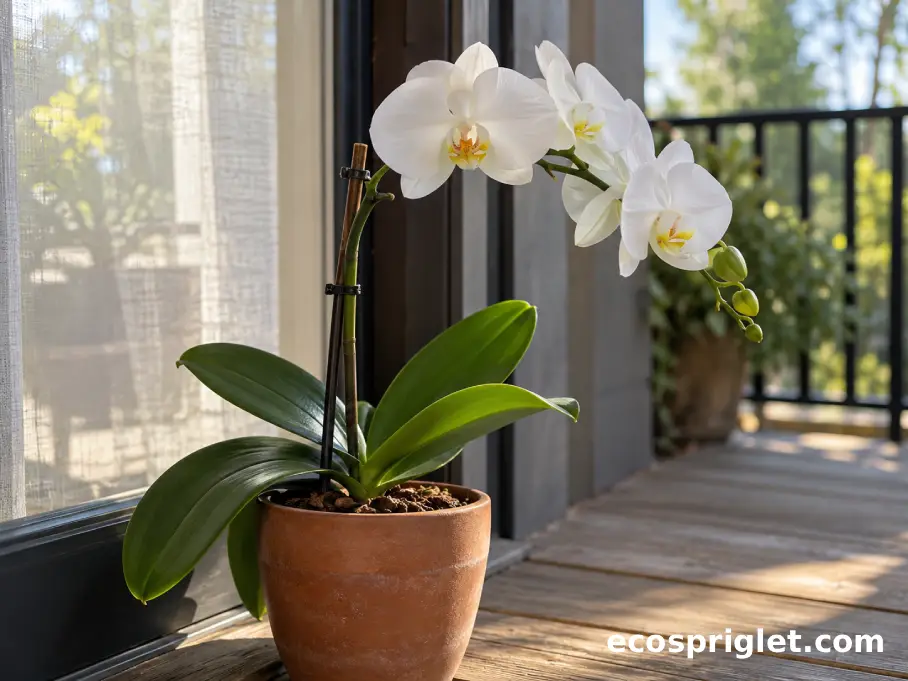
Water the Roots, Not the Calendar
If there’s one habit worth learning early, it’s checking your orchid before watering it.
Moth orchids dislike sitting in soggy potting material. Their roots need moisture, but they also need oxygen. Constantly wet bark can lead to root rot, while allowing the roots to become severely dehydrated can leave them shriveled.
For many apartment growers, checking the plant about once a week is a sensible starting point. Actual watering frequency depends on indoor temperature, humidity, airflow, pot size, and the growing medium.
A Simple Three-Step Watering Routine
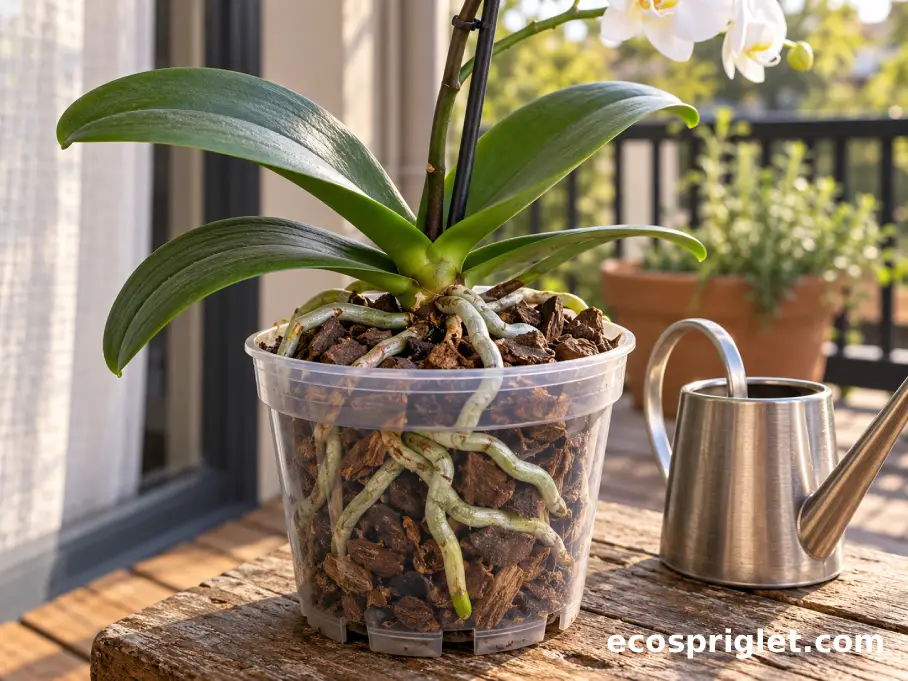
- Check the roots and bark. In a clear pot, silvery roots and bark that is approaching dryness often signal that watering is due. Green roots and visibly damp bark usually mean you can wait. Check roots inside the pot rather than relying on exposed aerial roots alone.
- Water thoroughly. Place the nursery pot in a sink and slowly pour room-temperature or lukewarm water through the bark until it is evenly moistened. If the bark has become very dry, repeat after a few minutes so it absorbs enough moisture.
- Drain completely. Let excess water escape through the drainage holes before returning the orchid to its decorative container. Empty any collected water and avoid leaving moisture trapped in the center of the leaves.
I learned the importance of this routine after treating an early orchid like a regular potted houseplant. I kept adding small amounts of water whenever the surface looked dry. The bark underneath remained wet, and the roots suffered.
These days, I’d rather lift the pot and check its weight than follow a rigid watering schedule. A light pot with nearly dry bark needs attention; a heavy pot with damp bark usually doesn’t. Clear plastic nursery pots make these checks much easier, especially for beginners.
What About Humidity?
Phalaenopsis orchids appreciate moderate to high humidity, but you don’t need to turn your apartment into a greenhouse.
If your room is particularly dry during winter, grouping compatible houseplants together or using a small humidifier can help. A shallow pebble tray may also slightly raise humidity immediately around the pot, provided the pot stays above the waterline.
Avoid relying on daily misting as the main watering method. It rarely supplies enough moisture to the roots, and water lingering in the crown can encourage rot.
The Royal Horticultural Society recommends keeping moth orchid roots from becoming excessively dry while also preventing waterlogging.
Choose an Airy Pot and Fresh Orchid Bark
One of the most common beginner mistakes is placing an orchid in ordinary potting soil. Phalaenopsis roots are adapted to airy conditions. Dense soil can retain too much water and deprive them of oxygen, even when the container has drainage holes.
Instead, use a commercially prepared orchid mix, usually based on chunky bark. Some mixes also contain other materials that help balance drainage and moisture retention.
For a standard apartment plant, a transparent nursery pot with multiple drainage holes is a practical choice. It allows you to observe the roots and monitor moisture without repeatedly disturbing the plant.
When Should You Repot?
Most mature moth orchids benefit from fresh potting material roughly every 1–2 years, although the condition of the bark matters more than the calendar.
Repot sooner if the bark has broken down into fine, soggy material, drainage has noticeably slowed, or many roots have become soft and damaged. Healthy aerial roots alone are not a reason to repot.
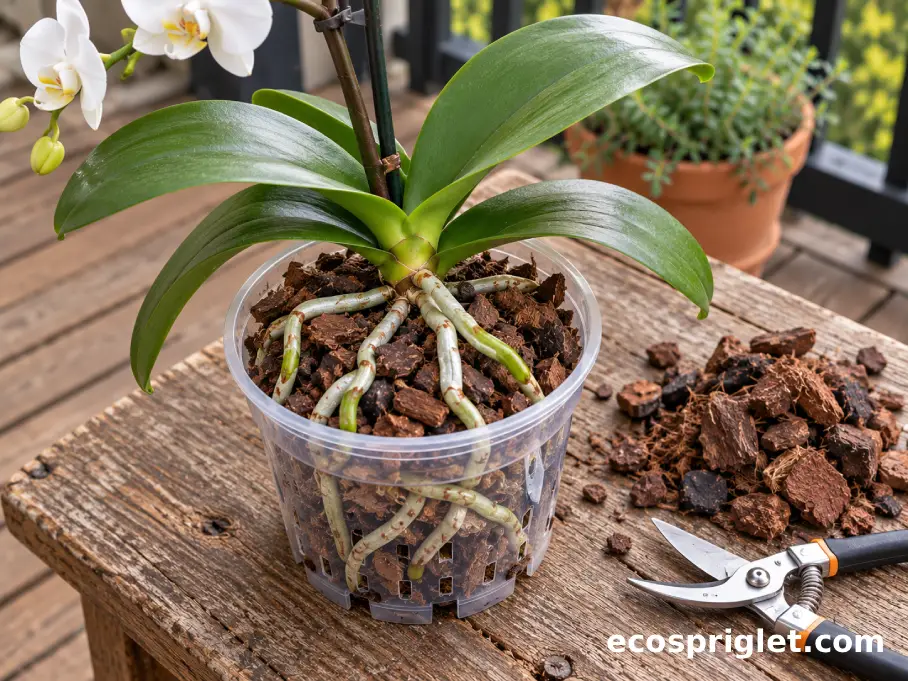
When repotting, remove the plant carefully, loosen old bark, and examine the roots. Firm green, silvery, or cream-colored roots are usually worth keeping. Trim roots that are clearly mushy, hollow, or dead with clean scissors.
Choose a pot just large enough to accommodate the remaining root system. Many standard orchids fit comfortably in a 4–6-inch pot, and some will remain in the same pot size after the bark is replaced.
Resist the temptation to move a small orchid into a very large decorative planter. Excess growing medium stays damp longer and can increase the risk of root problems.
Position the base of the leaves above the bark rather than burying the crown. Work the fresh mix gently around the roots without compressing it into a dense mass.
A decorative ceramic pot is fine as an outer cover, but the inner pot must drain freely. There’s no need to add a gravel layer beneath the bark; it won’t solve poor drainage.
When possible, repot as new roots begin growing, often after flowering. If a plant has serious root rot, however, don’t wait for the flowers to finish.
For more container advice, explore our beginner’s guide to repotting houseplants.
Encourage New Flowers After the First Display
Watching the final orchid flower fall can be disappointing, especially if you’ve grown attached to the display. But fading flowers don’t mean your plant is dying.
Most commonly sold moth orchids can bloom again when their growing conditions are suitable. Some flower once a year, while others may produce additional flowering branches or bloom at different times.
The first thing I’d check is light. A plant that produces healthy leaves but no flower spike may simply need a brighter location.
Next, pay attention to feeding. During active growth, use a commercial orchid fertilizer at the concentration recommended on its label, generally every third or fourth watering. Reduce feeding when winter light is weak and growth slows.
More fertilizer isn’t automatically better. Excess salts can damage roots, and heavy feeding won’t compensate for poor lighting.
Should You Cut the Flower Spike?
After the flowers have dropped, examine the spike. If it remains green and the orchid is strong, you can cut roughly 1/2 inch above a healthy unused node, often the second node above the base. The plant may develop a side branch with additional flowers.
Alternatively, cut the spike near its base if the plant is weak, recovering from root problems, or would benefit from concentrating on new roots and leaves.
If the entire spike turns brown and dry, it can be removed near the base.
Some specialty Phalaenopsis hybrids repeatedly bloom from the tips of existing green spikes, so leave these intact unless you know their flowering habit.
The American Orchid Society explains that encouraging a secondary flower branch can produce a smaller display and may place additional demands on a plant that is already struggling.
Use a Gentle Temperature Change
Mature, healthy moth orchids often respond to cooler nighttime conditions by initiating a new flower spike.
For a typical warm-growing hybrid, try providing nights around 62–66°F for several weeks while maintaining comfortable daytime temperatures around 70–78°F.
A modest seasonal temperature difference may be enough. Avoid sudden cold exposure, open winter windows, or putting the plant outside when nighttime temperatures are approaching 60°F.
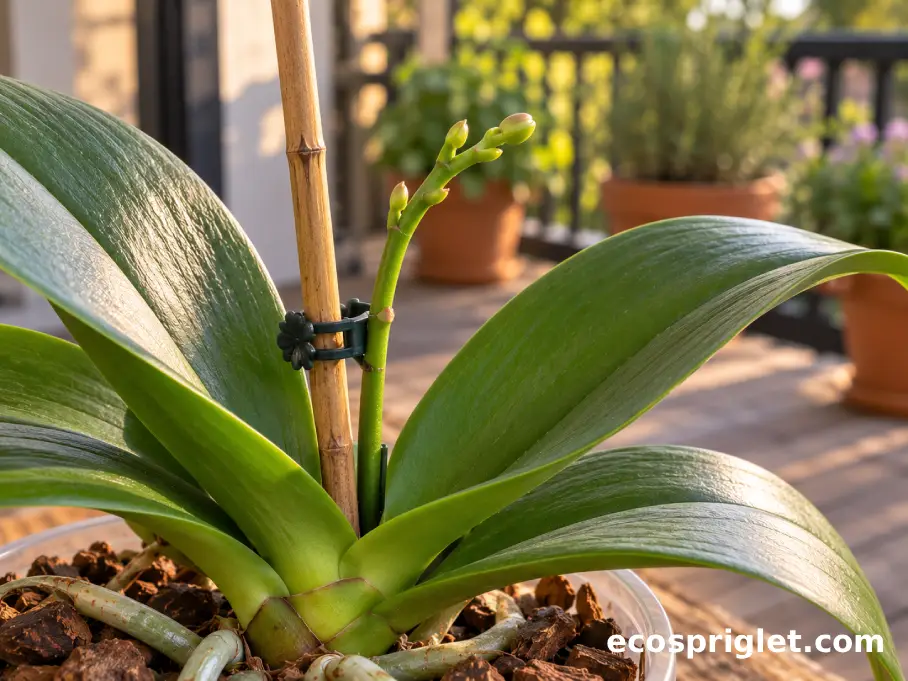
Once a fresh flower spike appears, return to stable growing conditions. If the spike begins leaning toward the light, add a thin stake and attach loose clips as it grows.
Patience matters here. A healthy orchid may spend months developing roots and leaves before it produces another flowering stem.
Choose White, Purple, or Patterned Blooms for Your Space
One reason Phalaenopsis orchids are so appealing is the remarkable variety of flower colors and patterns available.
White varieties are especially popular for apartment interiors. Their simple color pairs well with wood furniture, neutral walls, and terracotta pots without overwhelming a small room.
Purple, pink, and patterned hybrids can be just as easy to grow. The color of the petals generally doesn’t change the basic care requirements of commonly sold moth orchids.
Three Beautiful Choices for Apartment Gardeners
- Classic white Phalaenopsis: A clean, elegant choice for a bright living room or kitchen window. Look for healthy plants with several unopened buds and strong flower stems.
- Large white Phalaenopsis: Perfect when you want one plant to make a statement. Larger flower spikes may need a discreet support stake, particularly if they’re carrying several heavy blooms.
- White and purple Phalaenopsis orchids: These combine pale petals with purple lips, spots, veins, or contrasting edges. The patterns vary between hybrids, making them attractive options for small plant displays.
You may also encounter sales labels such as White Dream. Be aware that commercial names don’t always identify a particular registered orchid hybrid. If the exact cultivar matters to you, look for a full botanical or hybrid name on the grower’s label.
The Royal Horticultural Society notes that many Phalaenopsis plants sold through mainstream retailers are unnamed hybrids.
For a small apartment, I prefer letting one flowering orchid be the centerpiece rather than surrounding it with too many decorations. A single 4–6-inch pot can look surprisingly impressive when the flower stems are allowed to arch naturally.
Place a decorative pot on a stable shelf or table where the flowers won’t be brushed by curtains, doors, or passing furniture.
White flowers also make discoloration and bruising easier to notice. Handle the blooms gently, avoid unnecessary spraying, and keep them away from cold drafts.
Whether you choose solid white, purple, or a patterned hybrid, prioritize healthy roots and leaves over the number of open flowers.
Common Mistakes to Avoid
Most orchid problems are easier to correct when you catch them early. Fortunately, you don’t need to diagnose every unusual leaf or root as a serious disease.
Start by checking the roots, the moisture inside the pot, and the amount of light reaching the leaves.
Four Problems Worth Watching
- Yellowing leaves: An old bottom leaf may naturally turn yellow before dropping. If several leaves yellow rapidly or become soft, inspect the roots for rot and check whether the potting mix remains wet for too long.
- Wrinkled or drooping leaves: These often indicate that the plant cannot absorb enough water. Check the roots before watering more frequently. Firm, dry roots may need more moisture, while soft, damaged roots may be unable to absorb water even in wet bark.
- Flowers or buds dropping early: Sudden temperature changes, drafts, dehydration, and stressful changes in growing conditions can cause bud drop. Move the orchid away from cold windows and heating vents, then keep conditions steady.
- No flowers for many months: Look at the lighting first. Move a healthy plant into brighter indirect light and allow it to experience a gentle seasonal nighttime temperature drop. Don’t respond by doubling the fertilizer.
Check for Pests Before They Spread
Mealybugs and scale insects can occasionally appear on orchids, particularly where leaves meet the stem or around flower spikes.
Look for white cottony clusters, small attached bumps, or sticky residue. If you find pests, separate the affected orchid from nearby houseplants and gently remove visible insects with a damp cloth or cotton swab.
Repeat inspections every few days, especially around hidden leaf joints. If pests persist, choose a treatment specifically labeled for orchids and follow its instructions carefully.
Avoid spraying harsh household cleaning products onto delicate leaves and flowers.
Don’t Make These Watering and Repotting Errors
One common mistake is assuming that watering a little every day is safer than thoroughly watering when the roots need it. Constantly damp bark can quickly become a problem.
Another is planting an orchid in regular potting soil because it appears more nutritious. Orchid bark is designed to keep air moving around the roots, which matters far more than providing a dense, soil-like environment.
Beginners also sometimes cut off every aerial root during repotting. Healthy exposed roots belong to the plant and should normally be left intact.
If you’re unsure about a plant’s condition, avoid making several changes at once. Adjust one factor, such as the watering routine or light exposure, then observe new growth over the following weeks.
That slower approach makes it much easier to understand what actually helped.
A Simple Routine for Healthy Orchids and Beautiful Future Blooms
A healthy moth orchid doesn’t need complicated care. It needs a few good conditions repeated consistently.
Give it a bright spot without harsh afternoon sunshine, keep it in an airy orchid mix, and check the roots before watering. During active growth, feed lightly rather than frequently, and replace aging bark before it becomes compacted and soggy.
Every week or so, take a moment to lift the pot, inspect the leaves, and look for changes in the roots. During darker winter months, you’ll often find that watering needs decrease. In brighter seasons, watch for fresh leaves and root tips that signal active growth.
Most importantly, don’t be discouraged when the flowers fade. That’s a normal part of the plant’s cycle, not a sign that you’ve failed. A little patience, enough light, and a gentle seasonal temperature change may bring another flowering stem.
Whether your favorite is a classic white Phalaenopsis, a bold purple hybrid, or a white orchid with delicate purple markings, the same basic principles apply.
Start with one healthy plant, learn its rhythm, and let those elegant blooms become a familiar part of your apartment garden.