There’s something satisfying about discovering a tiny aloe vera plant growing beside its parent. What started as one succulent on your windowsill can eventually become two, three, or even a whole collection of little green plants.
If you want to learn how to propagate aloe vera, the good news is that you don’t need a greenhouse, expensive equipment, or much gardening experience. A small pot, well-draining soil, and a healthy aloe plant are usually enough to get started.
But there’s one important detail that trips up beginners: aloe vera is much easier to propagate from baby plants, called pups or offsets, than from individual leaves. Unlike some other succulents, a cut aloe leaf rarely develops into a complete new plant.
I’ve always liked propagating aloe because it fits so naturally into apartment gardening. You can work on a small table, keep the mess contained, and make room for new plants without buying another large container.
Here’s how to choose a healthy pup, separate it without damaging the parent plant, and help it grow strong roots. We’ll also cover what to do if your aloe has no roots, no pups, or a leaf that has already been cut.
Why Aloe Pups Work Better Than Leaf Cuttings
Before reaching for a knife, it helps to understand how aloe vera naturally produces new plants.
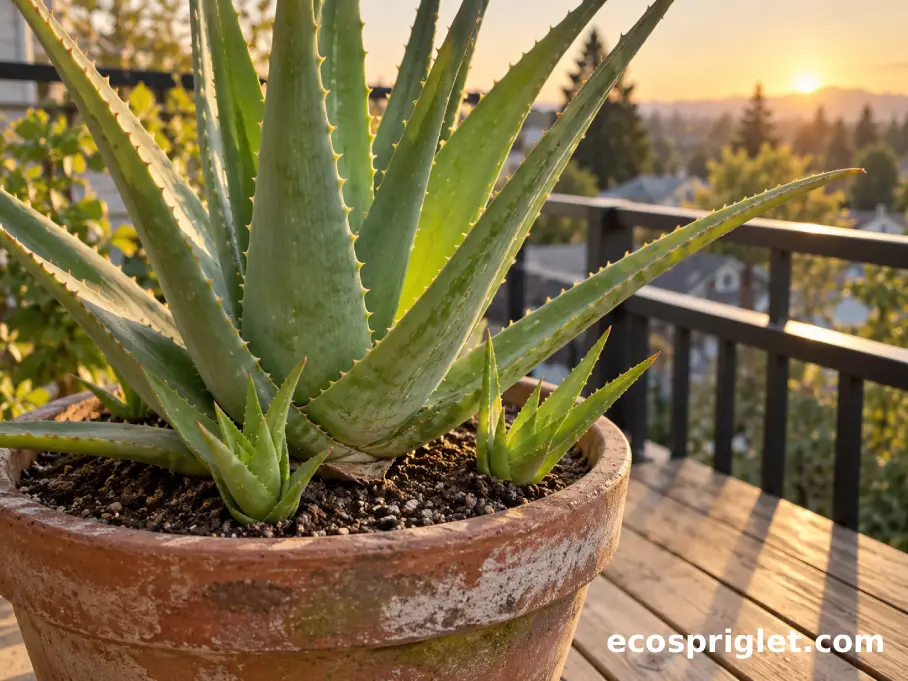
Mature aloe plants often develop smaller rosettes around their base. These are called pups, offsets, or offshoots. Each pup is a miniature plant connected to the parent, and many eventually develop their own roots.
Once a pup has enough growth and a suitable root system, you can separate it and grow it independently. This method is called propagation by offsets or division.
It’s the method recommended by horticultural organizations such as Iowa State University Extension, which identifies offsets and division as suitable propagation methods for aloe.
Can You Propagate Aloe Vera From a Leaf?
Here’s where aloe behaves differently from many popular succulents.
Some plants, including certain echeverias and jade plants, can develop new roots and shoots from detached leaves. Aloe vera doesn’t reliably reproduce this way.
A freshly cut aloe leaf contains plenty of moisture, but that doesn’t mean it has the growing tissue needed to form an entirely new plant. The cut end may dry out, shrivel, or rot instead of developing new growth.
That’s why aloe vera propagation from leaf cuttings is generally unsuccessful, even when the leaf looks healthy.
If you’ve already removed a leaf, you can experiment with letting the cut end dry and placing it against a gritty growing medium. However, don’t expect a new plant, and don’t sacrifice healthy leaves specifically for propagation.
A cutting that includes a living stem and growing crown is different from a leaf-only cutting. Such stem pieces may sometimes root, but for an ordinary potted aloe vera, separating established pups remains the simpler and more dependable approach.
My advice is to look closely around the base of your plant before cutting anything. You might already have the beginning of a new aloe hidden beneath the older leaves.
Choose the Right Pup and Time for Propagation
A healthy pup is much more important than a large collection of gardening tools.
For beginners, I recommend waiting until an offset is approximately 3–4 inches tall, has several firm leaves, and preferably has roots of its own. This is a practical starting point rather than a strict biological rule; a smaller pup can sometimes survive, but it has fewer reserves if its roots are damaged.
If you can see a tiny offset that’s only 1 inch tall, leave it attached for now. The parent plant is still helping support its growth.
When Is the Best Time to Separate Aloe Pups?
Spring and early summer are generally the easiest times because increasing daylight and active growth help newly separated plants establish themselves. Indoor aloe can sometimes be propagated at other times of year, especially in a bright, comfortably warm apartment. However, growth may be noticeably slower during winter.
I’d avoid dividing an aloe during a period of poor growth or obvious stress. If the parent is badly dehydrated, showing signs of rot, or struggling in very low light, correct those problems before making additional cuts.
Look for a pup with leaves that feel firm rather than mushy, a healthy central growing point, and no obvious pest infestation.
If the pup is already crowding the parent plant or pressing against the pot’s edge, that’s another good reason to consider separating it.
One final tip: don’t assume every small shoot needs to be removed. A group of aloe plants sharing one pot can look attractive, provided the roots aren’t badly crowded and the container drains properly.
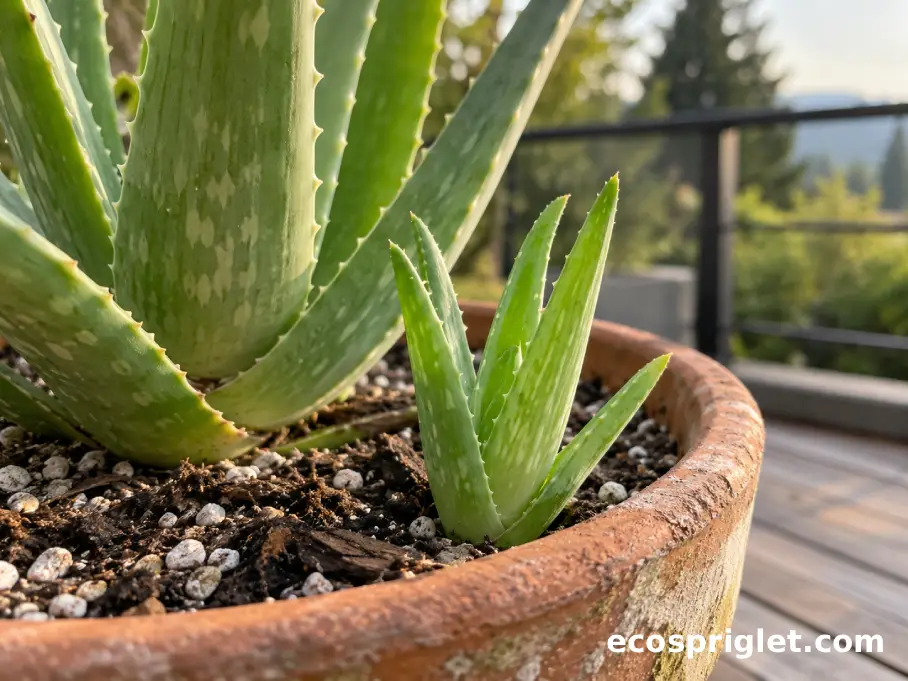
Prepare a Small Pot and Fast-Draining Soil
You don’t need a complicated propagation station. In a small apartment, I prefer a simple setup that fits onto a washable tray. The biggest concern isn’t whether the container looks attractive. It’s whether the roots can breathe and excess water can escape.
Here’s what I would prepare:
- A small pot: A 3–4-inch-wide terracotta or plastic nursery pot works for many young aloe pups. Choose one that fits the roots comfortably without surrounding them with a large amount of unused soil.
- Drainage holes: At least one open drainage hole is essential. A decorative pot without drainage should be used as an outer cover, not the planting container.
- Fast-draining potting mix: Choose a packaged cactus and succulent mix. If your mix is very moisture-retentive, adding roughly 1 part pumice or perlite to 2 parts mix can improve aeration.
- Clean cutting equipment: A small sharp knife or garden snips, cleaned before use, are helpful when pups are firmly attached.
- A tray and saucer: A shallow work tray catches loose soil, while a saucer protects indoor surfaces after watering.
Terracotta is especially useful for beginners because its porous sides allow the potting mix to dry more readily. Plastic can also work, but moisture may remain in the soil longer.
The University of Illinois Extension advises against adding gravel as a drainage layer at the bottom of a pot. Gravel doesn’t improve drainage through the potting mix and can leave more moisture trapped above the layer.
Instead, use a suitable mix throughout the container and rely on the drainage hole.
I also suggest leaving about 1/2–1 inch of space below the pot’s rim. It keeps watering easier and prevents gritty soil from spilling across your windowsill.
If you’re choosing containers for other compact plants, our indoor succulent care guide offers additional ideas for managing light, moisture, and drainage in small spaces.
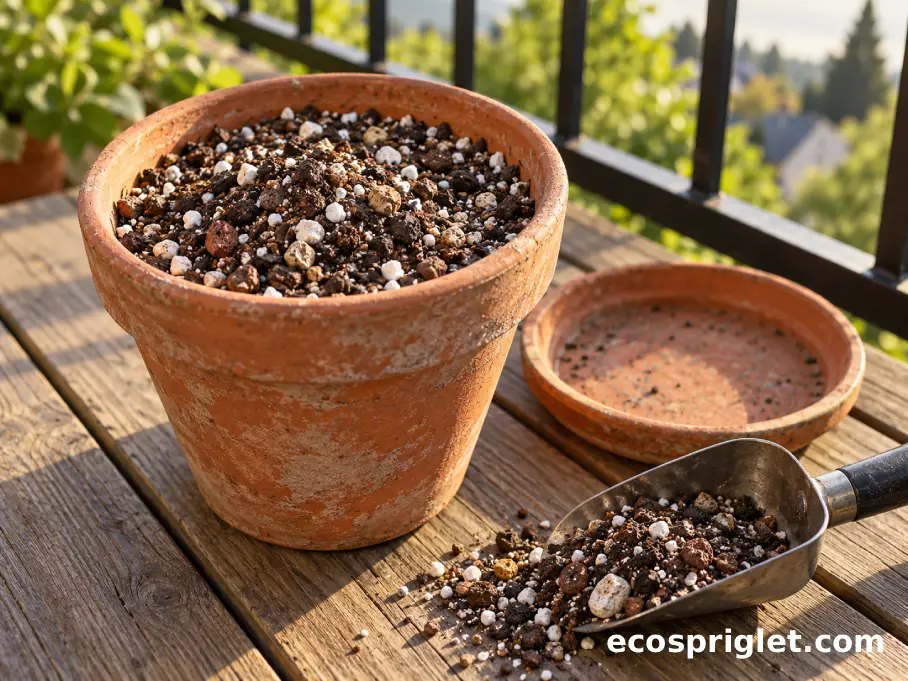
Separate and Replant an Aloe Pup in Five Steps
Once your pup is ready and your workspace is prepared, the actual separation is usually straightforward.
I remember being overly cautious the first time I removed a young aloe from a crowded pot. I kept trying to pull it free without disturbing the soil, which made the job harder. These days, I remove the whole root ball first. It’s much easier to see what you’re working with.
Step 1: Gently Remove the Parent Plant
Allow the potting mix to become fairly dry before starting. Dryish soil tends to shake away from roots more easily and makes the job less messy.
Tilt the container sideways, support the base of the aloe, and gently slide out the root ball. Avoid pulling forcefully on individual leaves.
If the plant refuses to move, squeeze the sides of a flexible plastic pot or gently loosen the soil around the inside edge.
Step 2: Find the Pup’s Connection
Brush away loose soil around the young offset. Look for its own roots and the point where it joins the parent plant.
If the pup is firmly attached, don’t tug until the connection tears. Use clean, sharp equipment to make a controlled separation.
Step 3: Separate the Offset Carefully
Try to keep as many healthy roots attached to the pup as possible.
When the connection is loose, you may be able to ease the two plants apart with a gentle twisting motion. Otherwise, cut through the connecting tissue with a clean knife, avoiding unnecessary root damage.
A pup with several roots already attached generally has a better starting point than one with no roots.
Step 4: Allow Significant Cuts to Dry
If the separation leaves a noticeable fresh wound through fleshy stem tissue, place the pup somewhere dry, shaded, and well-ventilated for approximately 1–3 days, or until the cut surface feels dry.
This drying process helps form a protective callus and lowers the risk of rot.
If the pup separates cleanly with an intact root system and no substantial wound, it can usually be potted promptly.
Step 5: Plant the Pup at the Correct Depth
Fill the new pot partway with cactus mix, position the pup upright, and gently arrange its roots downward.
Add soil around the roots until the plant stands securely. Keep the base of the leaf rosette above the soil surface instead of burying its lower leaves.
Press the soil lightly, just enough to support the plant without compacting the mix.
For a rooted pup without a significant fresh wound, water lightly to settle the mix and let excess moisture drain. If substantial cut surfaces are still healing, allow them to dry before watering.
The five things worth remembering are simple:
- Remove the parent plant gently rather than pulling on the pup.
- Keep healthy roots attached whenever possible.
- Use a clean cut when separation requires a knife.
- Allow substantial wounds to dry before introducing moisture.
- Plant into a small draining pot without burying the leaf crown.
Return the parent aloe to its container with fresh mix if needed, maintaining approximately the same planting depth. You now have two separate plants without having to purchase another aloe.
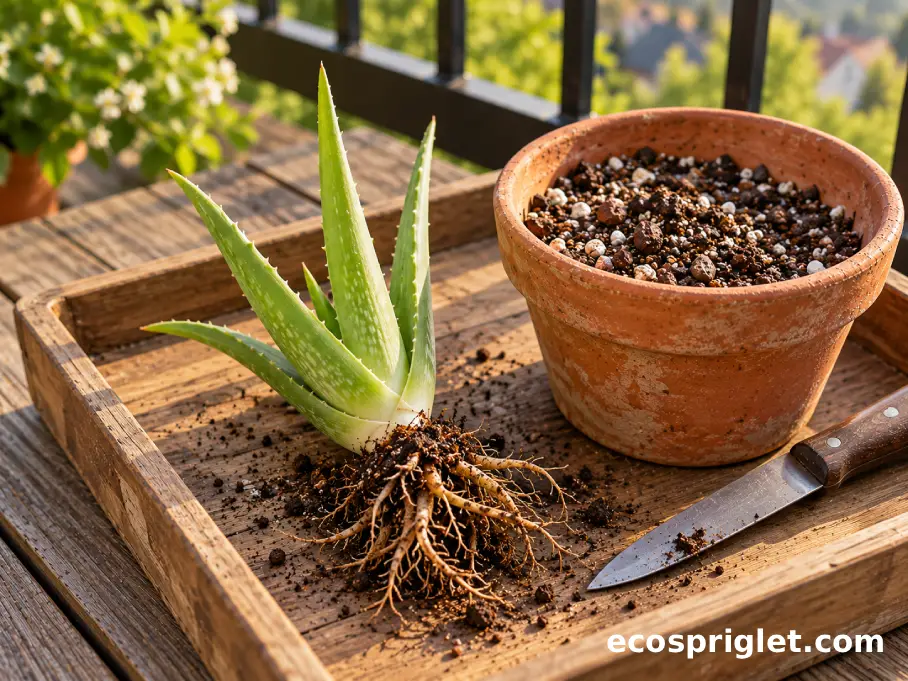
Can You Save an Aloe Pup Without Roots?
Sometimes a tiny aloe breaks away from the parent before it develops its own root system. It can happen while repotting, separating crowded plants, or accidentally knocking a small offset loose.
So, can you propagate aloe vera without roots?
Sometimes, yes, if you have a complete living pup with an intact base and growing point. Rootless offsets may develop new roots, but the process is less predictable than transplanting an already-rooted pup.
The safest option is to leave a rootless pup attached to the parent until roots develop. If it has already detached, I would try the following approach.
Let the Base Heal Before Planting
Inspect the bottom of the pup. A firm, pale base is encouraging. A soft, blackened, foul-smelling base suggests rot and significantly reduces the chance of recovery. Place a healthy detached pup in a dry, shaded location with good airflow. Allow the broken or cut surface to become dry and callused, usually over several days depending on the size of the wound.
Once healed, position the base just inside a small container of coarse, well-draining succulent mix. Support the plant gently so it stays upright, but don’t bury the crown. Keep the plant in bright, indirect light. Use moisture cautiously: the mix should not remain wet, especially while there are no roots to absorb water. Avoid soaking it or repeatedly misting the leaf crown.
Check occasionally for firmness and signs of new growth. After several weeks, a very gentle resistance test may suggest new roots have formed, but don’t repeatedly pull the plant up to inspect it.
A rootless pup may take several weeks or longer to establish, and some won’t survive. If the base begins to rot, continuing to water won’t solve the problem.
What About Rooting Aloe in Water?
Water propagation works well for plants such as pothos, but it isn’t my preferred method for aloe vera. Aloe’s fleshy tissues are susceptible to decay when kept constantly wet, and roots produced in water may have difficulty adjusting to potting mix.
Iowa State University Extension notes that most succulents do not root well in a glass of water. For aloe, a small container of airy, fast-draining substrate is the more sensible choice.
If you’re dealing with only a detached aloe leaf rather than an entire pup, remember that the chances of growing a complete new plant are much lower.
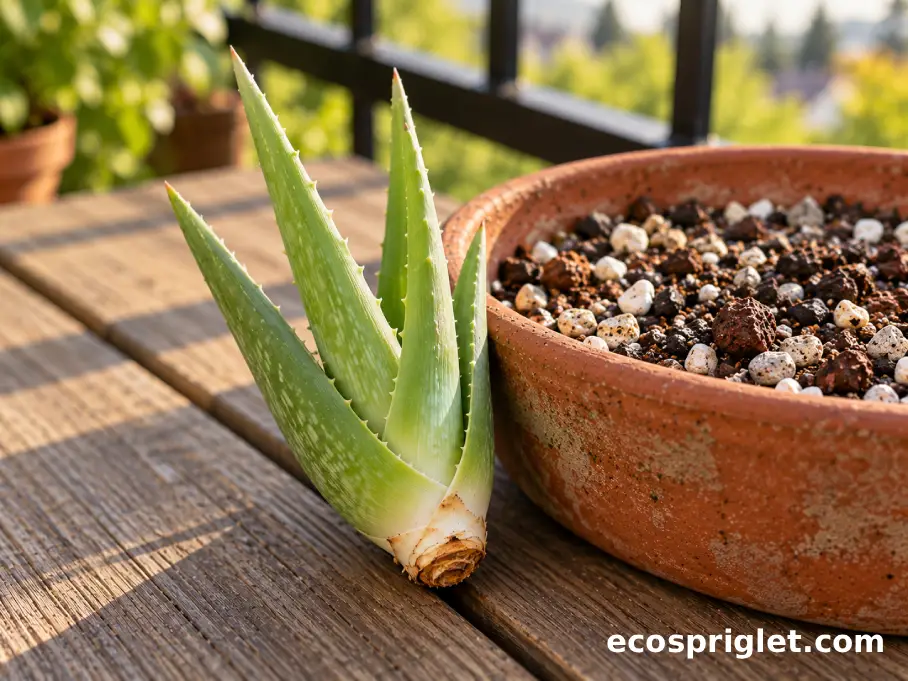
Help Your New Aloe Grow Strong Roots
New aloe plants don’t need constant attention. They need a stable environment while their roots recover and begin growing into the fresh mix.
The first few weeks are mostly about getting the balance between light and moisture right.
Give Bright Light Without Sudden Sun Stress
Place the newly separated aloe near a bright window where it receives plenty of natural light, but avoid suddenly exposing it to intense afternoon sunshine.
Bright, indirect light is a sensible starting point during recovery. Once the plant is established, you can gradually introduce more direct sun if its leaves tolerate it.
A south- or west-facing window can work well, but a newly divided aloe sitting directly against very hot glass may develop pale, brown, or scorched patches.
If you’re moving it outdoors for summer, start in a sheltered position and increase sun exposure gradually over approximately 1–2 weeks.
Remember that aloe vera is not frost-hardy. Bring it indoors before temperatures approach freezing; moving it inside earlier, when nights are consistently getting chilly, is safer for a newly rooted plant.
Water Based on Soil Dryness, Not the Calendar
Overwatering is one of the easiest ways to lose a newly propagated aloe. For a rooted pup that has settled into its container, wait until the potting mix has dried out before watering again. Then water sufficiently to moisten the mix and let the excess drain away.
A small terracotta pot in warm, bright conditions may dry substantially faster than a plastic pot in a cool apartment. That makes a fixed watering schedule unreliable.
Check the soil by inserting a dry wooden skewer toward the bottom of the container. If it comes out with damp soil clinging to it, wait. If the mix is dry throughout and the pup is properly rooted, watering is appropriate.
Don’t leave water sitting in the saucer. Empty any collected water after drainage finishes.
The University of Illinois Extension recommends allowing succulent potting mix to dry between waterings, since persistent moisture can encourage root rot.
Recognize Healthy Progress
A newly potted pup may not produce visible new leaves immediately. Some energy is going toward root development beneath the surface.
Encouraging signs include a firm central rosette, healthy leaf color, gradually increasing stability, and eventually new growth emerging from the center.
A rooted pup may begin establishing within a few weeks, but growth rates vary widely with light, season, temperature, and root damage.
Avoid fertilizer during the initial recovery period. Once the plant is rooted and actively producing growth, you can consider a diluted succulent fertilizer during spring or summer, following the product label.
For apartment gardeners, a stable bright windowsill is usually better than repeatedly moving the plant between rooms in search of faster growth.
Common Mistakes to Avoid When Propagating Aloe
Most failed aloe propagation attempts come down to a handful of avoidable mistakes. I’ve found that the less you interfere with a healthy, newly potted pup, the better its chances of settling in.
- Separating pups too early: A tiny offset with no established roots has fewer reserves. Leave very small pups attached until they develop several healthy leaves and preferably their own roots.
- Using an oversized pot: A 2-inch pup placed directly into a 10-inch container sits in far more moisture-retaining soil than it needs. Start with a small pot that fits the root system.
- Watering too frequently: Wet soil around damaged or undeveloped roots encourages decay. Let the mix dry appropriately and avoid soaking unrooted offsets.
- Burying the leaf crown: Soil packed around the center or lower leaf bases may trap moisture. Keep the rosette above the potting mix and plant at the original depth.
- Using a single cut leaf: A detached aloe vera leaf is not equivalent to a pup. Choose an offset with a growing crown rather than expecting a leaf segment to create a whole plant.
How to Troubleshoot a Struggling Pup
If the leaves become soft, yellow, and translucent while the soil stays wet, inspect the plant for rot. Remove it from the container, check the roots and base, and discard decayed material with clean tools. A plant with a completely rotted crown is unlikely to recover.
If the leaves look somewhat thin or wrinkled but the base remains firm, the pup may be adjusting after root loss. Check whether roots are present before changing your watering routine. A rootless plant cannot absorb moisture effectively simply because the soil is kept wet.
Brown, dry patches appearing after a move to a sunny balcony may indicate sunburn. Move the plant to bright filtered light and acclimate it more gradually.
If nothing seems to happen for several weeks, don’t automatically assume failure. A firm, green pup in a stable pot may still be establishing roots.
One more apartment-specific caution: the ASPCA lists aloe vera as toxic to cats and dogs when ingested. Keep both parent plants and newly potted pups out of pets’ reach. If a pet chews aloe, contact your veterinarian or an animal poison-control service.
What to Do If Your Aloe Has No Pups Yet
Not every aloe produces pups on the same schedule. Young plants may need more time to mature, while older plants can go through periods with little or no offset production.
If you don’t see any baby plants yet, resist the temptation to cut off leaves or dig repeatedly around the roots.
Instead, focus on keeping the parent plant healthy. Provide bright light, a suitable pot with drainage, and an opportunity for the soil to dry between waterings.
Check whether the plant is spending most of the year in a dark corner. Aloe generally grows more actively with stronger light, although sudden exposure to hot direct sunshine can damage leaves.
During spring and summer, a warm, well-lit location may encourage healthier growth. A plant that is comfortable and actively growing has a better chance of eventually producing offsets, but there’s no reliable trick that guarantees pups.
Don’t deliberately stress the roots, overfertilize, or keep the plant pot-bound simply to force propagation. Those methods can weaken the aloe without producing the result you want.
For an apartment with limited windowsill space, it’s also worth thinking ahead. One mature aloe plus two small offsets can fill a shelf surprisingly quickly.
When you eventually have several healthy pups, you can keep them in separate matching terracotta pots, arrange them together on a sheltered plant stand, or give a rooted young plant to a friend.
If you keep aloes outdoors during warmer months, choose a stable surface away from exposed balcony edges. Secure lightweight containers against wind and follow any building restrictions on balcony planters. Bring plants inside as the weather cools.
Conclusion: Start With One Healthy Aloe Pup
Propagating aloe vera becomes much easier once you understand one simple rule: work with the way the plant naturally grows.
Instead of relying on unreliable leaf cuttings, look for healthy pups around the parent plant. Give them time to develop several firm leaves and, ideally, their own roots. Then separate them carefully, use a small pot with fast-draining soil, and avoid keeping the new planting constantly wet.
If a pup breaks away without roots, there’s still a possibility of saving it. Allow the wound to heal, use an airy growing medium, and be patient while it attempts to establish. Just remember that rooted offsets offer a more predictable starting point.
For a small apartment garden, you don’t need much more than a bright window, a clean workspace, and a little restraint with the watering can.
My favorite part is seeing a tiny offset become sturdy enough to stand on its own. It might take longer than expected, especially through the darker months, but watching that gradual growth is part of the reward.
Start with one healthy pup rather than trying to divide everything at once. Once you’ve successfully established your first new aloe plant, you’ll have the confidence to repeat the process whenever another offset appears.