That beautiful fiddle leaf fig in your living room can do more than brighten up a corner. With one healthy stem cutting, you can grow an entirely new plant without buying another one.
Learning how to propagate a fiddle leaf fig is surprisingly manageable, even if you have limited space and have never propagated a houseplant before. You don’t need a greenhouse, expensive equipment, or a complicated setup. A clean pair of pruning shears, a small container, and a warm, bright spot are enough to get started.
The important part is knowing where to make the cut. Fiddle leaf figs grow new plants most reliably from stem sections containing nodes, rather than from individual leaves alone. You can root those cuttings in water, start them directly in potting mix, or use air layering on a larger tree.
I’ve always liked propagation projects that fit neatly on a small apartment shelf. They’re inexpensive, don’t require much cleanup, and give you a chance to understand how your plants grow.
Here’s how to choose the right cutting, encourage healthy roots, and care for your young fiddle leaf fig until it’s ready to grow on its own.
Why a Stem Node Matters More Than a Leaf
Yes, you can propagate a fiddle leaf fig (Ficus lyrata), and the most practical starting point is a healthy stem cutting. However, there’s one detail that makes the difference between growing a new tree and keeping a rooted leaf in a jar: the node.
A node is the point on a stem where a leaf attaches and where a growth bud may be present. These buds are important because they can develop into new shoots as the cutting establishes itself.
If you remove a single fiddle leaf fig leaf with only its leaf stalk, it may develop roots. But that doesn’t mean it will produce a complete new plant. Without suitable stem tissue and a growth bud, it may remain a rooted leaf rather than develop new branches and foliage.
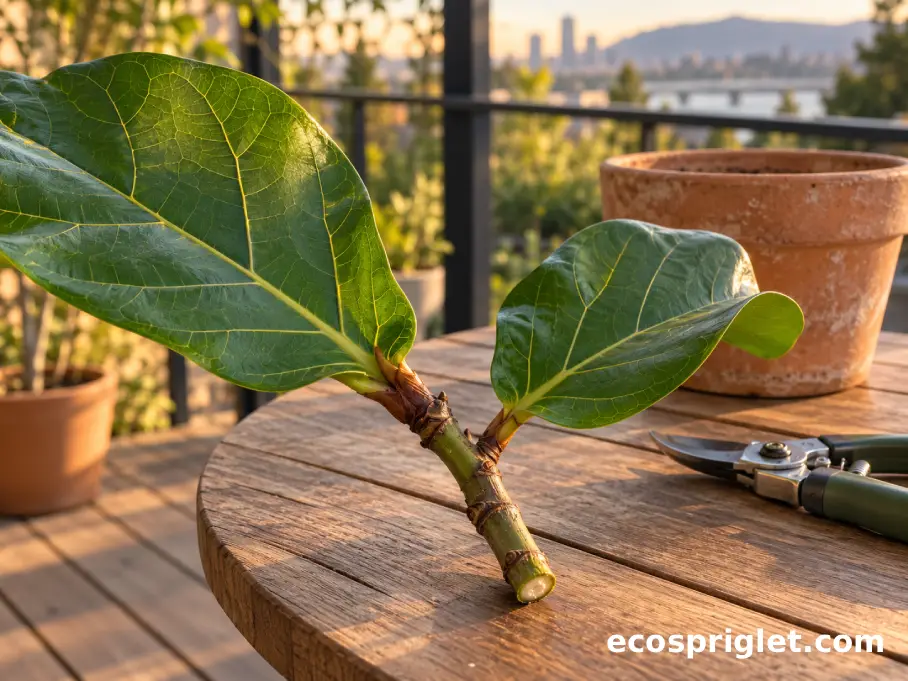
For dependable results, choose a piece of stem approximately 4–6 inches long with at least two identifiable nodes and one or two healthy leaves. This gives you a lower node for rooting and another potential growth point above the water or potting mix.
The Royal Horticultural Society identifies leaf-bud and semi-hardwood cuttings as suitable propagation methods for Ficus lyrata. North Carolina State Extension also recommends stem cuttings for this species.
For beginners, I recommend a short stem-tip cutting rather than a bare leaf. It’s easier to prepare, easier to monitor, and offers a better opportunity to develop into a complete young tree.
Choose the Right Cutting and Prepare Your Workspace
A successful cutting starts with a healthy parent plant. If your fiddle leaf fig is already losing leaves, showing signs of root rot, or dealing with pests, give it time to recover before removing more growth.
Late spring through summer is usually the easiest time to propagate. Longer days and active growth improve your chances of rooting, particularly in apartments where winter light is limited.
I like to prepare everything before making the first cut. Fiddle leaf figs release a sticky, milky sap when pruned, and it’s much easier to handle when you already have a protected work surface.
What You’ll Need
- Clean, sharp pruning shears or a small knife, wiped with rubbing alcohol before cutting.
- A healthy 4–6-inch stem section with at least two nodes and one or two mature leaves.
- A clean glass jar for water propagation or a 3–4-inch nursery pot with drainage holes for potting-mix propagation.
- Fresh potting mix, perlite or another airy rooting medium, and an optional rooting hormone for soil cuttings.
- Gardening gloves and a paper towel to manage the irritating white sap.
How to Make the Cut
Find a healthy growing tip with firm green or slightly woody tissue. Make one clean cut approximately 1/4–1/2 inch below a node. Avoid crushing the stem or repeatedly trimming the same area.
Remove any leaves that would sit underwater or beneath the potting mix. Keep one or two leaves near the top. Fiddle leaf fig leaves are large, and leaving too many attached increases moisture loss before the cutting has roots to replace that water.
For a very large leaf, some growers reduce its surface area, but I prefer starting with a modest cutting and leaving healthy foliage intact whenever possible.
Work on a washable tray, wipe up sap promptly, and wash your tools afterward. The sap can irritate skin, so gloves are worthwhile.
North Carolina State Extension also notes that Ficus lyrata is harmful if eaten by cats, dogs, or people. Keep both fresh cuttings and fallen plant material away from pets and young children.
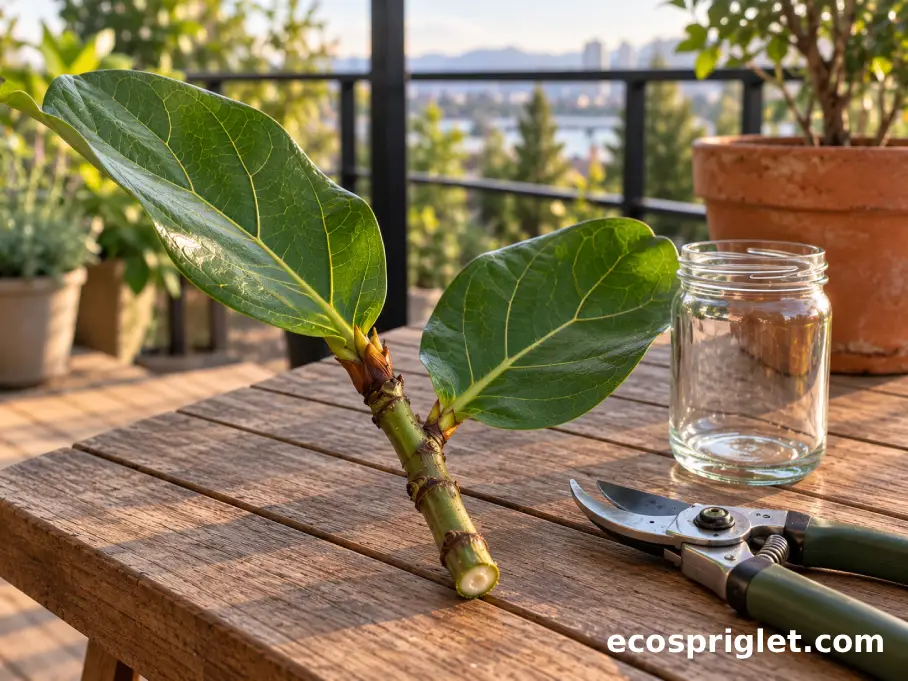
Root Your Fiddle Leaf Fig Cutting in Water
Water propagation is my favorite method for a first attempt because you can actually see the roots developing. That visibility makes it easier to recognize progress and catch problems before they get serious.
University of California Cooperative Extension includes rooting a six-inch fiddle leaf fig stem-tip cutting in water among its recommended propagation approaches.
Here’s a simple way to do it at home.
Step-by-Step Water Propagation
- Prepare the jar. Wash a clear glass jar thoroughly and fill it with enough room-temperature water to cover the bottom 1–2 inches of the cutting.
- Position the cutting. Keep at least one lower node submerged while making sure the leaves remain completely above the waterline.
- Choose a bright location. Place the jar near a window with bright, indirect light. Aim for a warm room around 70–80°F and avoid cold drafts or harsh afternoon sun.
- Refresh the water. Check every few days and replace the water when it becomes cloudy. Changing it roughly every 3–5 days is a useful starting routine.
- Watch for developing roots. Once several healthy roots have formed and are approximately 1–2 inches long, prepare to move the cutting into potting mix.
How Long Does Water Propagation Take?
Rooting speed varies with stem maturity, light, temperature, and the health of the parent plant. Some fiddle leaf fig cuttings begin showing roots within several weeks. Others may need 4–8 weeks or longer, particularly when indoor temperatures fluctuate or light levels are low.
Don’t assume a cutting has failed just because nothing appears after two weeks. If the stem remains firm and the leaves look reasonably healthy, continue monitoring it. Small pale bumps near the submerged portion of the stem can precede root growth. Avoid rubbing them off when changing the water.
If the water turns cloudy repeatedly or develops an unpleasant odor, wash the jar and inspect the cutting. Soft, dark, mushy tissue is more concerning than a little discoloration on an otherwise firm stem.
Water rooting is convenient, but it isn’t always the easiest route to long-term establishment. Roots produced in water may need time to adjust after being transferred into potting mix.
That’s why I recommend potting your cutting once it has a modest, healthy root system rather than leaving it in water for months.
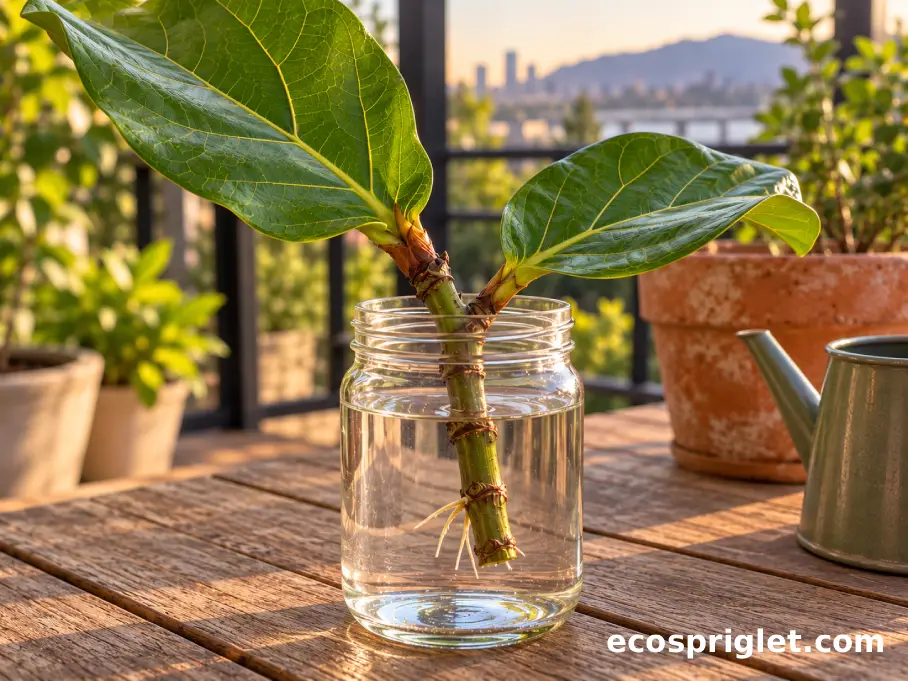
Try Potting Mix for Stronger, Less Fussy Transplants
Although water propagation is easy to observe, starting directly in a rooting medium has an important advantage: the roots develop in an environment closer to the one where the plant will eventually live.
University of Illinois Extension notes that roots formed directly in rooting media often adapt more easily to potting mix than roots initially produced in water.
For a small apartment, you don’t need a complicated propagation station. One 3–4-inch nursery pot, a drainage saucer, and a few inches of clean rooting mix are enough for a single cutting.
Prepare a Light, Well-Draining Medium
A practical starting mix is approximately equal parts peat-free houseplant potting mix and perlite. You can also use a clean commercial seed-starting or propagation medium designed to retain some moisture while allowing air around the roots.
Moisten the mixture before planting. It should feel evenly damp, not saturated or dripping.
Use a pencil or dibber to make a hole approximately 1–2 inches deep. If using rooting hormone, apply it to the lower cutting according to the product label. Insert the stem carefully so that a lower node sits beneath the surface and the leaves remain above it.
Gently press the medium around the stem to hold it upright.
Keep Moisture Consistent Without Drowning the Cutting
Place the pot in bright, indirect light and keep the rooting medium warm. A root-zone temperature around 75–80°F can encourage rooting, as recommended by University of Illinois Extension.
A loose, clear plastic covering can help limit moisture loss in dry apartments. Keep the plastic away from the leaves and provide ventilation regularly. If heavy condensation builds up or mold appears, increase airflow.
Check the medium every two or three days. Add a little water whenever the surface begins drying, but don’t leave the pot standing in water.
There’s no need to put gravel at the bottom of the container. Drainage holes and a suitable potting medium are more important for managing excess moisture.
After several weeks, a gentle resistance test may suggest roots have formed. Don’t repeatedly pull the cutting out to inspect it; disturbing new roots can slow establishment.
My preference for small-space growing is to start with one cutting per pot. It makes watering easier to judge and avoids tangled roots when the plants are ready for larger containers.
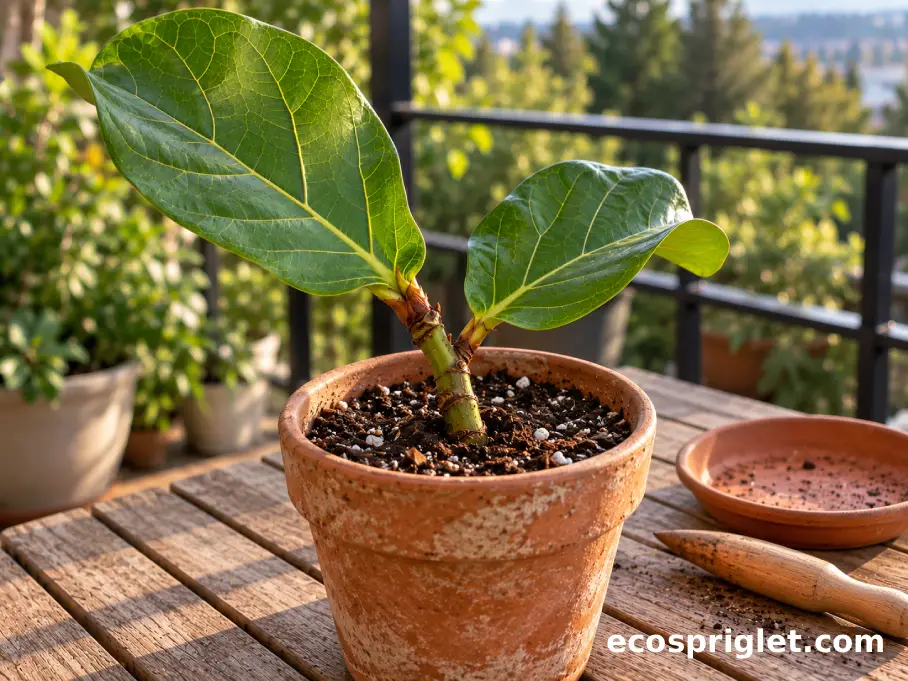
Help Your Rooted Cutting Adjust to Its First Pot
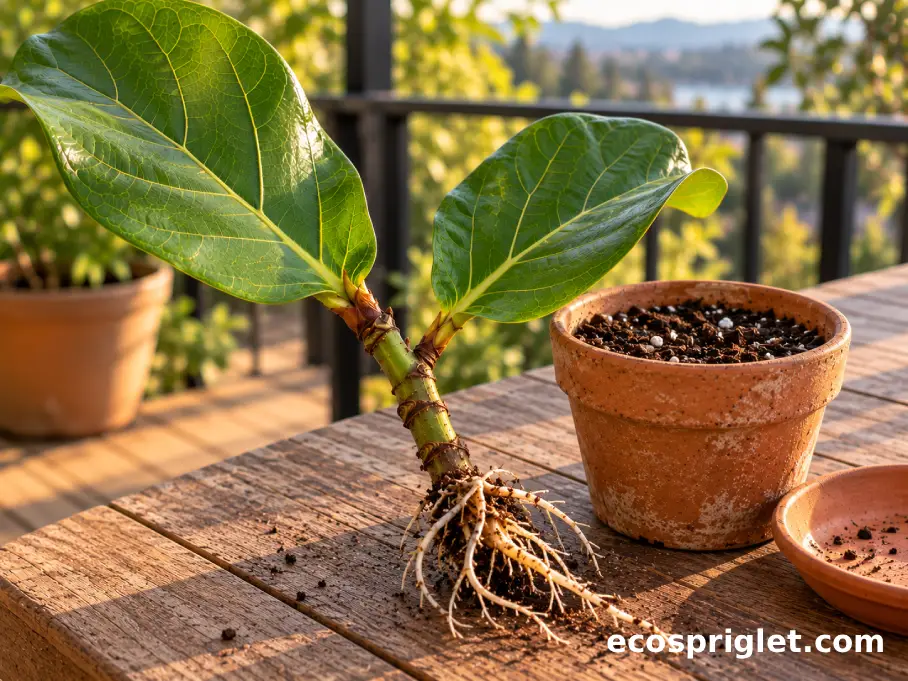
Once your water-rooted cutting has several roots around 1–2 inches long, it’s usually ready for its first small pot. Choose a container approximately 3–4 inches wide with drainage holes. This may look tiny compared with the parent tree, but starting small helps you manage moisture around the young root system.
Fill the pot partly with a light houseplant mix. Position the cutting carefully, spread the roots without forcing them, and add more mix until the roots are covered and the stem sits upright. Avoid burying leaves or deeply covering the original stem.
Water thoroughly once and allow the excess to drain into a saucer. Empty the saucer afterward.
For the first week or two, check the moisture frequently. The goal is lightly and consistently moist soil while the water-developed roots adjust to their new environment. As the cutting becomes established, let the upper portion of the mix dry slightly between waterings.
Keep the plant in bright, indirect light, away from heating vents, chilly windows, and strong afternoon sun. Wait until you see convincing signs of new growth before introducing a regular fertilizer routine.
A slightly droopy leaf immediately after transplanting doesn’t necessarily mean failure. But persistent wilting, a soft stem, or yellowing leaves alongside wet soil deserves attention.
For longer-term care, our fiddle leaf fig care guide covers light placement, watering, and keeping container-grown plants healthy.
Resist the urge to move your cutting into a large decorative planter right away. Let it develop a stronger root system before increasing the pot size.
Use Air Layering When Your Fiddle Leaf Fig Gets Too Tall
Sometimes the challenge isn’t growing a new fiddle leaf fig from scratch. It’s finding space for the one you already own.
If your tree is getting too tall for your apartment, air layering offers another way to propagate it. Rather than cutting off a branch immediately, you encourage roots to develop while the upper portion remains attached to the parent plant.
This technique is especially useful for a tall, leggy fiddle leaf fig with a long bare trunk and a leafy top. The University of Florida’s IFAS Extension specifically identifies air layering as a propagation method for fiddle leaf figs.
How Air Layering Works
Choose a healthy section of stem, preferably pencil-thick or somewhat larger, with sufficient foliage above it. The rooting point is commonly positioned at least 12–15 inches below the branch tip.
Using a clean, sharp knife, carefully remove a ring of bark approximately 1/2–1 inch wide at the chosen point. This is a more advanced procedure than taking a cutting, so work slowly and avoid damaging the branch unnecessarily.
Wrap the exposed section with a handful of damp, long-fiber sphagnum moss. The moss should be moist but not dripping. Cover it with clear plastic and secure both ends to prevent it from drying out.
Protect the wrapped section from strong direct sun. A removable covering of aluminum foil can help keep the bundle from overheating while allowing you to check for roots.
Inspect occasionally to make sure the moss remains moist. Root development can take several weeks to many months depending on growing conditions.
Once a substantial network of roots is visible, remove the covering carefully, cut below the rooted portion, and pot the new plant in a well-draining medium.
The original tree may eventually produce new growth below the pruning point, although the response depends on its health and the season.
For apartment gardeners, I would save air layering for a healthy, established plant that genuinely needs reshaping. A small stem cutting is simpler when you’re just experimenting.

Common Mistakes to Avoid When Propagating
Most propagation problems come from a handful of avoidable mistakes. Fiddle leaf figs aren’t the fastest plants to root, so patience matters just as much as technique.
I remember being tempted to check a cutting constantly after seeing the first hint of white root growth. The trouble is that frequent handling can damage the very roots you’re trying to encourage.
These are the problems I’d watch for first.
- Using a leaf without a stem node. A detached leaf might form roots without developing a new shoot. Start with a stem cutting containing at least one viable growth bud and preferably two nodes.
- Placing cuttings in harsh direct sunlight. Strong afternoon sun can increase water loss before roots develop. Move the cutting to bright, indirect light or gentle morning light.
- Leaving stems in dirty or stagnant water. Cloudy water and soft, dark stems can indicate problems. Replace the water, clean the jar, and remove rotting tissue only if a healthy portion with a node remains.
- Keeping the rooting mix saturated. Constantly wet media reduce oxygen around developing roots. Use a container with drainage holes and keep the mix damp rather than waterlogged.
- Transplanting or disturbing roots too early. Wait for several roots to reach approximately 1–2 inches before potting a water cutting. Avoid repeatedly lifting soil-rooted cuttings to inspect them.
What If the Cutting Isn’t Growing Roots?
First, check the growing environment rather than immediately discarding the cutting. Is the room staying reasonably warm? Is the cutting getting enough indirect light? Is the submerged or buried stem still firm?
If temperatures fall well below 70°F, rooting may slow. Move the cutting away from cold glass or drafty doors and into a consistently warmer spot.
If a leaf develops brown edges but the stem remains healthy, avoid making several changes at once. Correct the most obvious problem, such as excessive sun exposure or dry air, and monitor the cutting.
On the other hand, if the stem becomes soft and mushy, particularly near the base, rot is likely. You may be able to make a fresh cut above the damaged area if enough healthy stem and a viable node remain.
Start again with clean equipment and fresh water or rooting medium. One final caution: don’t seal a cutting permanently inside a wet plastic bag. Humidity can help, but trapped moisture without adequate ventilation may encourage mold and decay.
Give Your New Fiddle Leaf Fig Time to Grow
One of the most satisfying moments in propagation is seeing a new leaf emerge from a cutting that, only weeks earlier, was sitting in a glass jar.
It’s also the point where some gardeners become impatient. A fiddle leaf fig may spend considerable time developing its root system before producing noticeable new foliage. A healthy cutting doesn’t have to grow a new leaf immediately after rooting.
Watch for steady signs of establishment: firm stems, leaves that remain reasonably healthy, roots growing into the potting mix, and eventually fresh shoots or expanding leaves.
As the plant settles in, keep its environment consistent. Bright, indirect light is a dependable choice, especially during the first few months. Avoid moving it repeatedly between windows or taking it onto a windy balcony without gradual acclimation.
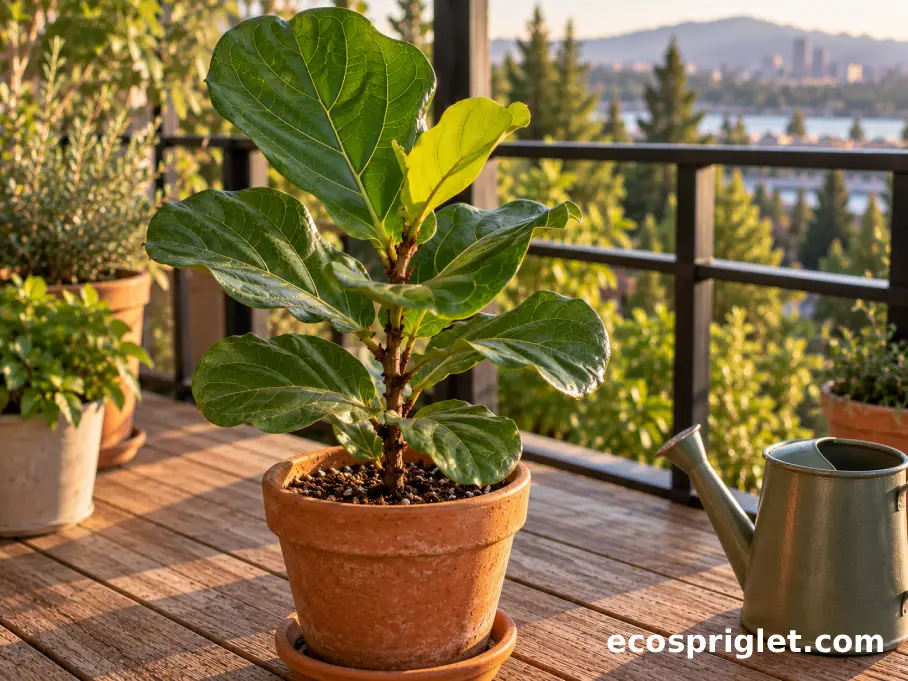
During warmer months, a sheltered outdoor space may work for an established plant, but fiddle leaf figs are tropical. Bring them indoors before cold nights become a problem, and protect them from temperatures approaching 55°F.
Water according to the condition of the soil rather than a fixed calendar. Once the young plant is established, check the upper 1–2 inches of potting mix and water when that area begins to dry. Always let excess water escape.
For more help managing moisture in compact containers, see our guide to watering houseplants in small spaces.
Keep the plant in its starter container until roots are developing throughout the mix and it begins drying noticeably faster between waterings. Then move it into a pot only 1–2 inches wider.
Remember that a newly rooted cutting is still a young plant. It doesn’t need to look like a miniature version of the original tree immediately. Give it steady conditions, modest watering, and time to develop.
Final Thoughts: Start With One Healthy Cutting
Growing a new fiddle leaf fig from a cutting doesn’t require a large home, a dedicated gardening room, or years of experience. The process becomes much easier when you focus on a few essentials: a healthy parent plant, a stem containing nodes, clean equipment, and a warm location with bright, indirect light.
For your first attempt, I’d start with one 4–6-inch stem cutting rooted in a clear jar of water. It’s inexpensive, easy to monitor, and gives you a useful view of how the roots develop. If you prefer to avoid the transition from water to soil, start the cutting directly in a small pot of airy rooting mix instead.
Don’t worry if roots take longer than expected. Healthy fiddle leaf fig cuttings can be slow, and progress isn’t always visible above the surface.
Once your new plant is established, give it time to develop a stronger root system before increasing its pot size or moving it to a brighter location. Consistency matters more than constant attention.
And if your original tree has become too tall for your space, air layering gives you another practical option for creating a smaller plant while reshaping the parent.
Choose one healthy cutting, prepare a clean spot near a bright window, and give it a try. That simple start could become the next beautiful fiddle leaf fig in your apartment.