If you’ve ever stared at a gray winter sky and wished your balcony or living room looked more like April, indoor tulips are your secret weapon. The short answer to “can you grow tulips indoors?” is yes—as long as you treat them the way winter does first. By chilling tulip bulbs, planting them in the right pots, and giving them steady light and cool temperatures, you can enjoy fat, colorful blooms on a tiny apartment windowsill. In this guide I’ll walk you through how to plant tulip bulbs in pots, how deep to plant them, how to care for tulips indoors day to day, and even how to try growing tulips indoors in glass vases for a minimalist look.
Think of indoor tulips as a slow, cozy project: a few minutes of potting in fall, a quiet “fake winter” in your fridge or a cool storage spot, and then a burst of color when your place needs it most. We’ll keep everything apartment-friendly—no garden soil, no big equipment, and plenty of options whether you have a bright balcony, a single sunny window, or just room for a couple of pots next to your couch.
Indoor Tulips: Can Tulips Really Grow Inside?
Tulips are naturally outdoor spring bulbs, but what they really care about is a sequence: a long, cool “winter” followed by brighter light and gentle warmth. Indoors, you’re just re-creating that process on your schedule. That’s why most guides talk about “forcing tulips indoors”—you’re convincing the bulbs that winter has happened, even if they’ve never touched real soil.
For indoor tulips, you’ll usually work with pre-chilled bulbs or chill them yourself, then grow them in pots or glass vases. University of Minnesota Extension notes that hardy bulbs like tulips can be potted in fall, chilled at around 35–48°F for roughly 12–13 weeks, and then brought into a cool, sunny window to bloom in late winter. It sounds technical, but in practice it’s “bag in the fridge, then bulbs in a pot, then pot by a bright window.”
One important safety note: tulips are toxic to cats and dogs, especially the bulbs. The ASPCA lists tulips (Tulipa spp.) as toxic to pets, with the highest concentration of toxins in the bulb itself. If you live with curious animals, keep bulbs and containers out of reach or choose a pet-safe plant instead.
Planning the Chill: How Forcing Tulips Indoors Works
Forcing tulips indoors starts months before you see a single flower. In nature, tulip bulbs sit in cool soil for a long stretch, slowly building roots and prepping the flower inside the bulb. To grow tulips indoors, you mimic that winter period with “cold treatment” or chilling.
Most hardy bulbs, including tulips, need about 10–16 weeks of cold at roughly 35–48°F to bloom well indoors. Cornell Cooperative Extension lists tulips in the 10–16 week chill range, while University of Minnesota Extension recommends a minimum of 12–13 weeks of cold treatment for potted bulbs. A safe apartment-gardener rule is: plan for 12–16 weeks of chilling, plus 3–4 weeks of growth indoors before bloom.
Here’s a simple timeline you can follow:
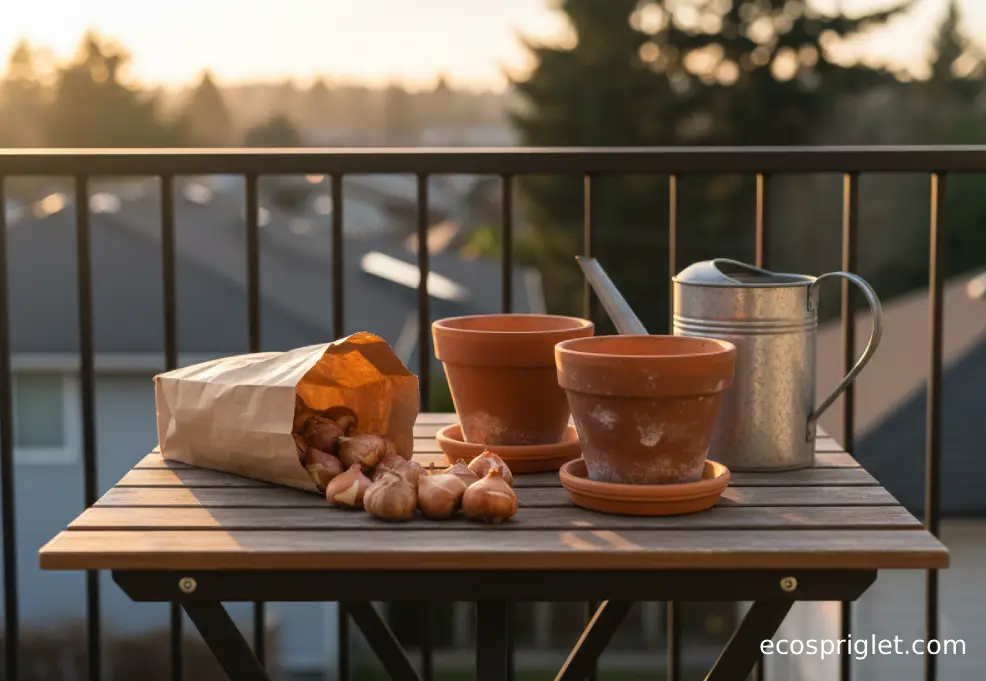
- Early–mid fall: Buy large, healthy tulip bulbs and a bag of good potting mix.
- Same month: Pot the bulbs or place them in a breathable paper bag and chill them at 35–48°F—usually in the fridge away from fruit.
- Late winter: After 12–16 weeks, bring chilled pots or planted bulbs into a cool, bright spot indoors; blooms usually follow in 3–4 weeks.
I like to mark the “chill start” date on the bulb bag and set a reminder on my phone about 13 weeks out. That way, I’m not guessing in January whether the bulbs have had enough winter yet.
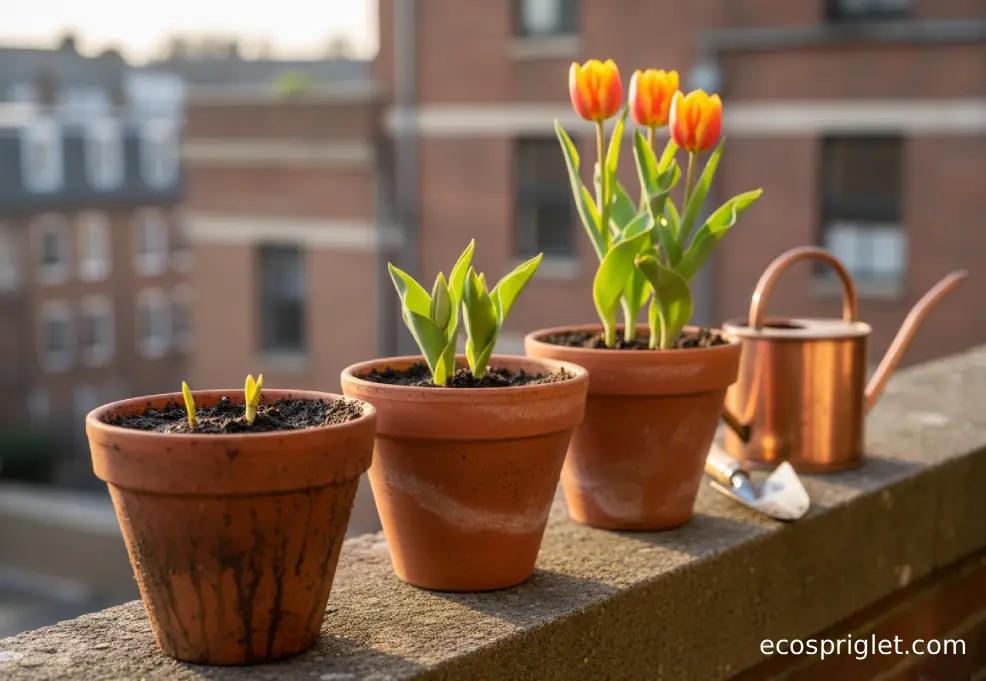
How to Plant Tulip Bulbs in Pots (Depth, Soil, and Spacing)
This is the part where your “how deep to plant tulip bulbs in pots?” question finally gets an answer. University of Minnesota Extension suggests pots at least 6–8 inches deep with drainage, filled with fresh, soilless potting mix rather than heavy garden soil. They also recommend planting tulip bulbs so that there’s about 4 inches of soil covering the bulbs. For a standard 6-inch-wide pot, six tulip bulbs planted close together (but not touching) makes a lush display.
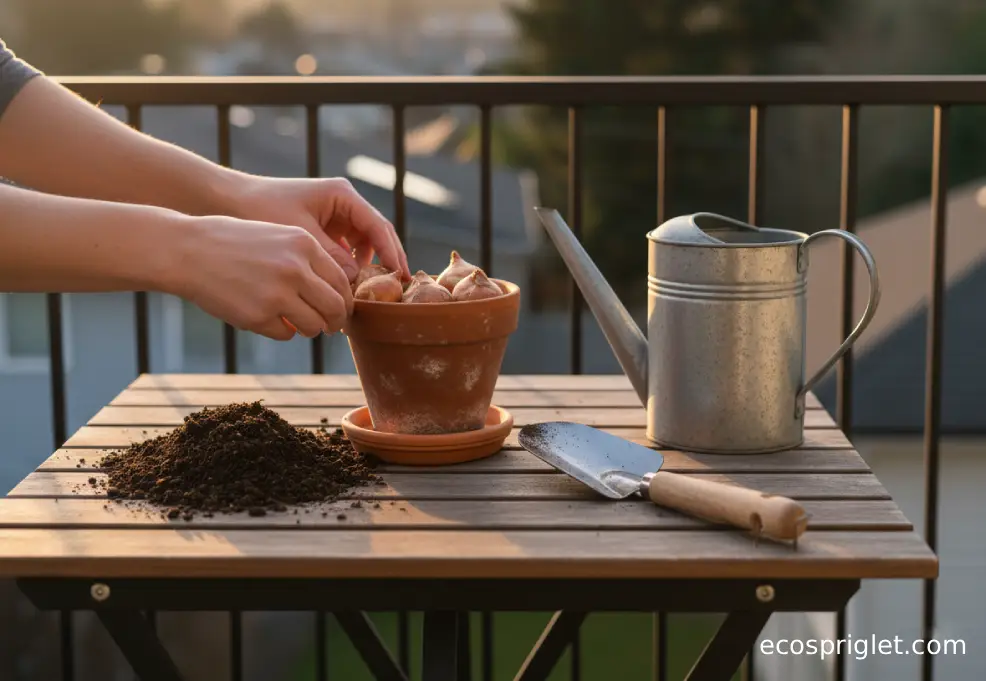
- Choose the container: At least 6–8 inches deep, with drainage holes and a saucer. Plastic or resin pots work well if they fit in your fridge.
- Fill with potting mix: Add fresh potting soil to fill about the bottom third of the pot.
- Place the bulbs: Set bulbs root-side down (flat, “hairy” end down, pointy end up) close together, with the flat side of each tulip bulb facing the rim for a fuller look.
- Cover to the right depth: Add more potting mix until the bulbs are buried with roughly 4 inches of soil over their bases and about 1/4 inch of space left at the pot’s rim for watering.
- Water once: Water thoroughly until excess drains out; the soil should feel as damp as a wrung-out sponge.
When I first tried forcing tulips, I was so nervous about rot that I barely watered them after planting. The bulbs survived, but the roots were sad and the stems short. Since then, I’ve learned to give them a good initial soak, then trust that cool conditions will keep the moisture level steady while they root.
If you’re layering bulbs (“bulb lasagna”) in one pot, keep tulips as one of the deeper layers and stick to shallower bulbs on top. Just remember that the more bulbs you squeeze in, the more often you’ll need to check moisture once growth starts.
Day-to-Day Tulip Care Indoors (Light, Water, and Temperature)
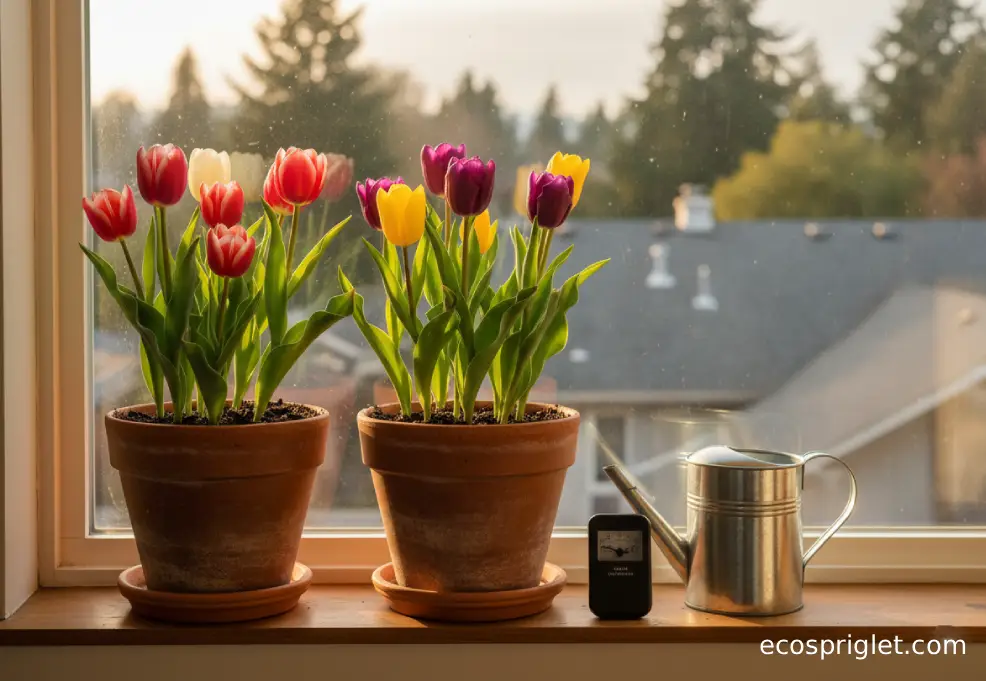
Once your chilled pots are ready to come out of “fake winter,” the goal is to wake them up gently. Bring them into a cool, bright space first—think 50–60°F if you can manage it, with bright indirect light from a window. University of Minnesota Extension notes that bulbs moved from 35–48°F into a cool, sunny window at 50–60°F typically bloom in about 3–4 weeks. Warmer rooms will speed things up but also shorten bloom time.
Watering is where most indoor tulip care questions land. Cornell Cooperative Extension suggests watering after planting until the soil feels like a wrung-out sponge and then letting the bulbs sit a bit on the dry side while they root, watering again when you see green shoots and the surface of the soil begins to dry. After growth starts, check every few days and water when the top 1–2 inches of soil feel dry to the touch. Water until a little drains into the saucer, then empty the saucer so the bulbs aren’t sitting in water.
Light-wise, a bright east- or south-facing window usually works well. Direct sun through glass can get surprisingly hot in a small apartment, so if leaves look limp or scorched, pull the pots a foot or two back from the glass. Rooms that stay under about 65°F will keep tulip flowers looking fresh longer; moving blooming pots to a cooler room at night can easily add several extra days of color.
Snip off spent tulip blooms as they fade, but leave the foliage until it yellows naturally. The leaves help the bulb use up its stored energy—important if you plan to plant the bulbs outside later or simply want them to die back cleanly.
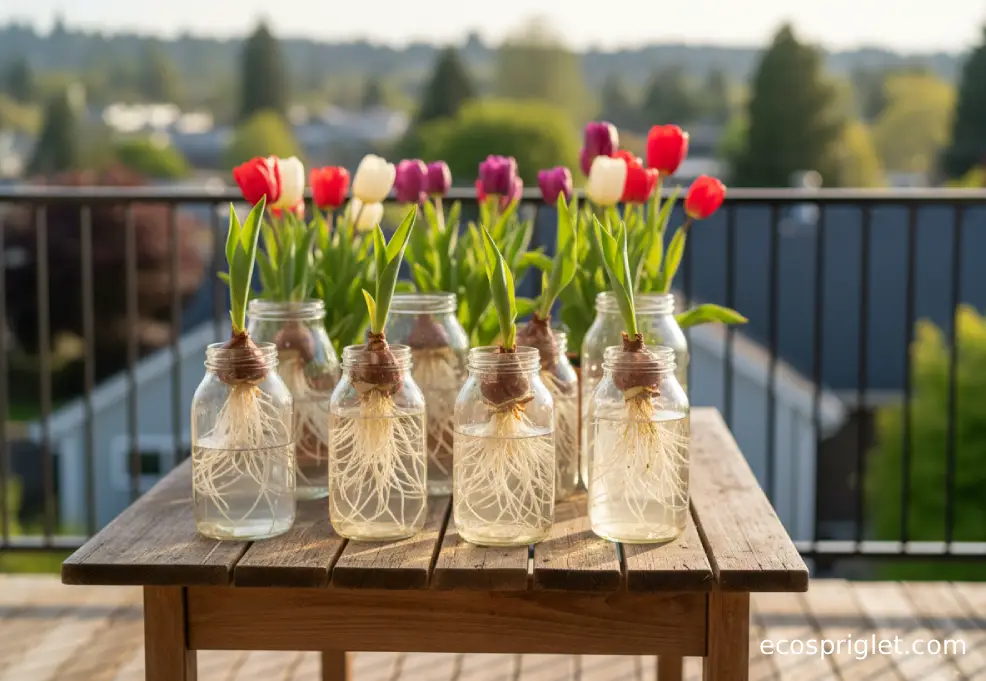
Growing Tulips Indoors in Glass Vases and Jars
Glass vases and jars turn tulip forcing into living decor: you see roots, water, and the flower all at once. The catch is that water-grown bulbs are a bit fussier and more prone to rot, so it’s worth copying what horticultural organizations recommend for similar bulbs like hyacinths and paperwhites.
The Royal Horticultural Society’s guidance for bulb vases is to fill the vase so the water level sits just below the bottom of the bulb, not touching it, and keep it that way as roots grow. That same rule-of-thumb works for tulips in glass: the roots belong in water; the bulb itself should stay dry.
- Use a purpose-made bulb vase or a narrow jar that supports the bulb at the neck.
- Add water until it’s about 1/8–1/4 inch below the base of the bulb.
- Chill the planted vases just like potted bulbs (35–48°F for 12–16 weeks), checking the water level occasionally.
- After chilling, move them to a cool, bright spot and keep topping up the water so it stays just below the bulbs.
I like to tuck a couple of water-grown tulips among regular houseplants so the glass catches the light. Just be extra careful with pets or kids—exposed bulbs are more tempting to nibble, and the ASPCA warns that tulip bulbs are the most toxic part of the plant for cats and dogs.
If you find your tulip stems are flopping, you can rotate the vases daily so the stems don’t lean as hard toward the window, or give them a slightly cooler spot for a few days. Some commercial growers tweak stem length with special techniques, but at home, simply keeping them cool and evenly lit goes a long way.
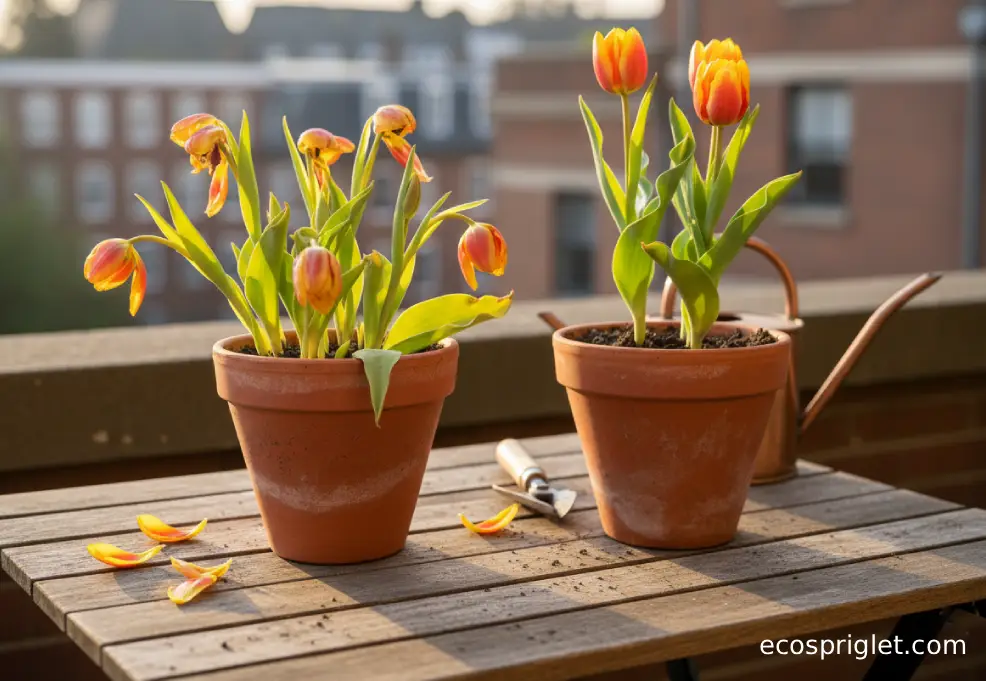
Common Indoor Tulip Problems and Easy Fixes
Even with good prep, indoor tulips sometimes misbehave. Here are a few issues I see most often in small apartments and how I handle them.
- Short, stubby stems: Usually from too little chilling or too-warm indoor temps. Next time, give bulbs the full 12–16 weeks of cold and keep them in a 50–60°F room when you first bring them out.
- Floppy, weak growth: Often a light issue. Rotate pots every few days and move them closer to bright windows (but not directly against hot glass) so stems grow straighter.
- Bulbs rotting in the pot: Overwatering or poor drainage is the usual culprit. Make sure your pots have drainage holes, empty saucers after watering, and water only when the top 1–2 inches of soil feel dry.
- No blooms, just leaves: Typically bulbs didn’t get enough cold time, or they were old and depleted. Make note of your chill dates and source fresher, larger bulbs next season.
- Spotted or yellowing leaves early: Can be stress from sudden heat or inconsistent watering. Move plants away from radiators and drafts, and aim for steady, moderate moisture in the pot.
When I noticed my first pot of indoor tulips leaning almost horizontally toward a south window, I wedged the container into a heavier decorative pot and rotated it a quarter turn every morning with my coffee. Within a week, the stems had straightened enough that no one visiting guessed how dramatic they’d looked before.
Common Mistakes to Avoid With Indoor Tulips
Indoor tulips aren’t especially hard, but there are a few traps that almost everyone falls into at least once—I definitely did.
First, skipping or shortening the cold period is a big one. If tulips don’t get enough time at 35–48°F, they either won’t bloom or will give you short, awkward-looking flowers. Another common mistake is using garden soil in containers. It compacts, holds too much water, and can bring in pests; a fresh, peat-free potting mix is far more reliable in pots.
Overwatering is another tulip-killer. It’s tempting to baby pots indoors and water “just in case,” but soggy soil during the chill or early growth phases is prime rot territory. Treat the “top 1–2 inches dry” test as your go-to rule, and always let excess water drain away.
Finally, don’t underestimate heat. Pots placed right above a radiator or pressed against a hot window often bloom quickly and then crash just as fast. Slide them a little farther into the room so they enjoy light without the bake.
I learned this the hard way with a pot I kept on a narrow radiator shelf—beautiful for about three days, then gone. Now I use that spot for tougher houseplants and keep tulips where the temperature swings are gentler.
After Flowering: What to Do With Indoor Tulips
Once your indoor tulips have finished their show, you have a choice: try to save the bulbs, or treat them as a one-time display. University of Minnesota Extension explains that bulbs forced indoors are unlikely to bloom well again because the forcing process uses up much of the stored energy inside the bulb. That’s why many experts suggest composting forced bulbs after flowering.
If you do want to give your forced tulips a second life and you have access to a yard or community garden, you can:
- Deadhead spent flowers but leave all foliage.
- Keep watering lightly and give the pot as much sun as possible until the leaves yellow and die back.
- Let the pot dry out, then plant the bulbs outside in fall like regular garden tulips, understanding that they may return weakly or not at all.
In a balcony or apartment context, I usually view indoor tulips the same way I view spring holiday plants: lovely seasonal visitors. After the blooms fade and foliage yellows, I compost the bulbs and refresh the pot with herbs or compact summer annuals.
Whichever route you choose, don’t forget the pet factor. Because tulip bulbs are the most toxic part of the plant for cats and dogs, make sure spent bulbs go into a secure compost or trash system that your animals can’t access.
Bringing It All Together: Designing With Indoor Tulips in Small Spaces
Once you know how to grow tulips indoors, the fun part is deciding where to put them. In a small apartment, even one or two pots can change the mood of a room. I like grouping three containers of different heights together—a low bowl of mixed bulbs, a medium tulip pot, and one glass vase with visible roots—for a little indoor “spring corner.”
Try these simple layout ideas:
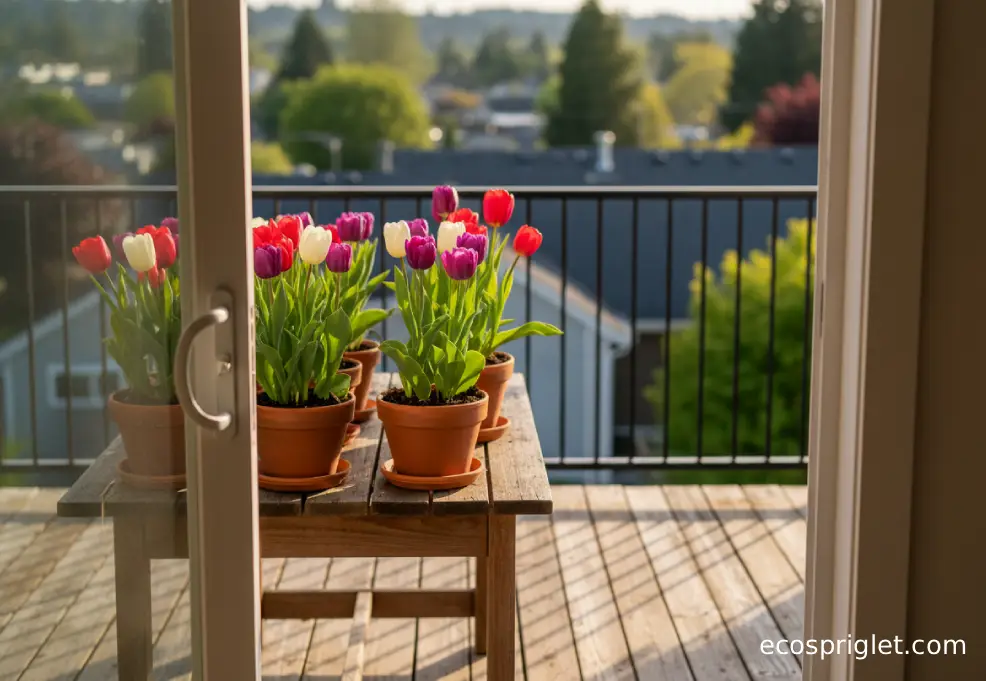
- By the balcony door: Line two or three pots just inside a sliding door where they get bright light without crowding your walking space.
- On a narrow shelf: Use matching pots in a row for a clean look, with bulbs chilled and brought inside in batches for staggered bloom.
- Mixed with houseplants: Tuck one tulip pot among leafy foliage plants so the flowers pop against a green backdrop.
Indoor tulips won’t last forever, and that’s part of their charm. You prep them in the quiet months, watch green shoots appear just when you’re tired of heavy coats, and then enjoy a couple of glorious weeks of color. For a small space, that’s a pretty good trade for a bit of fridge real estate and a couple of terracotta pots.