If your plants are starting to take over the floor, a DIY plant stand is one of the easiest upgrades you can make for a small apartment or balcony. A good stand lifts your pots closer to the light, frees up valuable square footage, and turns a cluster of containers into something that looks intentional and stylish. The best part is you don’t need a full workshop or fancy tools to build a simple DIY plant stand for indoor or outdoor use—just a bit of planning, a few basic boards, and an afternoon of tinkering.
In this guide I’ll walk you through planning your stand, choosing materials, and building both an easy indoor wood plant stand and a sturdy outdoor plant stand for succulents. We’ll talk about how much weight these stands really need to support, how to avoid wobbly legs, and how to style your plants so the whole thing feels like a mini green gallery. I’ll also share a few mistakes I’ve made over the years (including a dramatic toppled monstera) so you don’t have to repeat them on your own balcony.
Why Build a DIY Plant Stand Instead of Buying One?
Buying a ready-made plant stand can be convenient, but building your own gives you three huge advantages: it fits your exact space, it carries the weight you need it to carry, and it works with your style instead of fighting it. In a tight apartment or on a narrow balcony, even a difference of 2–3 inches can decide whether a stand blocks a door, hogs the outlet for your grow light, or leaves just enough space for a chair.
A DIY indoor plant stand also lets you play with height. You can build a low, wide stand to slide under a window, or a tall, narrow one to tuck next to a sofa without blocking your view. For outdoor spaces, a DIY plant stand outdoor design can group your sun-loving herbs where they’ll actually get those 4–6 hours of direct light container gardening guides like those from NC State Extension recommend. Instead of scattering pots everywhere, your plants become a focal point—almost like a living bookshelf.
And finally, building it yourself is simply satisfying. I still remember my first plant stand: a wobbly little step-shaped thing made from leftover deck boards. It wasn’t pretty, but the moment I saw all my plants together at different heights, I knew I was hooked. Every version since has been a little sturdier, a little smarter, and a lot more “me.”
Planning Your DIY Plant Stand: Space, Light, and Safety
Before you pick up a saw or buy a single board, it helps to treat your DIY plant stand like a tiny piece of architecture. Where will it live? How much sun hits that spot? How much weight will the shelves or top surface have to carry?
Grab a tape measure and jot down three key numbers: width, depth, and height. For an indoor plant stand DIY project, a depth of 10–12 inches usually works well against a wall without sticking out too far. On a balcony, you might need to go slimmer—sometimes as little as 8–10 inches—to keep a walkway clear. Height-wise, I like to keep indoor stands between 18–30 inches so they don’t block windows or feel like towers in a small room.
- Plan for at least 2–3 inches of clearance around each pot so leaves aren’t crowded.
- Estimate total weight: add up your heaviest pots and assume each gallon of moist soil weighs around 8–10 pounds.
- Place the heaviest pots on the lowest level to avoid a top-heavy stand.
Safety deserves a special shout-out. On upper-floor balconies especially, never attach a plant stand directly to a railing unless your building rules explicitly allow it. Keep anything tall 2–4 inches away from the railing so wind can move through, and weight the bottom with heavier pots.
University extension resources on container gardening often remind people to think about load, not just style, and that’s even more important when you’re building the furniture yourself.
I learned this the hard way when a surprise wind gust nudged one of my early stands against the railing and sent a small pot tumbling. Since then, I always imagine a kid pulling on the stand or a cat jumping onto it—if it wouldn’t handle that gracefully, I beef up the design. If you’re unsure about balcony load limits, keep your stand small and use lighter potting mixes, just like you would with any other balcony herb setup.

Simple Materials and Tools for DIY Wood Plant Stands
The classic DIY wood plant stand is friendly to beginners because it uses straight cuts and common materials. For most simple stands, you only need a few items:
- 1×2 or 2×2 lumber for legs
- 1×3 or 1×4 boards for shelves or the top frame
- Exterior-grade screws (for outdoor stands) or standard wood screws (for indoor)
- Wood glue (optional but adds strength)
- Sandpaper (80–120 grit) and a small brush or rag for finish
Softwoods like pine, fir, or spruce are affordable and easy to cut. For an outdoor DIY plant stand outdoor build, cedar or pressure-treated lumber (sealed properly) will handle weather better. Whatever you choose, look for straight boards without big knots around areas you plan to screw into.
Tool-wise, a basic cordless drill/driver, a measuring tape, and a hand saw or circular saw will carry you through most plant stand DIY projects. A clamp or two helps keep things square, but you can get by without them on a small stand. If you’ve never built anything before, start with one level and four legs before moving on to multi-tier designs.
Most container gardening guides from groups like the Royal Horticultural Society (RHS) and UCANR emphasize durability for outdoor structures, so it’s worth taking the time to seal your DIY wood plant stand with an exterior finish.
For indoor stands, a simple water-based poly or plant-safe oil keeps soil splashes from staining the wood and makes cleanup much easier.

Step-by-Step: Easy DIY Indoor Wood Plant Stand
This simple DIY indoor plant stand is designed for one medium pot, roughly 8–12 inches in diameter. It’s a great first project and looks surprisingly polished once you stain or paint it.
Cut List (for one stand)
- Four legs: 2×2 lumber cut to 16–20 inches (shorter for low stands, taller if you like)
- Four side rails: 1×3 boards cut to form a square or rectangle slightly larger than your pot
- Optional cross brace under the pot: a scrap 1×3 cut to fit
Build Steps
- Mark and cut: Measure twice, then cut your legs and rails. Dry-fit them on the floor so you can see the footprint.
- Assemble the frame: Screw the rails into the legs to make a box. Pre-drill to prevent splitting, especially near board ends.
- Add support: If your pot is heavy, add a cross brace or two under where the pot will sit so the frame doesn’t sag over time.
- Sand and finish: Knock down any splinters and edges with sandpaper, then seal the wood. Let it dry fully before placing your plant.
- Test the load: Place the empty pot first, then add soil and plant. Gently wiggle the stand—if it feels wobbly, tighten screws or add a diagonal brace.
I like to build a pair of these at slightly different heights to create a layered look in a corner. Because you’re customizing the dimensions, you can make one that fits neatly under a window and another that tucks beside a sofa. If you’re working with moisture-loving plants (ferns, calatheas, etc.), consider pairing this stand with a drip tray and a well-draining potting mix, just like you would for plants on a shelf or in a dedicated container mix.
Indoor plant care advice from sources like the RHS and various university houseplant guides generally recommend letting the top 1–2 inches of soil dry out for most common houseplants before watering. A sturdy stand makes it easier to slide a finger into the soil and check without bending all the way to the floor.
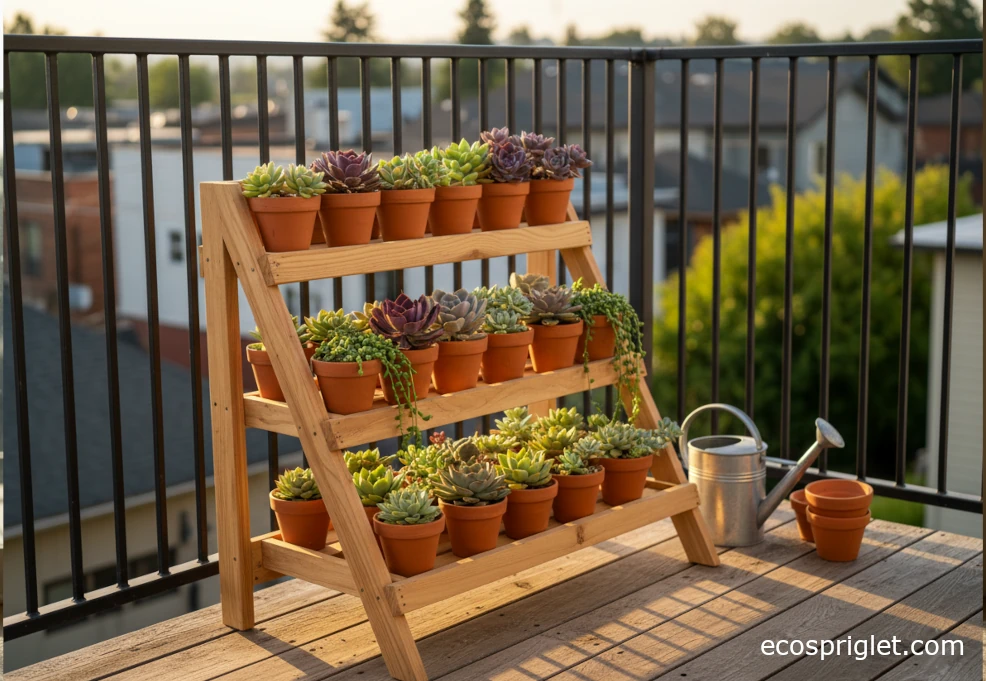
Step-by-Step: DIY Outdoor Plant Stand for Succulents
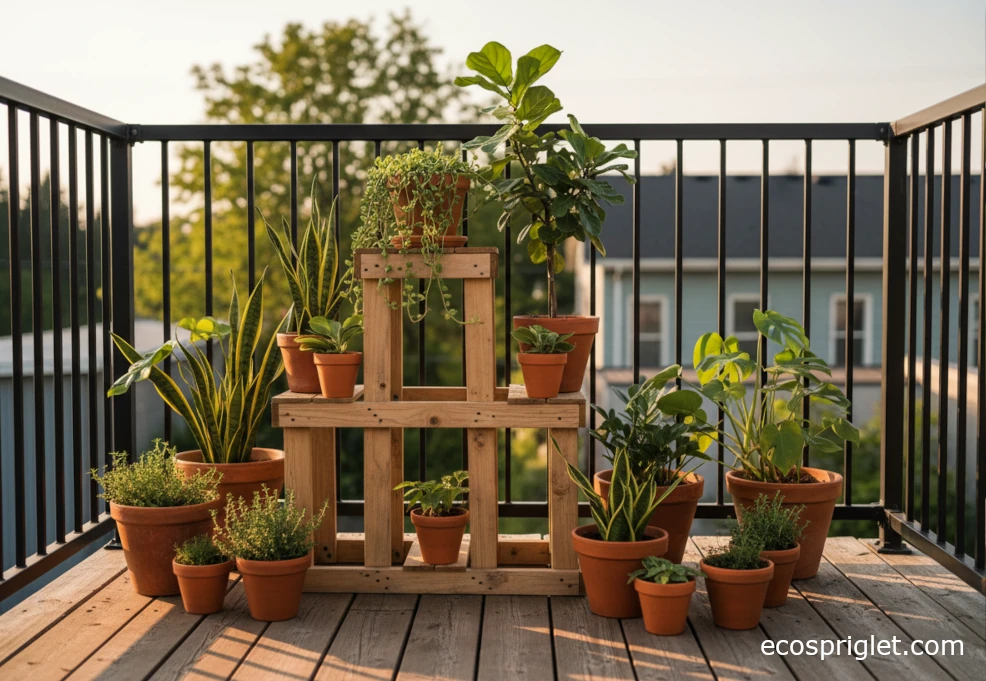
Succulents are perfect for a slim DIY outdoor plant stand because they don’t need huge pots or deep shelves. This simple ladder-style stand fits in a narrow balcony zone and gives you 3 tiers of plants in the footprint of just one.
For a small stand about 24–30 inches wide:
- Cut the sides: Two side pieces from 1×4 or 2×4 boards, about 24–28 inches tall, with the top corners slightly angled if you like the ladder look.
- Cut the steps: Three or four “steps” from 1×3 or 1×4 boards, between 6–8 inches deep, spaced 8–10 inches apart.
- Pre-drill and assemble: Position the steps like shallow shelves between the sides, then attach with exterior screws. Make sure the bottom step sits flat on the ground.
- Seal the wood: Use an exterior-grade finish to protect the wood from rain and sun.
Because succulents are relatively light compared to big soil-filled pots, this DIY outdoor plant stand for succulent collections doesn’t need massive lumber, but it does need drainage. Stick with terracotta or containers with holes, and avoid trays that stay full of water. Extension services and cactus/succulent societies often suggest letting the soil dry almost completely between waterings and giving these plants plenty of bright light—often 4–6 hours of direct sun, depending on species.
I like to group similar succulents together on each tier so I can water them on the same schedule. On the top level I usually place the sunniest, most drought-tolerant varieties, and on the lower tiers I tuck in a few trailing plants that can spill over the edges. If your balcony gets intense afternoon heat, a thin shade cloth above the stand or a shift to morning sun can prevent scorched leaves.
Styling and Arranging Plants on Your Stand
Once the screws are tightened and the finish is dry, the fun part begins: turning your DIY plant stand into a mini green display. Think like you’re arranging a tiny city skyline. Taller plants or climbing supports go toward the back or on the highest tier; trailing plants spill over edges; compact plants fill the gaps.
Here are a few simple styling rules that have never failed me:
- Mix heights and textures: Pair tall, upright plants with mounding ones and at least one trailing plant per level.
- Keep pots mostly neutral: Terracotta and muted colors help the foliage stand out rather than the containers.
- Use odd numbers: Groups of three or five pots look more natural than pairs lined up like soldiers.
For an indoor plant stand DIY, I like to repeat one or two dominant colors in the foliage—like deep green and silver—and then add one “wild card” plant with variegation or bold pattern. Outdoors, especially in summer, you can go more playful with flowering succulents or seasonal annuals tucked in between permanent containers.
I remember styling a stand so densely that I could barely fit my hand in to water. It looked lush for about a week, then quickly turned into a puzzle every time I needed to prune or check for pests. Now I always leave a bit of “air” between pots so I can reach in with a watering can or snips without moving everything around.
Caring for Plants on a Stand: Water, Light, and Weight
Plants on a stand often dry out faster than plants on the floor because they catch more air movement and, in many cases, more direct sun. Most university extension guides for container gardening suggest a simple rule: check moisture with your finger daily in warm weather and water when the top 1–2 inches of soil feel dry for typical houseplants and balcony herbs. For succulents on your DIY outdoor plant stand, wait until the soil is dry almost all the way down before giving a deep soak.
When you do water, aim for a slow, even soak until you see 10–20 percent of the water drain from the bottom of the pot. This flushes salts and ensures the entire root ball gets moisture, a practice often recommended by sources like UCANR and other container gardening programs. Just make sure your stand can handle the temporary added weight of wet soil—another reason to keep heavy pots on the lowest level.
Light is the other big factor. An indoor diy plant stand placed near an east- or south-facing window can deliver 4–6 hours of good light to sun-loving species. If leaves start to bleach or crisp, move the stand a foot or two farther from the glass or add a sheer curtain. Outdoors, remember that the top tier of a stand usually gets more sun and more wind than the lower tiers; put your toughest plants up high and your shade-lovers lower down.
Lastly, keep an eye on stability over time. Wood can swell, screws can loosen, and the way you water and rearrange pots can shift weight around. Once or twice a season, especially after moving the stand or adding big new plants, give it a gentle shake; if you feel wobble, tighten hardware or add a discreet brace.

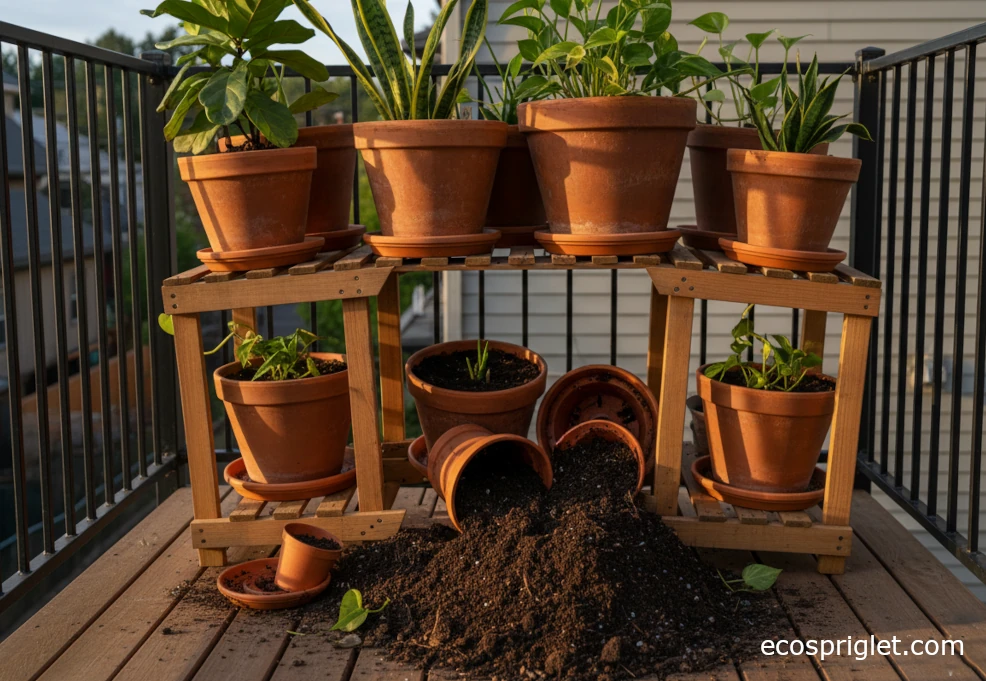
Common Mistakes to Avoid With DIY Plant Stands
I’ve made more plant stand mistakes than I care to admit. The good news is they’re easy to avoid once you know what to watch for.
- Underestimating weight: Wet soil is heavy. If you stack large pots on a flimsy top shelf, the stand can sag or tip over. Keep big containers low and build with solid joinery.
- Ignoring drainage: Pots without drainage holes or saucers that stay full of water can rot roots and stain your wood. Use true potting mix, not garden soil, as organizations like the RHS and many extensions recommend.
- Blocking doors and windows: A beautiful DIY indoor plant stand that makes it hard to open a door won’t feel beautiful for long. Recheck swing clearance before you build.
- Using indoor finishes outdoors: An indoor-only finish on a DIY plant stand outdoor project will peel quickly in sun and rain. Choose exterior-grade sealers for anything exposed to weather.
- Skipping fasteners on tall stands: For tall, narrow stands, a simple bracket into a wall (indoors) or a stabilizing brace can make the difference between “solid” and “precarious.”
My most memorable mistake was building a narrow stand for a big, top-heavy monstera without securing it to the wall. It looked amazing—right up until the day a curious cat tried to climb it. Since then, I’ve treated any stand taller than about 30 inches like real furniture: if it could topple, I anchor it.
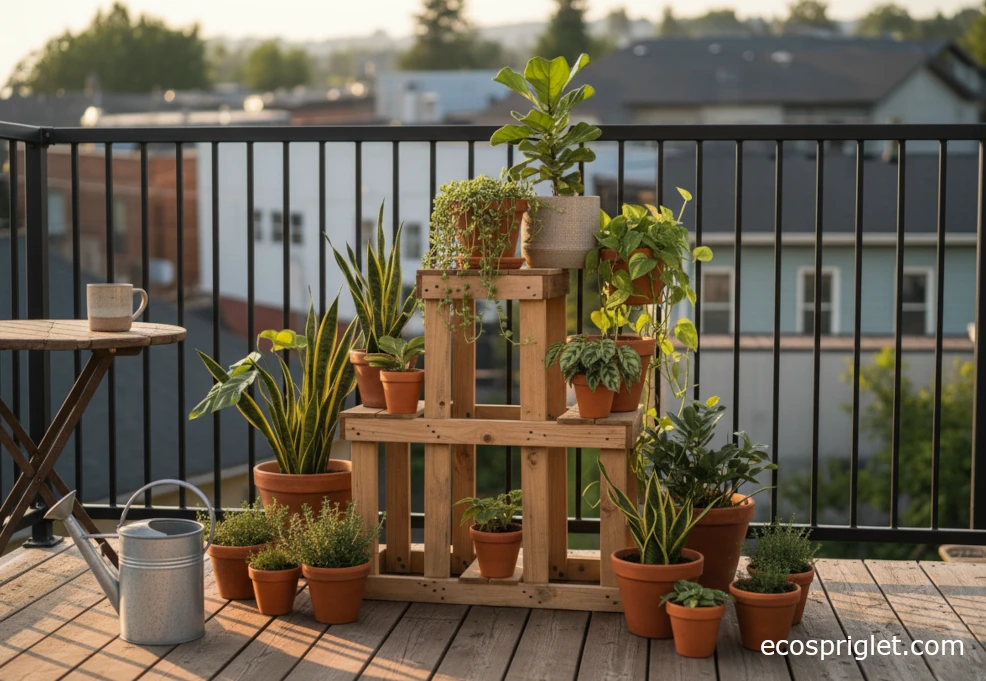
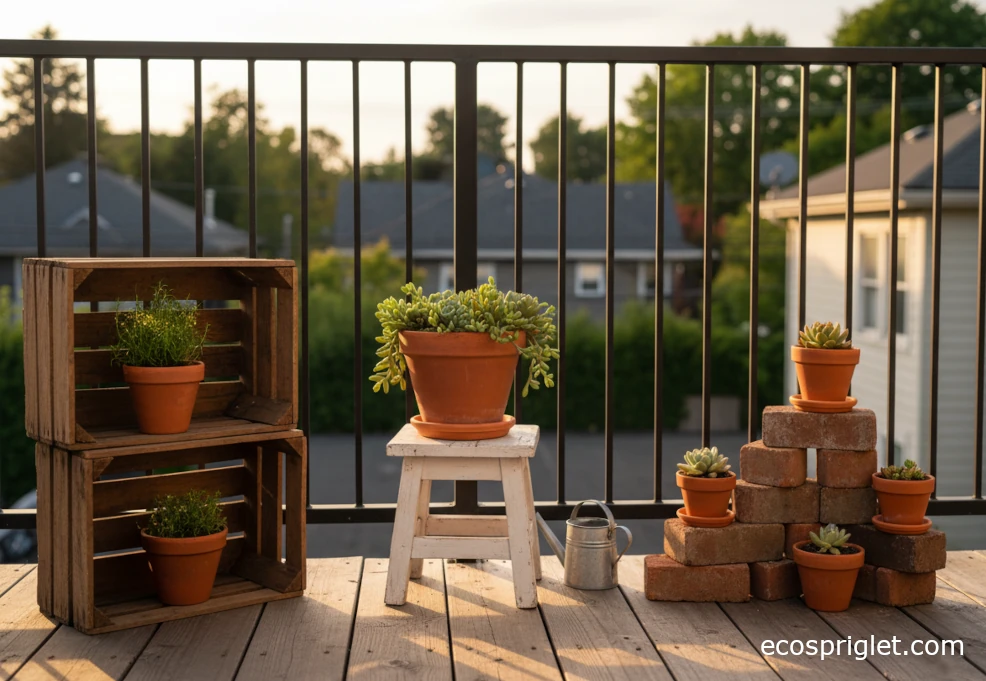
Creative DIY Plant Stand Ideas for Tiny Spaces
You don’t always have to start from raw lumber to get a great plant stand. Sometimes the best DIY plant stands are simply smart reuses of things you already have. I love mixing “built” stands with a few improvised ones so the whole space feels layered and personal.
- Stacked crates: Flip sturdy wooden crates on their side and stack them like cubbies. Screw them together so they don’t shift.
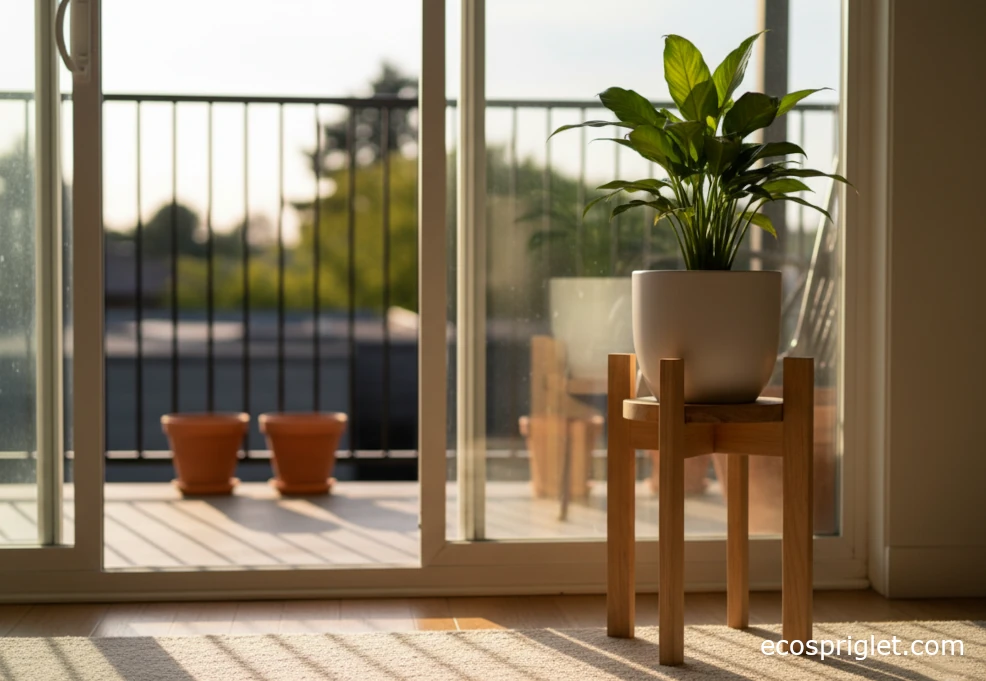
- Short stools: A thrifted stool instantly becomes a DIY indoor plant stand when you add a drip tray and maybe a coat of paint.
- Brick pedestals: Stack bricks or concrete pavers to create low risers for outdoor pots. Keep them in a stable, interlocked pattern.
- Rail-adjacent shelves: Place a narrow stand parallel to your balcony railing, leaving a small gap, to create the feeling of a built-in planter without attaching anything.
- Multi-stand clusters: Combine a taller DIY wood plant stand with a shorter crate and a floor pot to build a little “plant village” in one corner.
When you improvise like this, keep the same safety and weight rules in mind that you’d use for any plant stand DIY project. Make sure whatever you’re using is solid, level, and not supporting more weight than it was built for. A cluster of varied heights can make even a tiny apartment corner feel like a dense little jungle, especially when you repeat materials like wood and terracotta to tie it all together.
DIY Plant Stand FAQ
How much weight can a DIY plant stand hold?
It depends on your materials and design. Simple stands made from 2×2 legs and 1×3 rails, properly screwed and glued, can usually handle a single medium pot (10–12 inches wide) plus moist soil without trouble. If you plan to support several large containers, build with thicker lumber and keep everything lower and wider rather than tall and narrow.
Can I use a DIY indoor plant stand outside?
Only if you built it with weather-resistant materials and an exterior finish. Indoor stands made from untreated softwood and interior finishes will swell, crack, and weaken quickly outdoors. For long-term outdoor use, switch to cedar or treated lumber, and seal it with a suitable exterior product.
What type of soil should I use for plants on a stand?
Use a high-quality potting mix rather than garden soil. Container gardening resources from university extensions and groups like the RHS consistently recommend soilless mixes with ingredients like peat or coir, perlite, and composted bark because they drain well and stay airy. Heavy garden soil can compact and put extra strain on your stand and your plants’ roots.
Is wood the only option for a DIY plant stand?
Not at all. Metal pipe, concrete blocks, and even heavy-duty plastic crates can all be turned into plant stands. Wood is simply one of the easiest materials to work with using basic tools, which is why most diy plant stand ideas focus on simple wood construction.

A good diy plant stand is more than just a place to put pots—it’s a little stage where your plants can shine. With some simple measurements, basic lumber, and a plan for how much weight you need to support, you can build a diy indoor plant stand for that dark corner by the sofa, a diy outdoor plant stand for succulent collections on the balcony, or a whole family of small stands that move around as your plants grow.
Start simple. Build one stand for a single favorite plant, learn how it behaves through a full season, then tweak your next design. Pay attention to how quickly the soil dries, how much light each level gets, and whether your layout makes watering and pruning easy. Resources from horticultural organizations like the Royal Horticultural Society and university extensions are great companions when you’re deciding which plants to put where and how to care for them once they’re on your new stand.
If you’re ready to keep going, pair your new stand with a few fresh containers and a well-draining mix, and maybe even sketch out a mini balcony plan. You can explore our other guides—like a simple indoor herb garden plan—to fill those shelves with plants that actually thrive in your light and climate. Grab a scrap board, charge the drill, and give your plants the little stage they deserve.