If you’ve ever tried to keep herbs alive on a dim windowsill or watched seedlings stretch and flop over in late winter light, a DIY indoor greenhouse can feel like a small miracle. Instead of fighting your apartment’s dry air, patchy sunlight, and curious pets, you create a controlled pocket of perfect plant weather: bright, warm, and just humid enough. The best part is that a homemade greenhouse doesn’t have to look like a science experiment; it can be as simple as a clear storage bin on a shelf or as stylish as a glass-fronted cabinet glowing softly in the corner.
In this guide, I’ll walk you through how to plan, build, and care for a DIY indoor greenhouse that fits right into a small urban home. We’ll talk about mini greenhouse shelves, repurposed cabinets, grow lights, and easy ways to manage temperature and humidity without turning your living room into a jungle lab. Along the way I’ll call out common mistakes (like overwatering and using heavy garden soil) and share a few projects that have worked well on my own Portland balcony and inside my apartment. By the end, you’ll know exactly how to build a diy indoor greenhouse that matches your space, budget, and plant ambitions.
What Is a DIY Indoor Greenhouse?
A DIY indoor greenhouse is simply a small, enclosed space where you control light, temperature, and humidity better than the rest of your apartment. Think of it as a “micro climate bubble” built from things you likely already have: shelves, clear bins, an old glass-front cabinet, or even a large jar. You’re not trying to recreate a full-size outdoor greenhouse; you’re building a focused growing zone for seedlings, cuttings, or small plants that need extra pampering.
Most indoor diy greenhouse setups share a few traits:
- Transparent sides (glass or clear plastic) so light gets in and you can see your plants.
- Some kind of adjustable light source, often LED grow bars or panels.
- Good airflow and drainage so you don’t end up with mold or soggy roots.
You can use a diy mini greenhouse indoor to start vegetable seedlings, grow herbs year-round, root cuttings, or keep humidity-loving houseplants happy without raising the humidity for your whole apartment. Average indoor plant temperatures of roughly 65–75°F are perfect for many of these plants, which conveniently matches normal living-room conditions in most homes.
Over time, a homemade greenhouse becomes a kind of plant workshop—somewhere you experiment with new varieties before promoting them to your main shelves or balcony. If you’re not sure whether you want a greenhouse cabinet, a simple shelf setup, or a mini dome, don’t worry; we’ll walk through those choices next.
Planning Your Indoor DIY Greenhouse Space
Before you buy a single grow light, decide what you want this diy greenhouse indoor setup to do for you. Are you mostly starting veggie seedlings for a balcony bed? Keeping a rotation of cooking herbs going all winter? Or building a dramatic plant display that doubles as a night light? The clearer your goal, the easier it is to choose the right scale, lights, and containers.
Grab a tape measure and look for a spot that’s near an outlet, away from direct heater vents, and reasonably level. Good candidates include the side of a sunny living room window, a hallway nook, or a bedroom corner that doesn’t block walking paths.
Measure three things:
- Footprint: Length and width of the floor area you can spare (even 18–24 inches wide is enough for a mini greenhouse indoor).
- Height: From floor to ceiling or shelf to ceiling, so you know how tall your structure and plants can be.
- Outlet distance: How far your cords need to run without becoming a tripping hazard.
I like to sketch a rough plan in a notebook, marking where each shelf will go and leaving at least 12–18 inches between shelves for plants and lights. If you’re planning a diy indoor greenhouse cabinet (like a repurposed glass display cabinet), double-check that the doors can open fully without hitting a wall or couch.
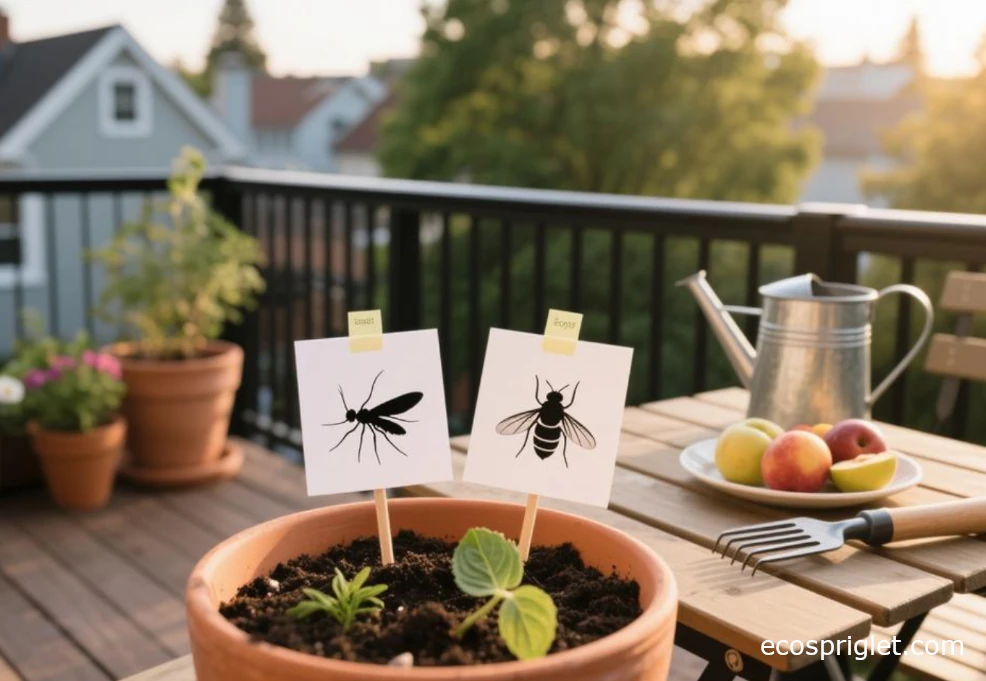
This is also a good moment to think about pets and kids. If you share your home with curious animals, choose non-toxic plants or stash toxic ones behind doors and out of reach, and consult trustworthy sources like the ASPCA’s houseplant toxicity lists when planning your collection.
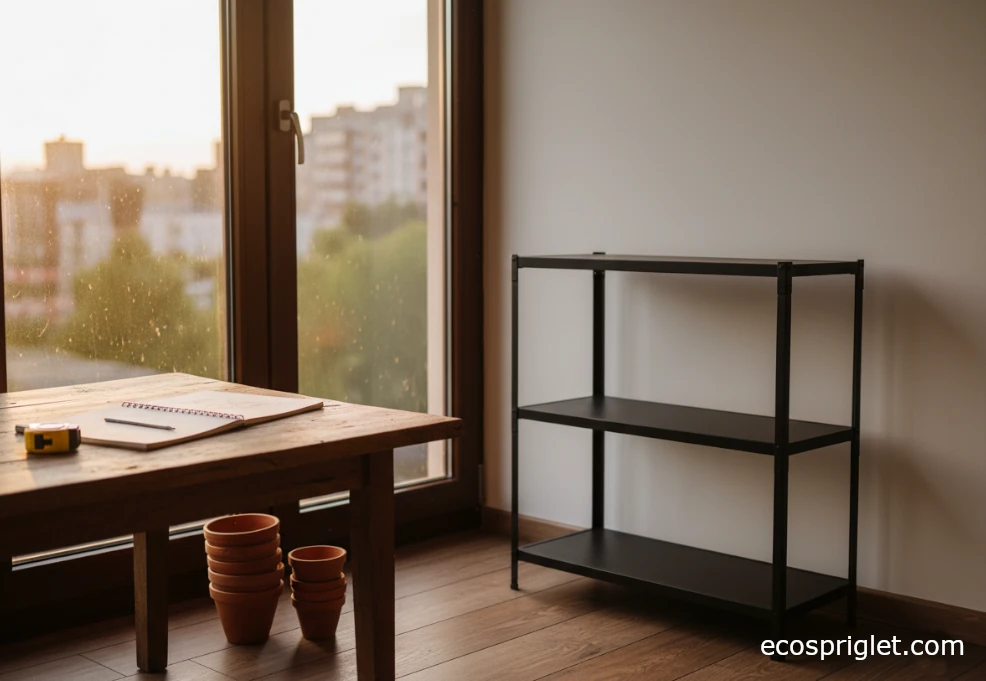
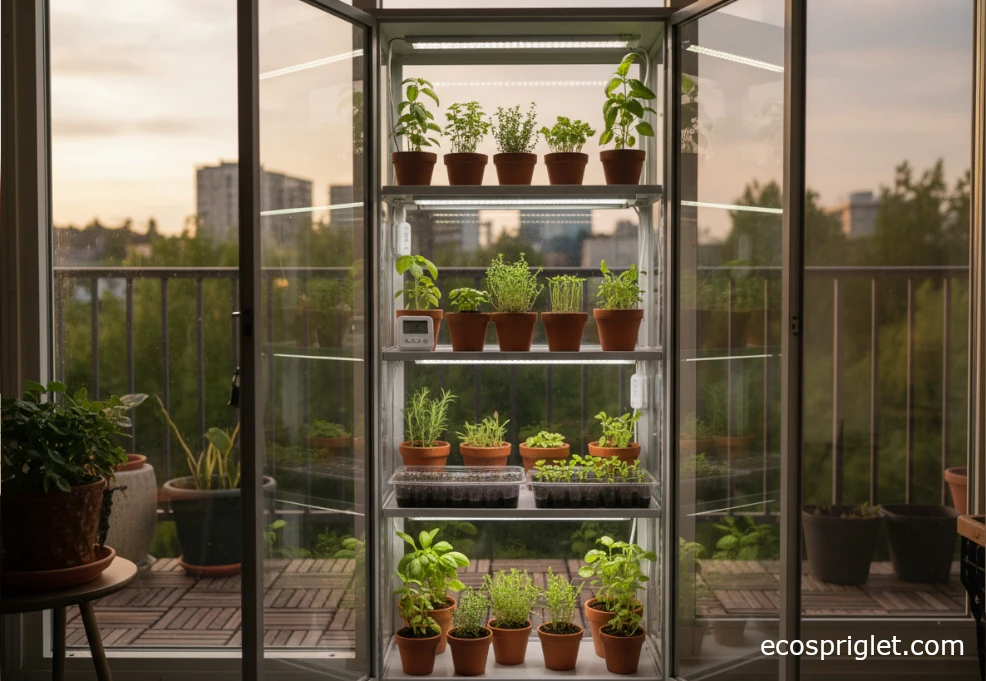
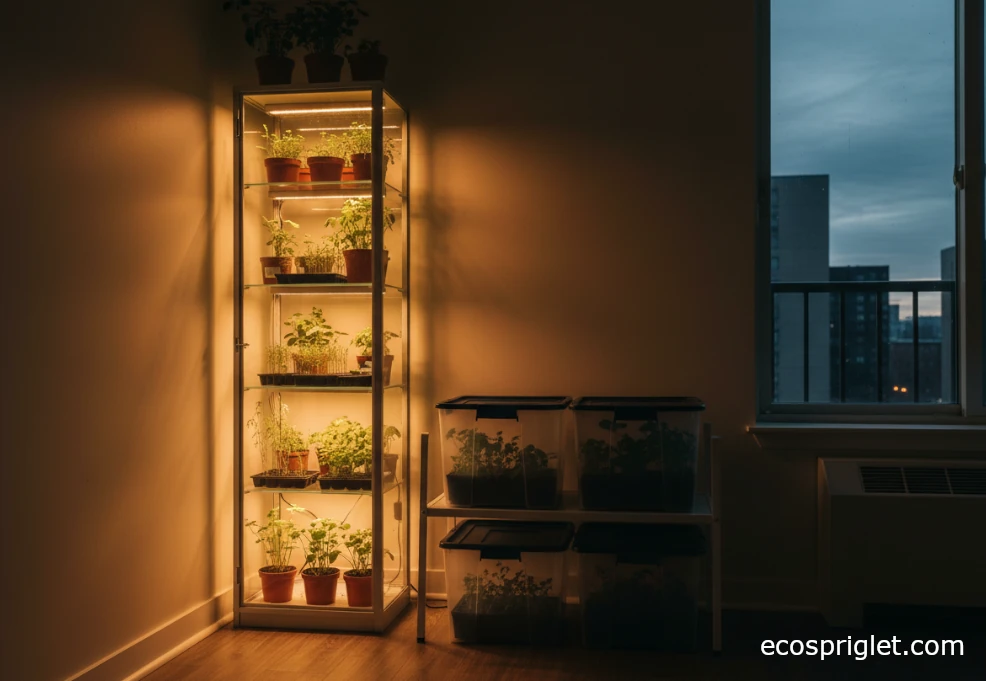
Building a DIY Indoor Greenhouse Cabinet or Shelf
This is the fun part—turning raw furniture into a working indoor greenhouse diy project. You don’t need expensive gear; a simple metal rack and a couple of clear bins can grow a surprising amount of food and foliage. I still smile when I think about my first “greenhouse”: a wire shelf wrapped with clear plastic and held together with clothespins. It looked scrappy, but I harvested more lettuce from that thing than from any store-bought kit I’ve owned.
Here are a few easy builds to consider:
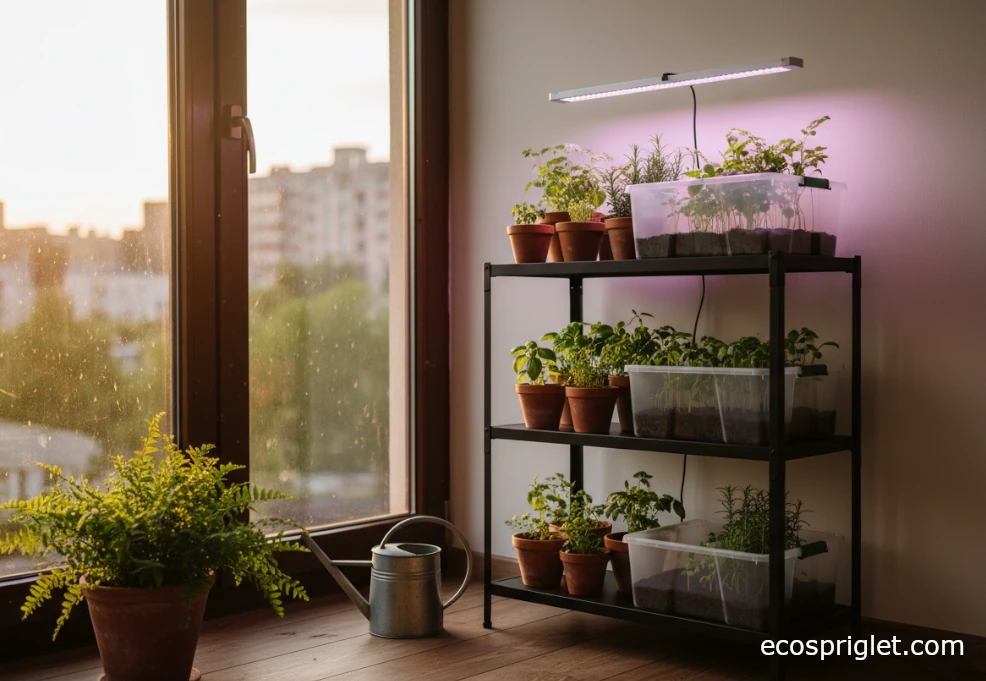
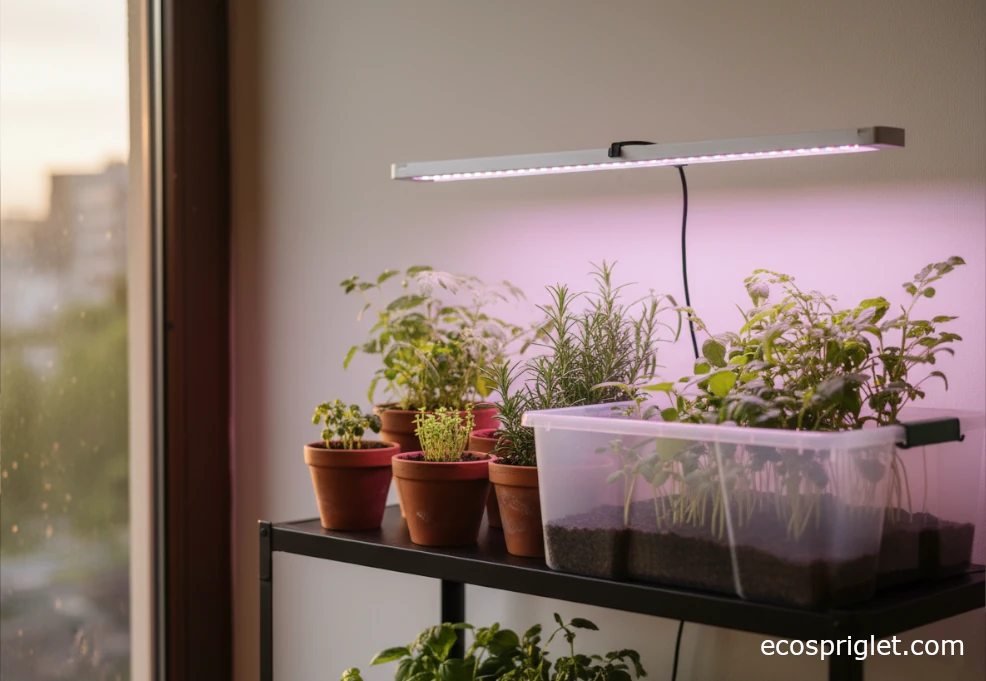
- Greenhouse shelf: A metal storage rack with LED grow bars zip-tied under each shelf and clear plastic on the sides to hold humidity.
- DIY indoor greenhouse cabinet: An IKEA-style glass cabinet or secondhand display case, retrofitted with grow lights and small fans.
- Bin-style mini greenhouse: Clear storage totes with lids, used as humidity domes on a regular shelf for seed trays and cuttings.
Whichever structure you choose, keep it stable and breathable. Avoid sealing every gap with tape; plants need some airflow to prevent mildew. Aim for doors or lids that close loosely, or drill a few small ventilation holes near the top of plastic bins.
For most people, a four-shelf rack about 24–36 inches wide is plenty of “greenhouse” for seedlings and herbs. If you plan to grow taller plants like tomatoes or peppers under lights, reserve one shelf with at least 18–24 inches of vertical clearance between the soil surface and the lights. You can always start small and expand as you gain confidence; check out guides like our indoor herbs guide if you want a plant list that stays compact indoors.
Light, Temperature, and Humidity Inside Your Greenhouse
Light is where most diy indoor greenhouse projects rise or fall. Even a south-facing window rarely gives the consistent, intense light that seedlings and sun-loving herbs crave. University extension programs generally recommend 14–16 hours of artificial light per day for healthy seedlings, with the lights kept just a few inches above the foliage.
For an indoor greenhouse with grow lights, I like a simple setup:
- Full-spectrum LED bars or panels mounted 4–8 inches above the plant canopy.
- A basic outlet timer set for 14–16 hours on, 8–10 hours off.
- The ability to raise the lights as plants grow so they don’t burn the leaves.
Temperature is usually easier indoors than outdoors. Many houseplants and seedlings are happiest with daytime temperatures around 65–75°F and slightly cooler nights, which matches typical home conditions. If your apartment runs cool in winter, a small seedling heat mat under a single tray can keep soil in the 65–75°F sweet spot for germination. Avoid placing your greenhouse directly above a radiator or heater, where temperatures can swing wildly and dry out plants quickly.
Humidity is the last piece of the microclimate puzzle. A completely sealed greenhouse can trap too much moisture and lead to fungal problems, while bone-dry indoor air can crisp leaf margins. I aim for a middle ground: lids or doors that close but still leak a little air, plus a few small vents. If everything is dripping with condensation, crack a door, remove a lid for part of the day, or add a tiny clip fan on the lowest setting to move air gently.
One beginner mistake is leaving seedling domes on for weeks. Use them for germination, then remove or prop them open once most seeds have sprouted to prevent damping-off disease and mold.
Soil, Containers, and Watering Indoors
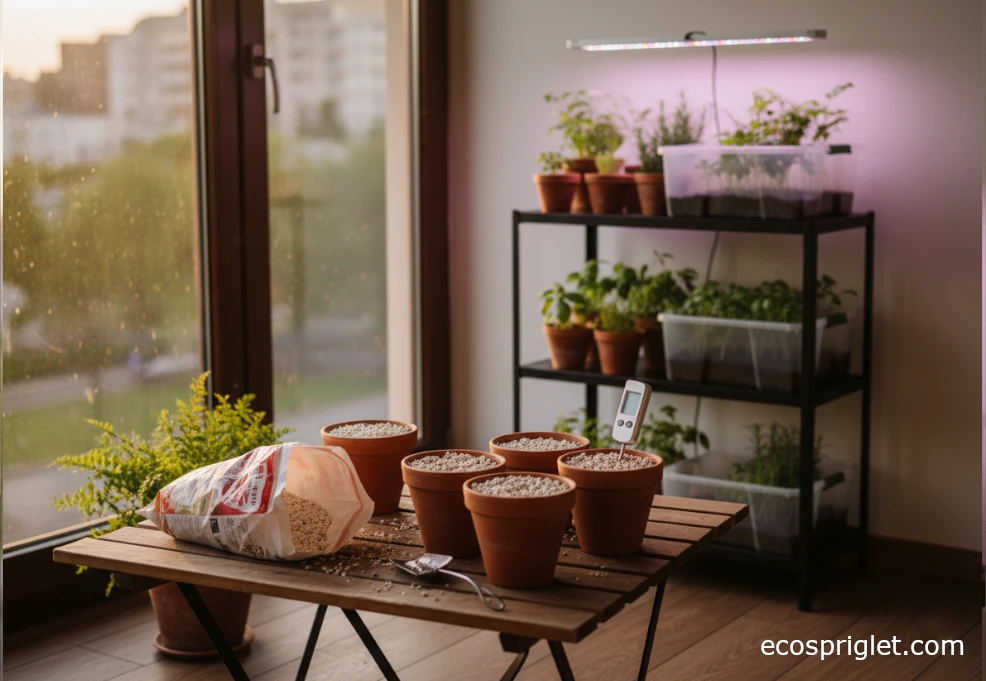
Soil choice can quietly make or break your indoor greenhouse diy project. Heavy garden soil holds too much water in containers and can bring in pests and diseases. Cooperative extension guides on container gardening generally recommend a soilless mix—based on peat or coir—with added perlite or similar materials for drainage. A good rule of thumb is to choose or mix a medium that’s light, airy, and drains freely when you water.
For a typical potting mix, using roughly 20–30% perlite by volume is common to increase air space and drainage for container-grown plants. This matches what I’ve found in practice; once I started mixing in that much perlite, my indoor herbs stopped sulking in oversaturated soil.
Skip the gravel layer at the bottom of pots. Research from university and extension sources shows that gravel doesn’t improve drainage and actually raises the saturated “wet zone” higher in the pot, closer to the roots. Fill containers completely with your chosen mix and rely on drainage holes to let excess water escape.
As for watering, aim for this simple rhythm:
- Check soil with your finger; water when the top 1–2 inches feel dry for most herbs and leafy greens.
- Water thoroughly until a little (about 10–20%) drains from the bottom of the pot, then empty saucers so roots aren’t sitting in water.
Inside a diy mini greenhouse, pots dry out at different speeds depending on light, plant size, and airflow. I like to keep a small notebook or notes app with each plant’s “normal” watering interval—maybe every 3–4 days for basil, every 7–10 for a slower-growing foliage plant—and adjust as seasons change.
Over time you’ll learn which plants in your setup are the “thirsty ones” and which prefer to dry slightly deeper between waterings.
Common Mistakes to Avoid With Indoor Greenhouse DIY
Every indoor greenhouse diy build comes with a learning curve. I’ve made most of these mistakes myself at least once—some of them more times than I’d like to admit. Here are the big ones to watch for:
- Too little light: Seedlings get tall, thin, and floppy, reaching for a distant window. Fix by adding grow lights and keeping them 2–6 inches above plants, on for 14–16 hours a day.
- Overwatering: A constantly wet mix invites fungus gnats and root rot. Let the top 1–2 inches of soil dry between waterings and use pots with drainage holes.
- Sealed, stagnant air: If condensation is running down the walls, open a door or lid and add gentle airflow with a small fan.
- Using garden soil: Heavy outdoor soil in pots compacts, drains poorly, and may contain weeds or diseases—use a bagged container mix instead.
- Overcrowding: Cramming every inch of space with plants makes it hard to water, inspect leaves, and maintain airflow. Leave space between pots so you can rotate and prune easily.
I learned the “sealed air” lesson the hard way. One winter I wrapped a shelf so tightly in plastic that everything inside looked like a rainforest—and a week later my basil stems were collapsing from damping-off disease. Now I always build in vents and make sure at least a little air can move through.

Daniel’s quick reset checklist
If your diy mini greenhouse feels “off,” run through this checklist:
- Are plants getting enough light hours and intensity?
- Is there any standing water in trays or saucers?
- Do you see mold on soil or walls (a sign of too much humidity and not enough air movement)?
- Are any plants clearly too big for their containers and in need of repotting?
Fixing just one or two of these issues can turn a struggling indoor greenhouse back into a thriving one in a couple of weeks.
Creative DIY Greenhouse Ideas for Tiny Apartments
Once you’ve mastered the basics, it’s fun to get creative with inside greenhouse ideas that fit your style and space. A diy indoor greenhouse doesn’t have to look “industrial” unless you want it to; a few small design decisions can turn it into living decor.
- Glow-cabinet in the living room: Use warm white grow lights in a glass cabinet so it doubles as a soft lamp in the evenings.
- Rolling mini greenhouse: Put a narrow shelf unit on locking casters so you can wheel it toward brighter windows in winter and tuck it out of the way for guests.
- Herb bar by the kitchen: Mount a pair of grow-light bars under a wall cabinet and keep herbs in narrow pots or a slim tray underneath—almost like a living spice rack.
- Seed-starting cart: Dedicate a small cart just for seed trays, heat mats, and labels when you’re prepping for balcony or patio season.
- Humidity nook for ferns: Use a clear bin or cabinet just for humidity-loving plants like ferns and fittonias, keeping them separate from your drier-loving cacti and succulents.
One of my favorite homemade greenhouse setups was a small bar cart with a top shelf for plants and a lower shelf for supplies—moisture meter, pruners, seed packets, and a notebook with planting dates. It took up less than 2 square feet but handled all of my spring seedlings for the balcony and gave me a place to jot down what actually worked each year.
Remember that your diy greenhouse indoor build can evolve. Start with a single shelf or bin, then add another light, another tier, or a cabinet door when you’re ready. The best setups are the ones you actually use and tweak, not the ones that look perfect in a photo but don’t fit your daily routine.
A well-thought-out diy indoor greenhouse turns a single corner of your apartment into a reliable plant engine. You’ve seen how to plan your space, choose a structure—whether it’s a simple shelf, a glass-front cabinet, or a set of clear bins—and dial in the essentials of light, temperature, and humidity. We’ve also covered why a light, soilless mix with good drainage, regular but measured watering, and decent airflow will keep your plants much happier than any fancy gadget.
Just as important, you’ve seen that an indoor greenhouse diy project doesn’t have to be all or nothing. You can start with one mini greenhouse indoor for herbs, add a greenhouse shelf for seedlings next year, and maybe upgrade to a full diy indoor greenhouse cabinet down the line. With each iteration you’ll learn how your space behaves—where drafts come from, how fast pots dry out, which grow lights you like—and your setups will quietly get better and easier to maintain.
If you’re feeling inspired, pick one simple idea from this guide and build it this week: maybe a clear bin greenhouse for basil, or a small seed-starting shelf on a timer. A tiny greenhouse isn’t about perfection; it’s about giving yourself a steady, forgiving space to grow more green life, right where you already live.