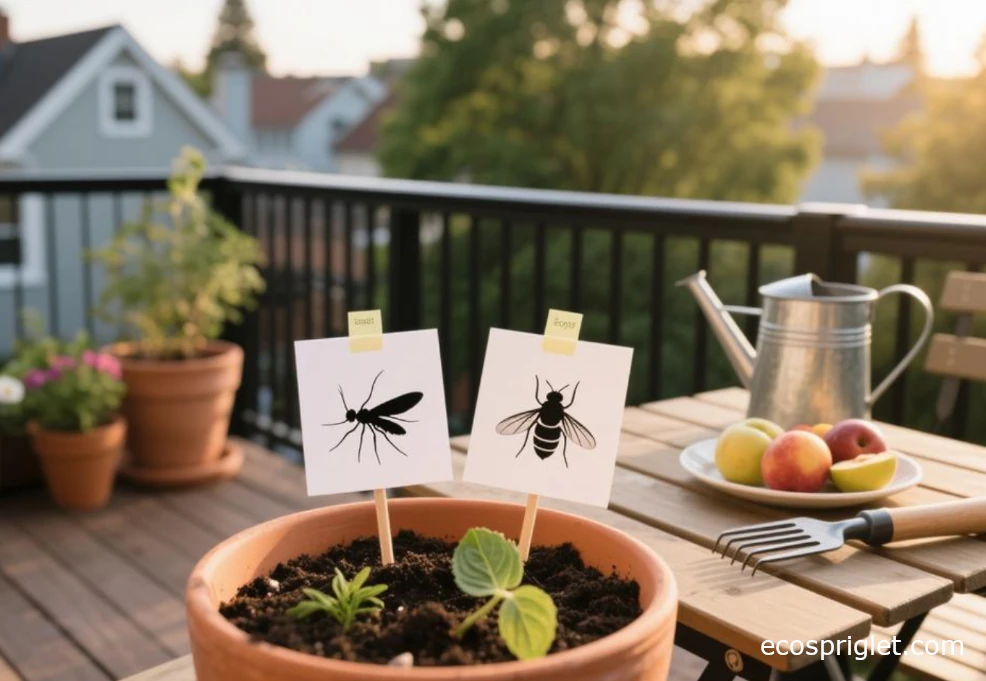
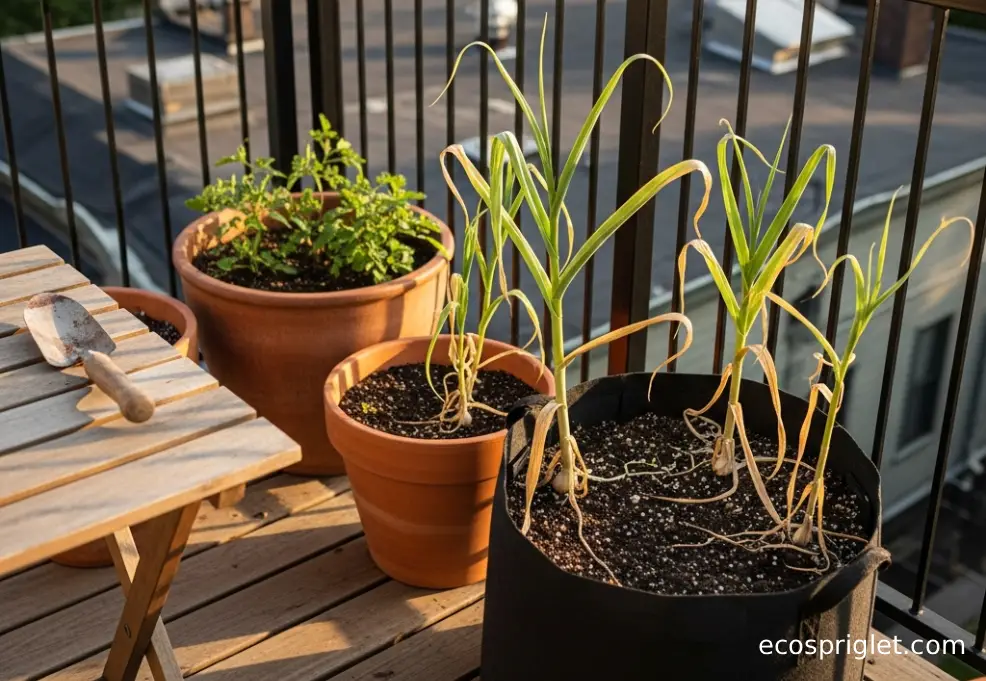
Harvesting garlic is one of those garden moments that feels simple—until you realize timing is basically everything. Pull too early and you’ll get small bulbs with thin wrappers that don’t store well. Wait too long and the bulb wrappers start breaking down, cloves separate, and storage life drops fast. The good news: you don’t need a big backyard or fancy tools to get it right. Even if your garlic is growing in a tote, fabric pot, or a deep balcony container, the plant gives you clear cues for when to harvest garlic and exactly how to harvest garlic without bruising it.
In this guide, I’ll walk you through how to tell when garlic is ready to harvest (including the leaf-color “math” that most beginners miss), how to lift bulbs cleanly in container soil, and how to cure garlic in a small apartment without stinking up your whole place. I’ll also share the mistakes I made the first time I tried curing garlic in a too-humid corner (spoiler: it wasn’t pretty), plus storage tricks that keep bulbs firm and flavorful longer. Sources referenced include University of Minnesota Extension, South Dakota State University Extension, University of Maine Extension, RHS, UMass Extension, UC Davis Postharvest, and Oregon State University Extension.
When Garlic Is Ready to Harvest: The Leaf Cues That Matter
If you only remember one thing, make it this: garlic harvest timing is about the leaves, not the calendar. Most extensions recommend harvesting when the lower leaves have browned and roughly half (or a bit more) of the upper leaves are still green. In plain English, you want “some green left,” because each green leaf usually maps to a wrapper layer around the bulb—more intact wrappers means better storage. University of Minnesota Extension describes starting harvest when the lower leaves turn brown and when about half (or slightly more than half) of the upper leaves remain green. South Dakota State University Extension gives a similar cue, and University of Maine Extension emphasizes that waiting too long can cause the outer wrapper to break down and storage quality to drop.
Two quick ways to confirm how to tell when garlic is ready to harvest:
- Leaf ratio check: lower third browning + plenty of green above (often 4–6 leaves still partly green).
- Test dig: pull one bulb, slice it crosswise. If the cloves fill the skins and look well-segmented, it’s go-time.
One more balcony note: containers can dry faster, so leaf yellowing can speed up a bit during hot, windy spells. If your potting mix is drying fast, use the test-dig method rather than guessing. It’s the most confidence-boosting move you can make.
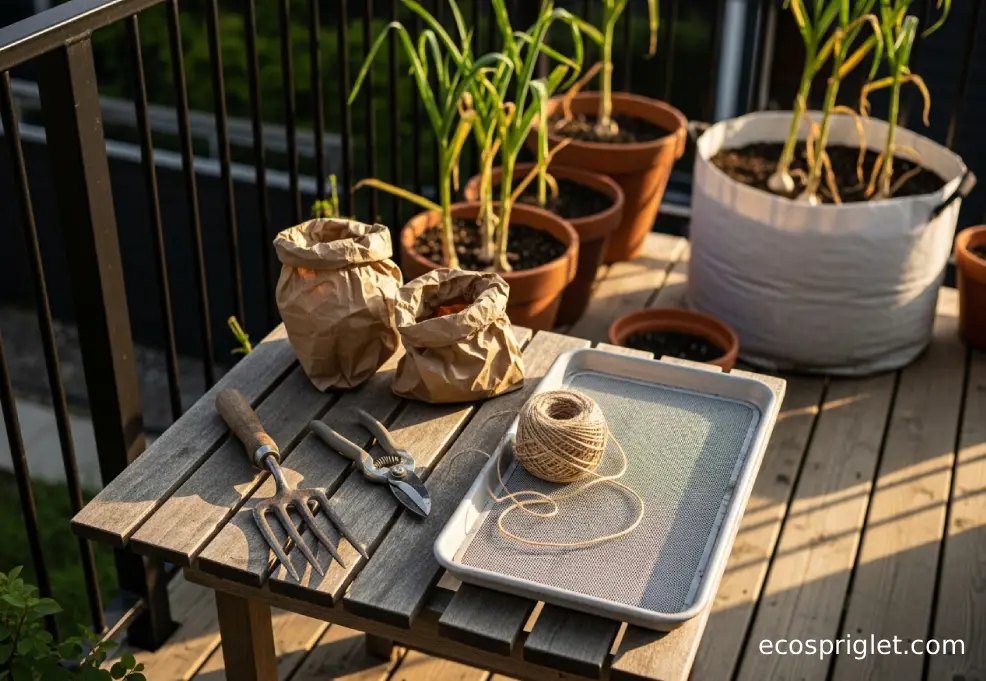
Get Set Before You Lift: Water, Tools, and a Clean Workspace
Harvest day goes smoother when you prep like you’re about to bake: tools out, workspace ready, and a plan for where the garlic will cure. A common recommendation is to ease up on watering shortly before harvest so bulbs lift cleaner and cure more reliably—South Dakota State University Extension suggests stopping irrigation about two weeks before harvest in garden settings. In containers, I usually aim for “drier, not dusty”: let the potting mix dry down so it’s crumbly, but don’t let the plants totally collapse.
- Tools: hand fork or small garden fork, pruners, a soft brush (or old paintbrush), twine.
- Skip the bucket of water: don’t wash freshly harvested bulbs—moisture slows curing and invites rot.
- Pick your curing spot now: shaded, dry, and airy (a spare room corner with a fan works). Colorado State University’s PlantTalk notes curing in a warm, airy place out of the sun for about 2–3 weeks.
Apartment bonus tip: lay down a flattened cardboard box or an old baking tray under your curing rack to catch crumbled soil. It keeps peace with neighbors and roommates, and it makes cleanup a 30-second job.
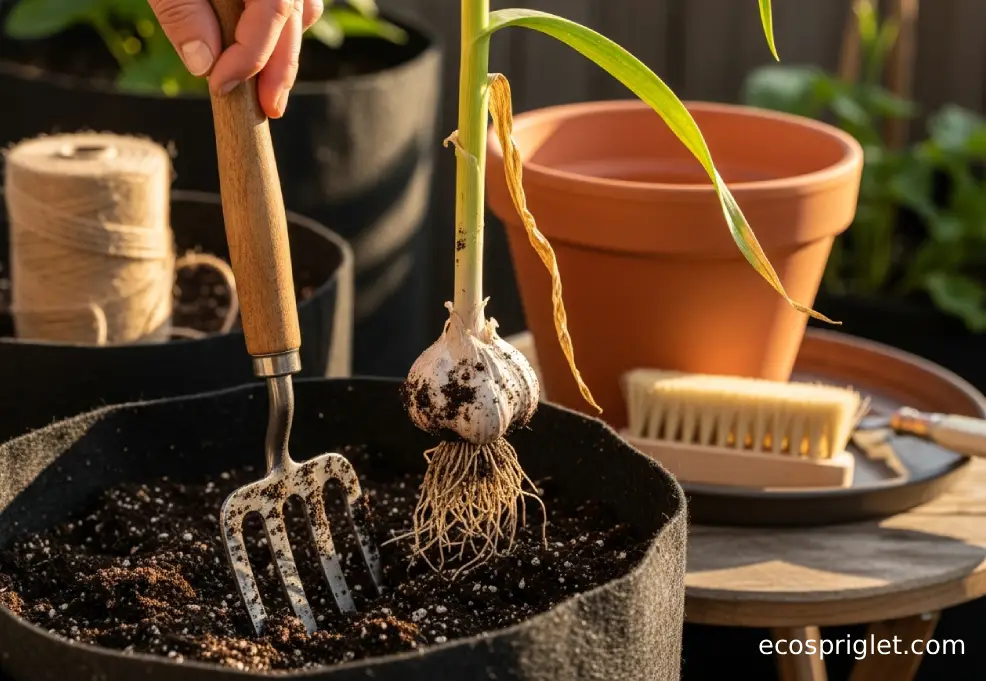
How to Harvest Garlic Without Bruising or Splitting Bulbs
I remember when I first tried harvesting garlic from a container, I grabbed the stalk like it was a scallion and yanked. The top came off in my hand. The bulb stayed put. I stood there, holding a sad green ponytail, thinking, “Well… that’s not how to harvest garlic.” The fix is simple: loosen first, lift second, and treat fresh bulbs like easily bruised fruit.
Here’s the clean, low-drama method that works especially well for balcony containers:
- Step 1: Insert a hand fork or trowel 2–4 inches from the stalk and loosen the potting mix all the way around the bulb.
- Step 2: Wiggle the plant upward by supporting near the base (not pulling from the tips of the leaves).
- Step 3: Lift the whole plant—bulb, roots, and leaves attached.
- Step 4: Gently knock off loose soil. Don’t bang bulbs together.
If you’re unsure about readiness, University of Minnesota Extension recommends pulling a few bulbs and cutting them in half to check clove development. It’s a smart move when you’re learning your balcony microclimate.
Beginner mistake to avoid: harvesting “one by one” over several weeks. That’s tempting in small spaces, but garlic left too long can start to split and lose wrapper quality. The RHS notes that delaying harvest can lead to bulbs opening up and shorter storage life.
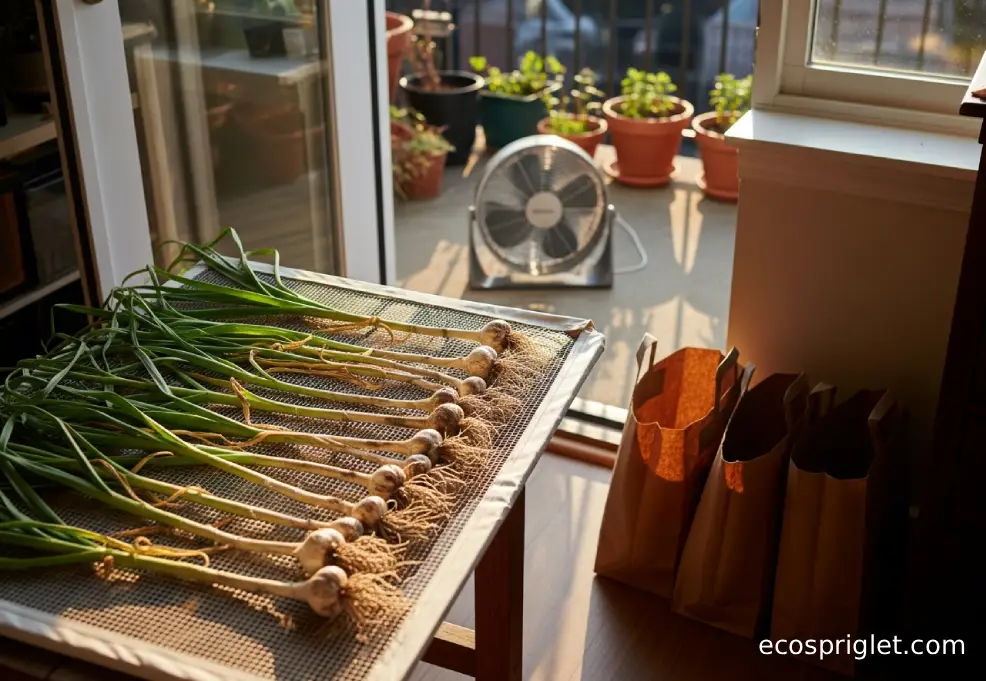
Curing Garlic in a Small Apartment: Dry, Dark, and Airy Wins
Curing is where garlic becomes storage garlic. Freshly lifted bulbs are tender and can bruise easily; a good cure dries the neck and outer wrappers so the cloves stay protected. Penn State Extension notes that garlic bulbs are easily bruised when first harvested and should be dried and hardened in a shaded, well-ventilated area for a few weeks. Colorado State University’s PlantTalk also describes curing for about 2–3 weeks in a warm, airy place out of direct sun.
Apartment-friendly curing setups that actually work:
- Mesh rack on a table: single layer, bulbs not touching, with a fan on low across the room.
- Hanging bundles: tie 6–10 plants together with twine and hang in a closet with the door cracked (add a small fan if it’s humid).
- Cardboard box “cure station”: punch side holes, line the bottom with a cooling rack, and keep the box open at the top for airflow.
What you’re looking for: the necks feel dry and tight, the outer skins are papery, and roots snap rather than bend. Common mistake: curing in direct sun “to dry faster.” Sun can scald bulbs and hurt storage quality—aim for shade and airflow instead.
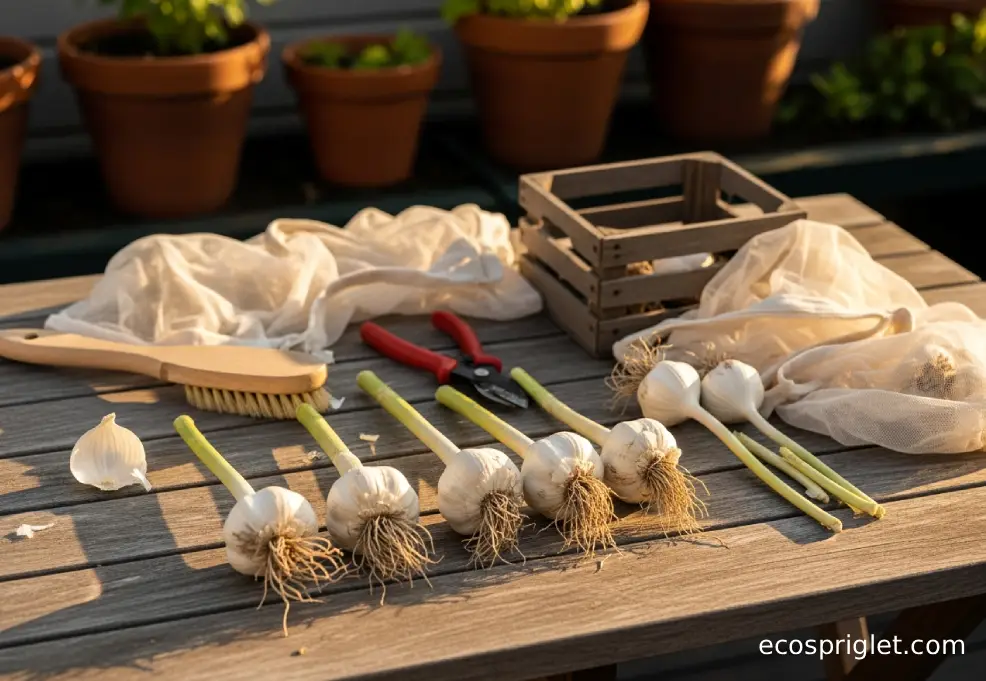
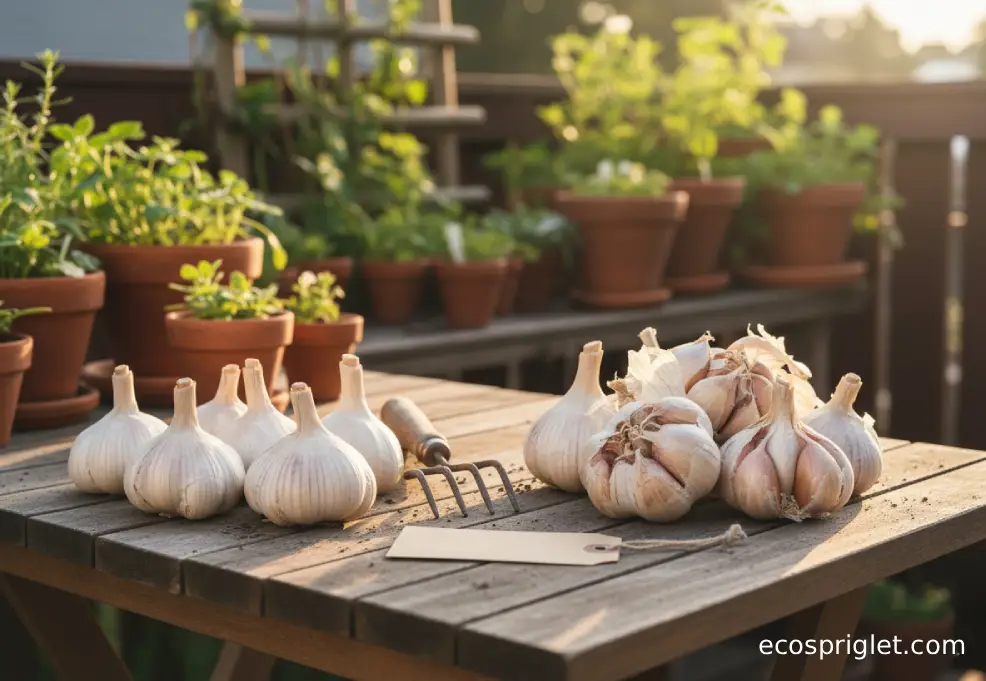
Cleaning, Trimming, and Storing Garlic So It Lasts
Once cured, keep your garlic dry, ventilated, and out of plastic. Oregon State University Extension notes garlic can be stored in mesh bags, slatted crates, or hung in braided ropes or bunches in a cool, well-ventilated place; they also note ideal long-term storage is very cold (around 32–38°F) with humidity below about 70%. UMass Extension and UC Davis Postharvest similarly describe long-term storage around 30–32°F with low relative humidity (about 60–70%) and good airflow.
Most apartment growers won’t hit “ideal warehouse conditions,” and that’s okay. UCANR notes garlic stored in cool, dry, dark conditions around 60°F has a shorter storage life (often a few months), and that typical refrigerator temperatures can encourage sprouting rather than prevent it. My rule: store what you’ll use soon in a pantry setup, and treat long-term storage as a bonus if you’ve got a truly cool spot.
Simple trimming approach: brush off soil (don’t wash), clip roots to about 1/4–1/2 inch, and either leave stems long for hanging/braiding or trim the neck to about 1 inch for “kitchen jar” style storage. (Softneck garlic is the classic braiding type; hardneck stems are usually stiffer.)
| Storage Method | Best For | Target Conditions | Notes |
|---|---|---|---|
| Mesh bag or slatted crate in a pantry | Everyday cooking | Cool, dry, dark, ventilated | Avoid sealed containers; airflow matters. |
| Hanging bundles or braids | Small spaces + good airflow | Dry, shaded, room-temp to cool | Great if your kitchen gets humid—hang away from the stove. |
| Very cool storage (basement/cold room) | Longest storage potential | About 30–38°F, 60–70% RH | Best-case conditions; not common in apartments. |
Quick quality check every couple of weeks: remove any bulb that feels soft, smells off, or shows mold—one bad bulb can raise humidity in a small bin fast.
Common Mistakes New Balcony Gardeners Make When Harvesting Garlic
- Waiting until every leaf is dead: wrappers can break down and bulbs may split, reducing storage life. University of Maine Extension warns you have a limited window once the lower leaves brown.
- Harvesting too early “because the tops look messy”: bulbs may be small and store poorly; extensions emphasize the importance of maturity.
- Yanking by the leaves: stems can snap and you’ll end up digging anyway—loosen soil first.
- Washing bulbs right after harvest: moisture slows curing and raises rot risk; brush soil off instead.
- Curing in hot sun or a stuffy room: cure in shade with airflow for about 2–3 weeks.
- Storing in plastic or sealed jars: garlic needs ventilation; use mesh, slatted crates, or hanging.
If you’ve already made one of these mistakes, don’t stress. Garlic is forgiving in the kitchen even when it’s not perfect in storage. Cook those bulbs first, and chalk it up as practice for next season.
Beyond Harvest: Scapes, Braids, and Setting Yourself Up for Next Year
Once you’ve nailed harvesting garlic, you can squeeze a little extra joy (and flavor) out of the crop. If you grew hardneck garlic, watch for scapes—the curly flower stems. The RHS notes the flower stem can be cooked and eaten, and many gardeners cut scapes to focus the plant’s energy on the bulb. I like to slice scapes into 1–2 inch pieces and sauté them like green beans with olive oil and a pinch of salt.
A few “next year” moves that work great in small spaces:
- Save your best bulbs for planting: pick the biggest, healthiest heads and keep them intact until planting time.
- Label hardneck vs. softneck: softnecks usually braid better; hardnecks often peel like a dream.
- Refresh your container mix: top up with compost and a quality potting mix rather than reusing exhausted media.
If you’re also looking for the full loop on how to grow garlic in containers, bookmark this and pair it with a basic balcony veggie setup guide like Indoor Herb Garden. Garlic is one of the most satisfying “plant it, wait, win” crops you can grow in a small footprint.

Troubleshooting: What to Do if Bulbs Are Small, Split, or Slow to Dry
Bulbs are small
This usually comes down to timing (harvested early), light, or nutrition. If you harvested before the lower leaves browned, that’s likely the main reason. Next season, let the plant reach that lower-leaf browning stage, and use the “test dig and slice” check if you’re unsure.
Bulbs are split or cloves are separating
That’s classic “harvested too late.” University of Minnesota Extension and the RHS both warn that delaying harvest can lead to bulbs opening and shorter storage life. Cook these first—they’re still tasty.
Garlic is slow to dry or smells musty
Airflow is the fix. Space bulbs farther apart, move them out of kitchens/bathrooms, and add a fan across the room. Colorado State University’s PlantTalk emphasizes curing in an airy place out of the sun; Penn State also highlights shaded, well-ventilated drying.
One more small-space reality check: if your apartment stays humid (hello, rainy-season Pacific Northwest), curing can take longer. Don’t rush trimming; wait until necks are truly dry and tight before you “clean them up” for storage.
Harvesting garlic doesn’t require a big garden—just good timing and gentle hands. Watch the leaves like a signal light: when the lower leaves brown and you’ve still got a solid amount of green up top, you’re in the sweet spot. If you’re nervous, do the test dig and slice one bulb. That quick peek tells you more than any date on a calendar ever will.
From there, treat bulbs carefully, cure them in shade with airflow, and store them like they’re allergic to plastic. Even if you can’t hit “ideal long-term storage” temperatures in an apartment, a dry, ventilated pantry setup will keep your homegrown garlic in great shape for everyday cooking—and it’ll taste like the victory it is. If you had a few split bulbs or small heads this year, cook those first and call it useful feedback, not failure. Next season, you’ll recognize the cues faster, and your curing setup will feel routine instead of improvised.