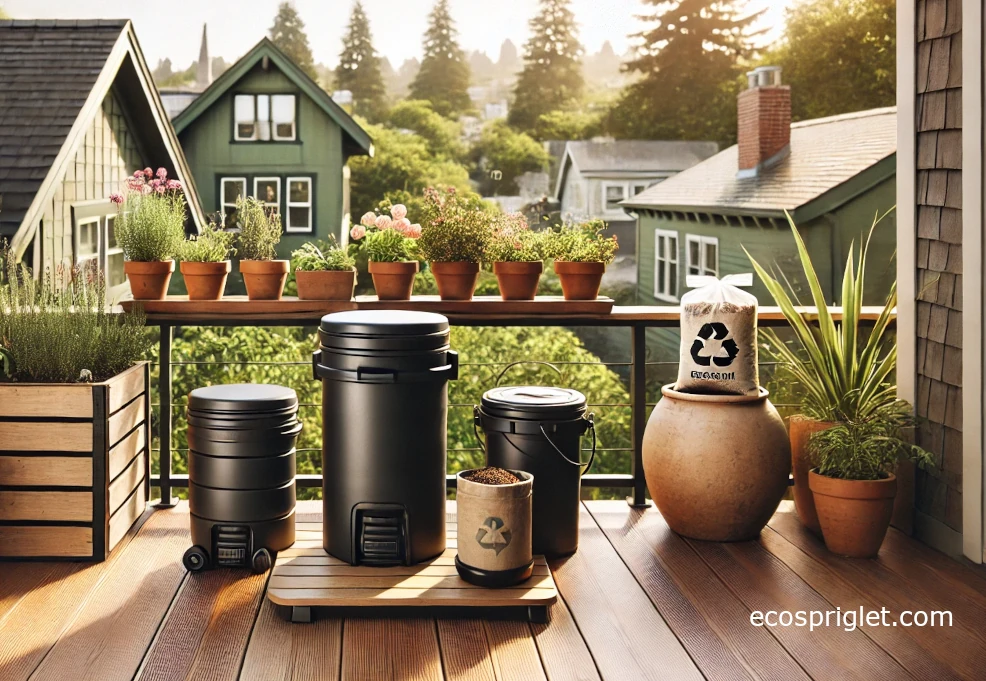
If you garden in an apartment, you already know the vibe: limited space, lots of containers, and plants that dry out faster than you’d like—especially in summer wind. Compost tea can be a handy tool in that reality, but it’s also one of the most misunderstood “organic hacks” on the internet. Done simply and safely, it’s a mild liquid feed and microbe rinse that can help perk up container plants. Done carelessly (or brewed like a science experiment with sugary additives), it can turn into a stinky mess that you don’t want anywhere near your herbs, lettuces, or kitchen sink.
This guide sticks to practical balcony methods: a basic bucket “compost extract” style, an optional small compost tea brewer setup, and clear dilution rates so you don’t overdo it. We’ll also cover the tea-bag side of things—because “tea bag compost” questions come up constantly, and the answer depends on what the bag is actually made of. Along the way I’ll call out the beginner mistakes I’ve made (yes, including one legendary rotten-egg bucket) so you can skip the gross parts.
Compost Tea Basics (And What It’s Actually Good For)
Let’s get one helpful definition on the table: most home “compost tea” is either (1) compost extract—compost soaked and stirred in water—or (2) aerated compost tea—compost brewed with constant aeration (air pump) to keep oxygen high. Oregon State University Extension notes that aeration shifts the brew toward oxygen-tolerant microbes and changes the microbial community.
On a balcony, the realistic benefits are pretty modest (and that’s okay):
- Quick, gentle feeding: a diluted drench can give container plants a mild nutrient boost—especially if you’re using high-quality finished compost.
- Microbe “rinse” for potting mix: it can add a little biological activity to sterile potting mixes (common in containers).
- Not a miracle pesticide: claims about disease control are mixed in research and very dependent on brewing method and starting materials. If your goal is “compost fertilizer,” compost itself (top-dressed) is often the more reliable backbone. Sources: University and Extension compost tea summaries (e.g., University of Arizona Cooperative Extension).
Balcony reality check: if you’re already using a slow-release organic fertilizer and occasional compost top-dressing, compost tea is an “extra,” not the foundation.
Choose the Right Compost for Compost Tea (This Matters More Than the Recipe)
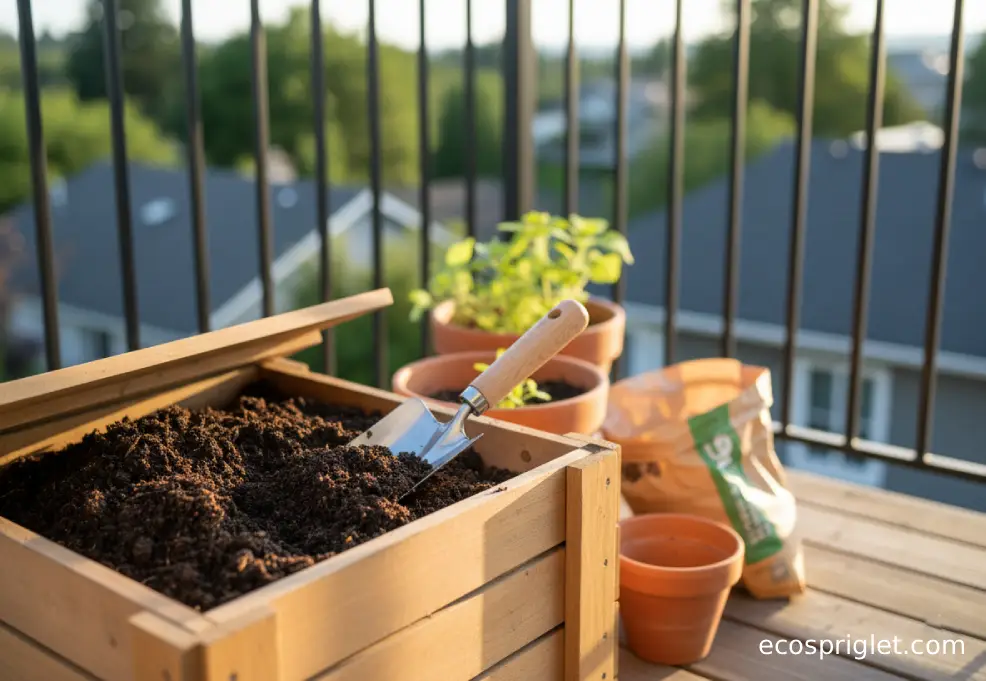
If you want better compost tea, start with better compost. The goal is finished compost—dark, crumbly, earthy-smelling. If it smells like ammonia or rotten eggs, it’s telling you something (usually too wet or too low-oxygen).
For apartment gardeners, here are the best options:
- Store-bought compost from a reputable brand (consistent, low-drama).
- Home compost that’s fully finished (no recognizable food scraps; smells like forest soil).
- Vermicompost (worm castings) can work well in small batches—very “balcony friendly”—but it’s potent, so you can use less.
Avoid: using raw manure or “not quite finished” compost for teas—food safety risk goes up, and it’s not worth it for a few patio pots. Sources: UMass Amherst food safety guidance on agricultural/compost teas; UConn Extension food safety notes on compost/manure.
Two quick tips that actually change outcomes:
- Use potable water (drinkable tap water is fine). If your tap water is heavily chlorinated, let it sit in an open bucket for 12–24 hours before brewing.
- Start small: a 1-gallon test batch is perfect for balcony learning (and easier to dump if you hate it).
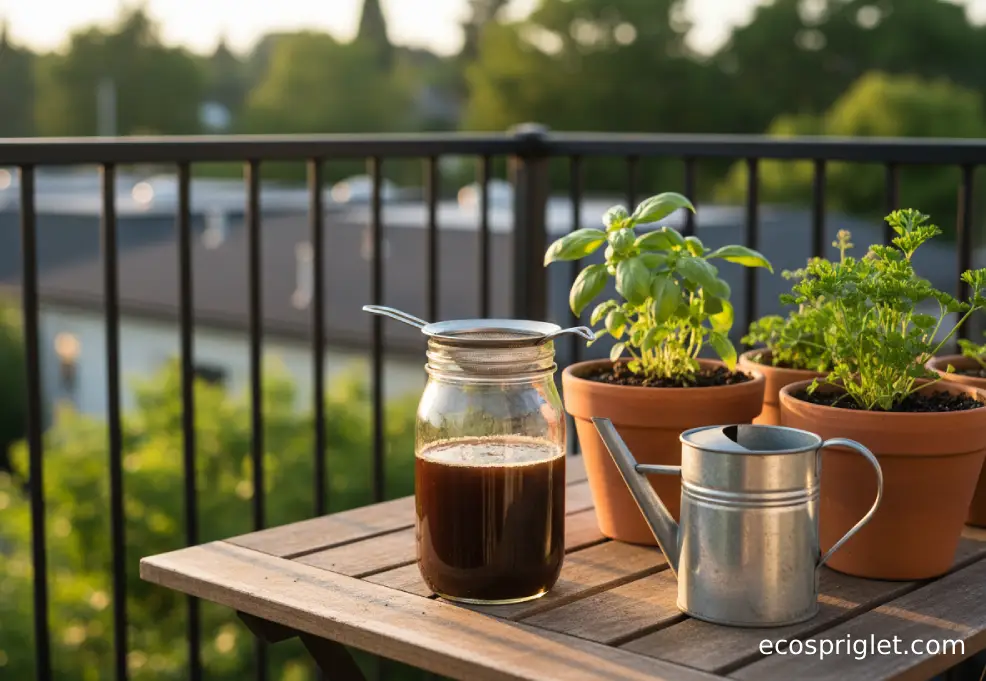
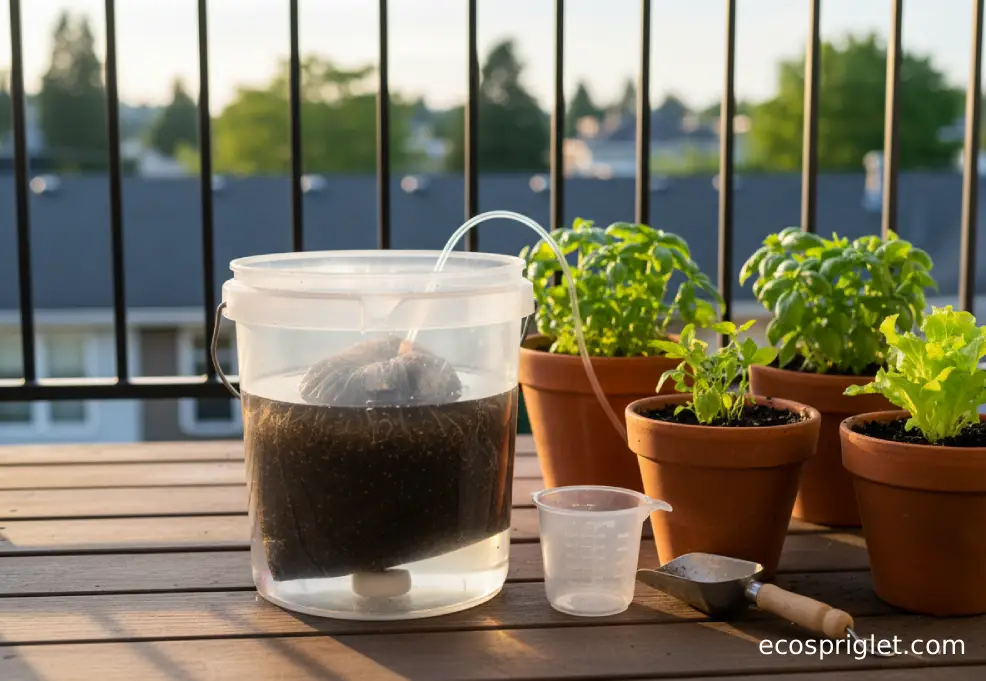
Simple Compost Tea Recipe (Bucket Method, Low Fuss)
This is my go-to method when I want “compost tea for plants” without turning my balcony into a lab. Think of it as a compost extract with optional aeration.
Bucket Compost Tea (1–2 gallons):
- Compost: 1–2 cups finished compost (or 1/2 cup worm castings)
- Water: 1 gallon (or 2 gallons for a milder brew)
- Bag: a reusable mesh “compost tea bag” (or an old nylon stocking / paint strainer bag)
- Time: 12–24 hours (stir a few times if you’re not aerating)
Optional but helpful: drop in a small aquarium air stone for constant bubbling. OSU Extension explains aeration changes dissolved oxygen and microbial activity in the brew.
How to do it (no drama version):
- Put compost in the mesh bag and tie it off. Submerge in water.
- If aerating, run the pump continuously. If not, stir hard for 30 seconds, 3–5 times over the day.
- Brew in the shade if possible. Hot sun can heat the bucket and push things funky.
- Strain (if needed) and use promptly.
Beginner mistake to skip: don’t add molasses or “microbe foods” on a balcony unless you’re following a tested protocol. Sweet additives can feed rapid growth—including organisms you don’t want—and increase food safety concerns if used on edible leaves. Sources: SARE compost tea manual; UMass food safety guidance.
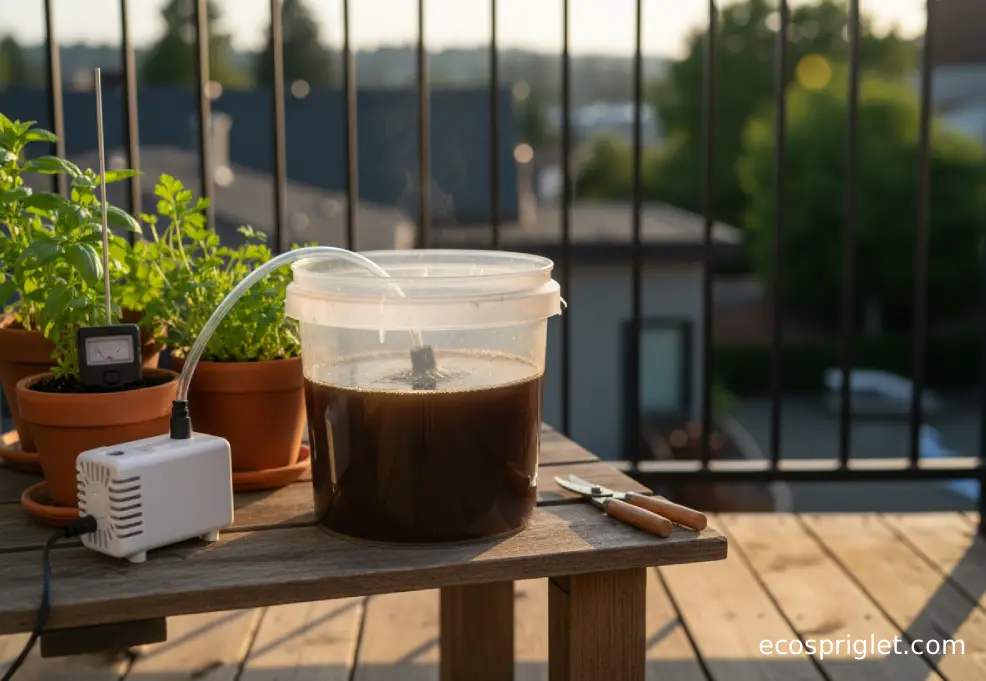
Compost Tea Brewer Setup (When a Pump Is Worth It)
If you keep seeing “compost tea brewer” online, it can sound like you need a fancy cone-shaped machine. You don’t. For balcony use, the smallest functional brewer is basically:
- a clean bucket (1–5 gallons),
- an aquarium air pump sized for the volume,
- tubing + air stone,
- a mesh compost tea bag.
I like aeration for one main reason: it keeps the brew from going anaerobic and stinky if my day gets busy. The “rotten egg” smell is your red flag that oxygen is too low. When I first tried compost tea, I left a bucket in a warm corner for two days because I got distracted—opening that lid was… unforgettable. If your brew smells foul, don’t “power through.” Dump it in a non-food landscape area or dilute heavily and apply to ornamentals only.
Two practical brewer tips:
- Keep brew time about 24 hours when aerating; longer isn’t automatically better. Several Extension/Master Gardener resources recommend using brewed tea quickly rather than letting it sit.
- Clean gear after use. Rinse the bucket, mesh bag, and air stone, and let them dry—don’t store them wet in a sealed tote.
How to Use Compost Tea for Plants (Dilution, Timing, and Where It Helps)
Compost tea is easy to overdo in containers because you’re working with a small volume of potting mix. The safest approach is: dilute, drench the soil, and use it as an occasional helper—not daily watering.
| Use | Best Dilution | How Often (Balcony Containers) | Notes |
|---|---|---|---|
| Soil drench (general) | 1:1 to 1:4 (tea:water) | Every 2–4 weeks | Start weaker (1:4) for seedlings and small pots. |
| Heavy-feeding veggies (tomatoes, peppers) | 1:1 to 1:2 | Every 2–3 weeks | Still pair with a real fertilizer plan. |
| Foliar spray | 1:4 (or weaker) | Occasional only | Avoid spraying edible leaves close to harvest; focus on soil drench instead. |
Two balcony-smart timing tips:
- Apply in the morning or early evening so leaves dry and pots don’t bake. Foliar sprays in hot sun can stress foliage.
- Use it when plants are actively growing—spring through early fall. In winter, most balcony plants need less feeding.
Edible safety note: risk depends on inputs and handling. Teas made from properly composted materials and potable water are considered lower risk than teas made from untreated manure or questionable inputs.
Compost Tea Bags, Tea Bag Compost, and Whether Tea Bags Are Compostable
This is the section that saves a lot of “why are there ghost teabags in my compost?” frustration.
Tea leaves: yes—tea leaves are generally fine in compost in small to moderate amounts. They behave like other soft “greens” and break down quickly.
Tea bags: maybe. Many tea bags that look like paper are sealed with plastics such as polypropylene (PP) or sometimes bioplastics like PLA, which may not break down in a home compost pile the way you expect. Consumer testing groups and published research have documented plastic components in some tea bags and plastic tea bag shedding during steeping.
So what should you do? This is the simplest balcony rule:
- If you don’t know the bag is plastic-free: cut it open, compost the tea, toss the bag.
- If it’s clearly labeled plastic-free and home-compostable: compost it, but expect slower breakdown (and remove staples if present).
- If it’s a “silky” pyramid bag: assume it’s plastic/nylon unless the brand proves otherwise—skip composting it.
Quick test (not perfect, but helpful): if the bag has a shiny heat-sealed seam, it may contain plastic fibers. The most reliable approach is checking the brand’s material statement—some brands explicitly state they’re free of polypropylene. Sources: Consumer organizations and manufacturer sustainability pages.
Compost tea bags (the brewing kind): these are reusable mesh bags for holding compost while brewing. They’re different from “tea bag compost” questions, but the names get mixed up constantly.

Common Mistakes to Avoid (I Learned These the Hard Way)
This is the “save your future self” list. Keep it short and strict and compost tea stays friendly.
- Brewing too long in warm weather: if it turns foul-smelling, dump it. Aim for 12–24 hours, especially if aerating. Sources: Extension/Master Gardener compost tea guidance; University of Arizona Extension overview.
- Adding sugary boosters: molasses and other “microbe foods” can raise food safety concerns and make brews unpredictable, especially for edible crops. Sources: SARE compost tea manual; food safety resources.
- Using sketchy inputs: don’t brew with raw manure or unfinished compost on a balcony—too risky and too smelly. Sources: UMass Amherst; UConn Extension.
- Spraying edible leaves close to harvest: if you grow salad greens and herbs, stick mostly to soil drenches and good compost practices.
- Clogging watering cans/sprayers: always strain if you’re using a sprayer. Mesh bags help, but fine particles still happen.
My personal “never again” moment: I once brewed in a sealed bucket (no air) during a warm week. When I cracked the lid, it smelled like a swampy egg factory. Lesson: don’t seal the lid tight, keep it shaded, and aerate if you can.
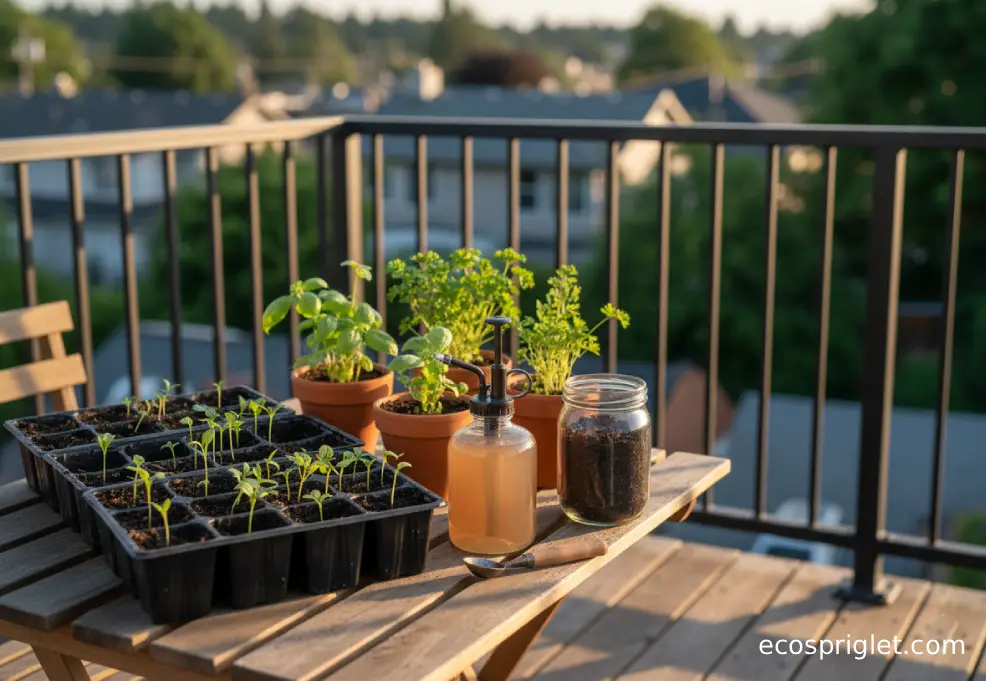
Creative, Apartment-Friendly Ways to Use Compost Tea
If you’re already brewing a small batch, you can stretch it in ways that make sense for tight spaces:
- Seedling support (very diluted): use a weak mix (around 1:4 tea to water) as a soil drench once seedlings have their first true leaves. If seedlings look pale, it can help—but don’t replace real nutrition long-term.
- Houseplant refresh (soil drench only): a light drench can perk up potting mix that’s been in a container for a while. Don’t drench plants that prefer lean soil (some succulents) unless you’re confident.
- “Compost rinse” after repotting: after you repot, a mild compost tea drench can help settle the mix and introduce a bit of biological life.
- Use leftovers smartly: if you brewed more than you need, apply to ornamental planters (flowers, shrubs) rather than storing it. Many resources recommend using brewed tea promptly rather than letting it sit.
Conclusion: Keep Compost Tea Simple, Safe, and Occasional
Compost tea shines when you treat it like a practical balcony tool: small batches, clean inputs, short brew times, and sensible dilution. If you remember nothing else, remember this: finished compost + potable water + prompt use gets you 90% of the way there. The rest is just dialing in what your containers actually need.
And on the tea-bag front: composting tea leaves is easy; composting the bag depends on whether it’s truly plastic-free. When in doubt, rip it open and compost the leaves only. That one habit keeps microplastic “mystery fibers” out of your bin and makes your finished compost cleaner.
If you want the simplest next step, start with a 1-gallon bucket batch, dilute it 1:4 for your first try, and apply it as a soil drench to a couple of your hungriest pots. Then build from there with a consistent soil and feeding routine.