If you’ve ever stared at a package of mushrooms in the grocery store and thought, “Could I grow these at home?”, the short answer is yes—at least, some of them. Indoor mushroom cultivation is surprisingly apartment-friendly: you don’t need a yard, the “plants” actually like low light, and a single shoebox-sized block can produce several meals’ worth of mushrooms. In this guide I’ll walk you through how to grow mushrooms at home using simple, legal, edible species like oyster, shiitake, lion’s mane, and button mushrooms—nothing psychedelic or illegal.
We’ll start with the basics of growing mushrooms indoors, choose beginner-friendly species, set up a small mushroom corner, and go through daily care, safety, and troubleshooting. Along the way I’ll flag common mistakes I’ve made myself (including the time I turned a closet into a mushroom sauna… not recommended) and explain why growing morel mushrooms indoors is more of a “graduate-level” project than a good first step. If you’ve been searching “how to grow mushrooms at home” or even “grow shrooms at home”, this is your cozy, practical, small-space-friendly roadmap—focused only on safe, edible mushrooms.
Why Growing Mushrooms at Home Is Apartment-Friendly
Mushrooms don’t care that you don’t have a backyard. Unlike tomatoes or peppers, most cultivated mushrooms actually prefer dim light, steady indoor temperatures, and high humidity, which makes a city apartment or basement corner a surprisingly good home. University and extension guides note that many common edible species fruit well at moderate indoor temperatures around 60–80°F with fairly high humidity, plus regular fresh air.
Another big plus: mushrooms are grown on “substrates” rather than garden soil. That might be a bag of sterilized sawdust, straw, or grain that’s already colonized with mushroom mycelium (the white, root-like network). When you buy a kit, the hard work—sterilizing and inoculating—is already done. You just give the block the right environment and wait for primordia (tiny pins) to appear.
For small-space growers, the key advantages are:
- Vertical, compact growing: a single block is often smaller than a loaf of bread.
- Low light needs: mushrooms use light mainly as a “direction” signal, not for photosynthesis.
- Quick harvests: some species can fruit in 1–3 weeks after you start a kit.
One important safety note: this guide focuses on legal, edible mushrooms for food. Instructions for cultivating psychedelic species (“magic mushrooms”) or other illegal fungi fall under drug production and aren’t something I can help with. Laws in many regions are strict, and wild mushrooms can also be toxic to people and pets.
Best Mushrooms to Grow Indoors for Beginners
Not every mushroom is a great candidate for your first indoor grow. Some species are fussy about temperature swings or need outdoor logs; others are forgiving and happy in a closet or on a shelf. Extension programs and mushroom specialists consistently recommend starting with a few beginner-friendly culinary mushrooms before you think about more exotic projects.
Good starter choices:
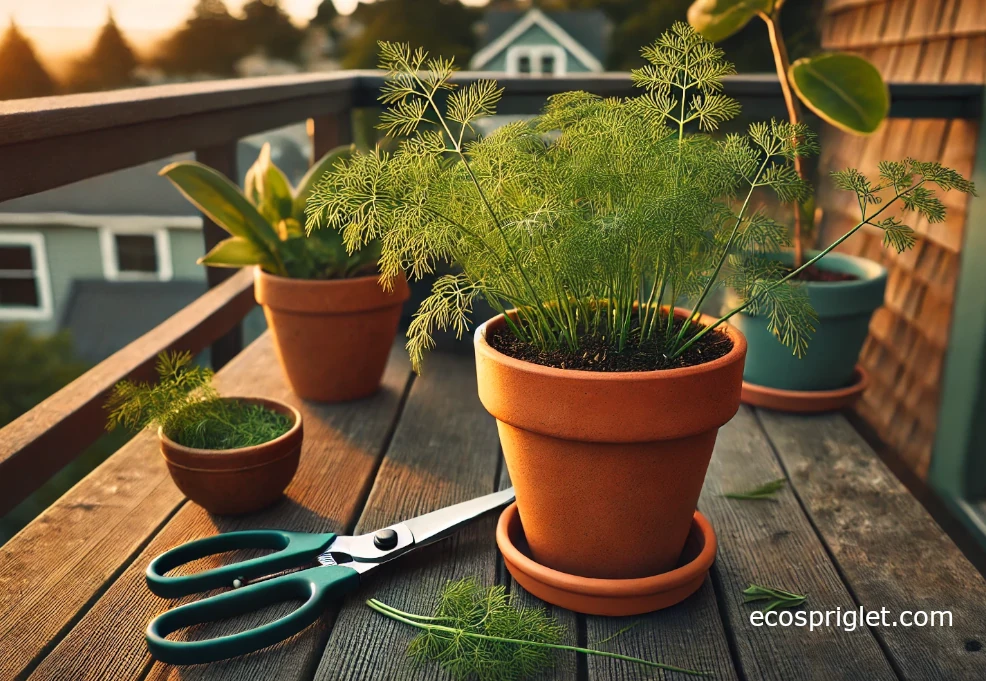
- Oyster mushrooms (Pleurotus spp.): super fast, tolerant of a wide range of substrates (coffee grounds, straw, sawdust), and very forgiving about minor mistakes.
- Lion’s mane (Hericium erinaceus): slower than oysters but still beginner-friendly in kit form; fruits as fluffy white clusters that look like pom-poms.
- Shiitake (Lentinula edodes): often grown on logs outdoors, but sawdust blocks and kits make indoor grows possible for intermediate beginners.
- White button/cremini/portobello (Agaricus bisporus): classic store mushrooms; a bit more particular about casing layers and CO₂ levels, but some starter kits handle the tricky parts for you.
I like to tell new growers: “Master oysters first.” Once you’ve grown two or three flushes from an oyster kit without major contamination, you’ll have built the instincts for humidity, airflow, and timing that transfer to other species.
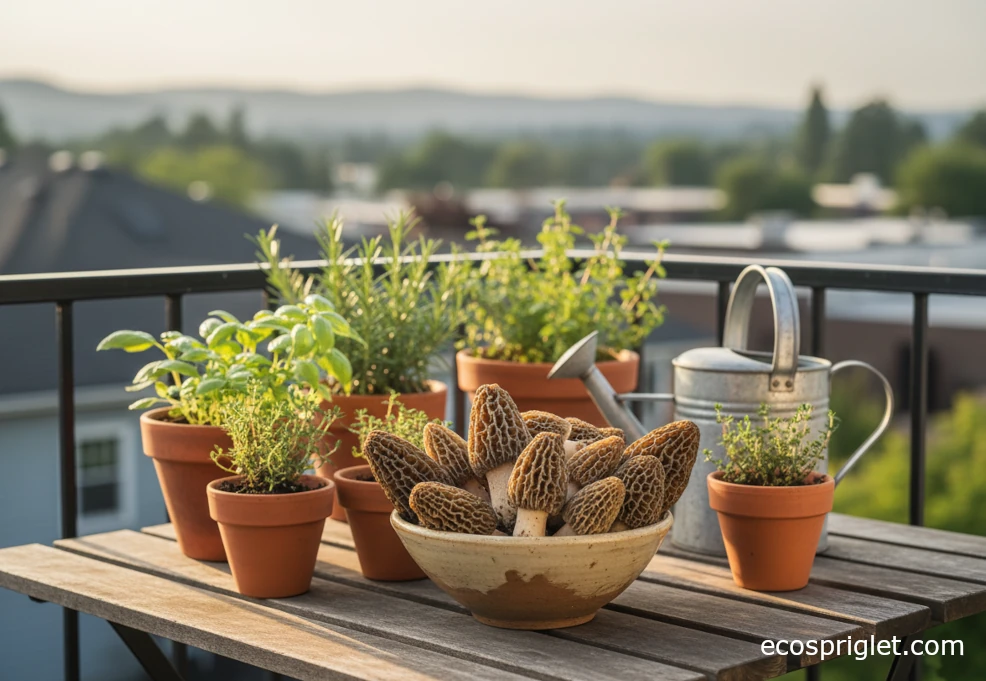
What about morels? Technically, morel mushrooms can be cultivated, but most reliable success so far has come from advanced outdoor beds or highly controlled indoor commercial systems like the Danish Morel Project. For an urban home grower, they’re an advanced challenge, not a practical first mushroom—so we’ll keep them in a special section later.

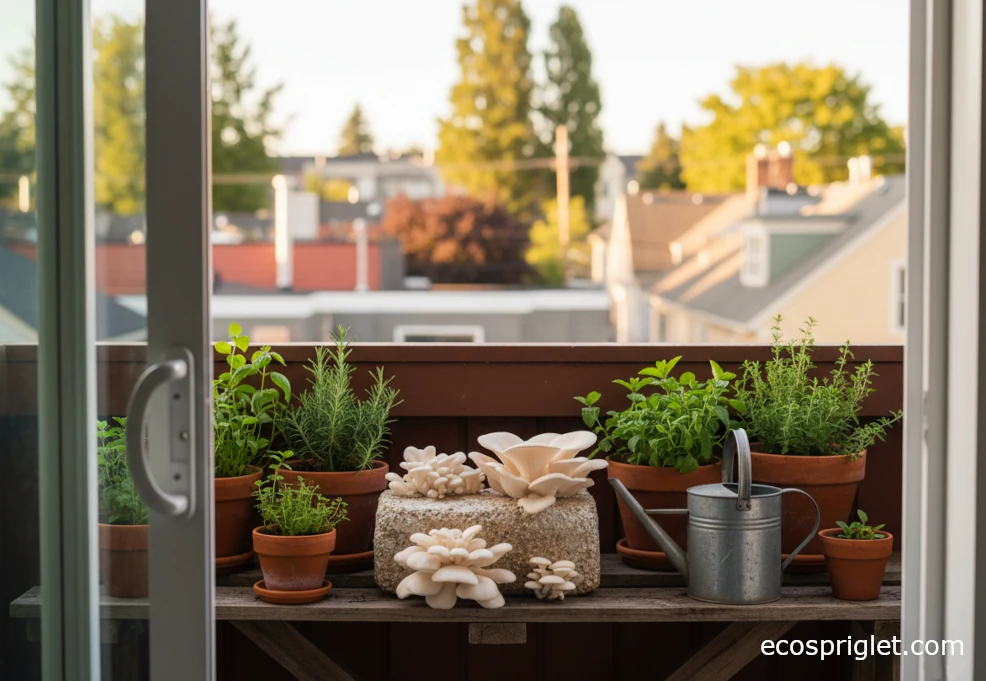
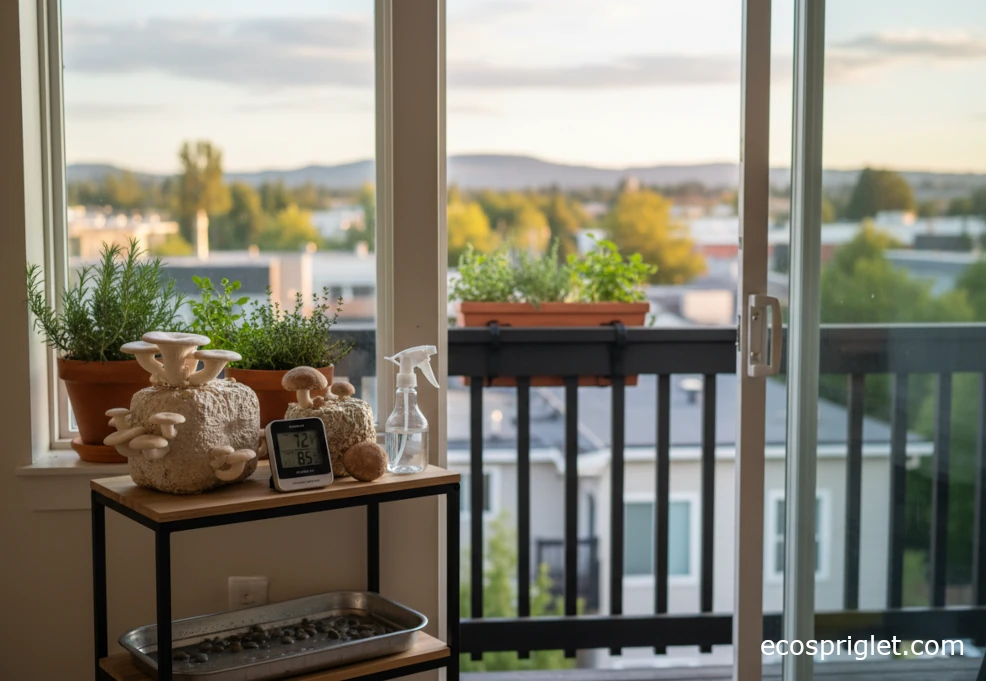
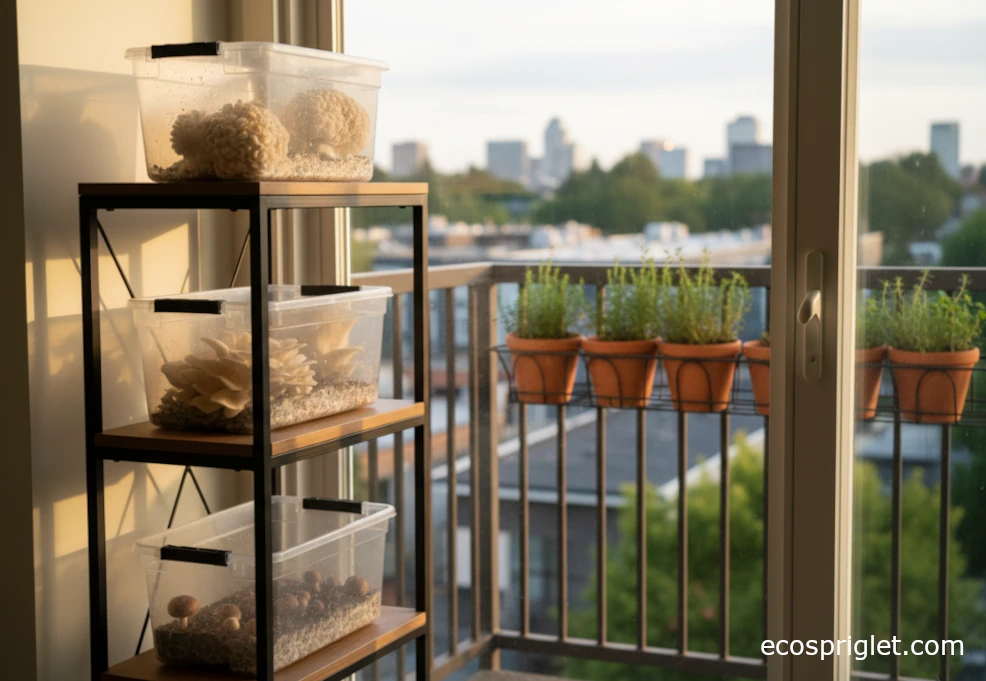
Setting Up an Indoor Mushroom Corner in a Small Space
The best mushroom setups look a little like a tiny spa: calm, humid, and stable. You don’t need fancy equipment to start, but you do need a spot that stays fairly steady in both temperature and humidity. University guides for home growers generally recommend moderate temperatures around 60–80°F and good air exchange; many species fruit happily close to normal room conditions.
Here’s a simple checklist I use when I’m choosing a mushroom corner in an apartment:
- Temperature: aim for somewhere that stays roughly 60–75°F most of the time (away from heaters and drafty windows).
- Humidity: choose a place where you can mist or run a small humidifier without ruining drywall—think bathroom shelf, laundry nook, or a plastic “fruiting tent” on a tray.
- Light: indirect daylight or a low-watt LED on a 12-hour timer is usually enough for most edible species.
- Airflow: fresh air is crucial; mushrooms stop pinning or grow long, spindly stems in stale, CO₂-heavy air. A cracked window in mild weather or a small fan on a low setting in the room (not blasting directly at the block) works well.
I remember my first “mushroom lab” being nothing more than a wire shelf over the toilet in our tiny Portland bathroom. It checked every box: easy to wipe down, high humidity after showers, no direct sun, and a door I could close if things got too damp. Today I usually set up a clear plastic tote as a mini fruiting chamber with a few holes for air—the same idea, just tidier.
If you already have plants under grow lights on your balcony or by a window, mushrooms can live nearby, but avoid blasting them with strong, hot light like you would for tomatoes. A softer, lower-intensity light is plenty.
How to Grow Mushrooms at Home With a Simple Kit
For most urban growers, the easiest way to start “mushroom farming at home” is with a ready-to-fruit kit. These are blocks or bags of sterilized, fully colonized substrate—often sawdust or straw—that just need the right environment to switch from growth mode to fruiting mode. Many university and extension resources recommend kits for beginners because they skip the higher-risk steps of sterilizing and inoculating substrate.
Every kit comes with its own directions, and you should always follow those first. But most follow a similar pattern:
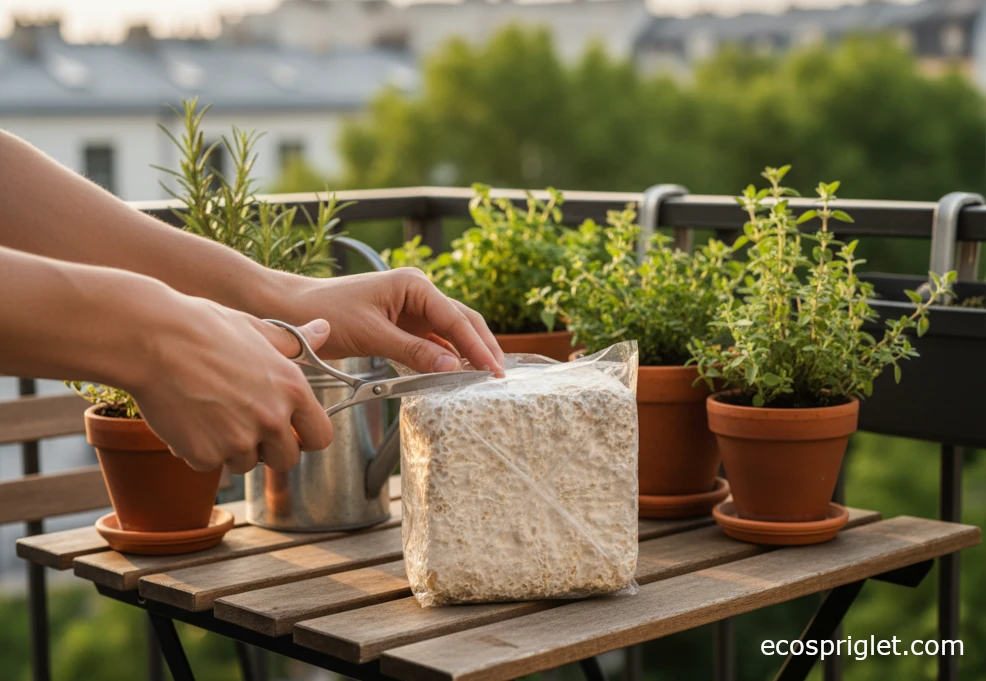
- 1. “Wake up” the block: some kits ask you to chill, soak, or simply open the bag to trigger fruiting.
- 2. Cut an opening: slice an X or flap where mushrooms will emerge; the manufacturer will mark or describe the best location.
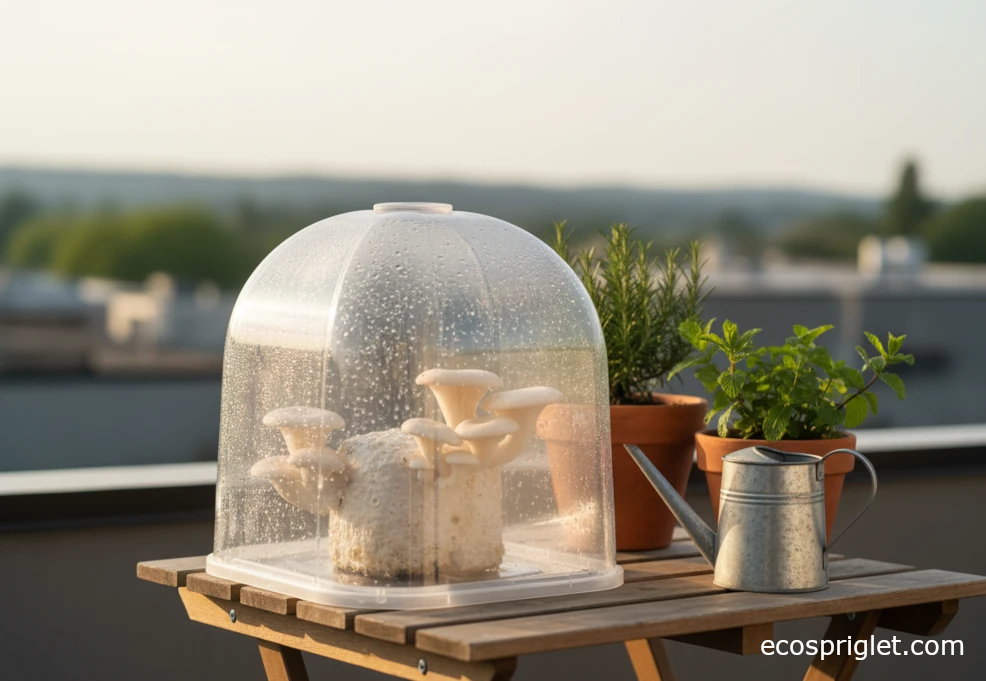
- 3. Place in your fruiting spot: that might be a humidity tent (clear bag with holes), a plastic tote with vents, or a bathroom shelf where you can mist several times per day.
- 4. Maintain humidity: mist the opening or tent walls as directed so the surface never dries out but doesn’t drip; many kits specify two to three light mists daily.
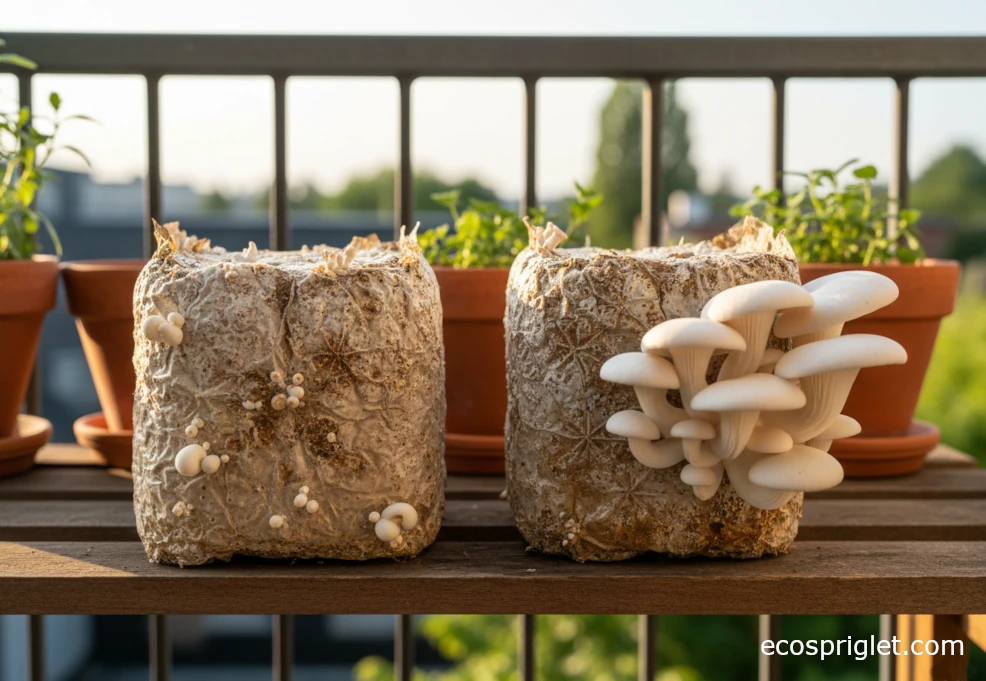
- 5. Harvest at the right size: oysterlings are usually best when caps are still slightly curled under; lion’s mane when it’s full and fluffy but still white.
From there, most blocks will rest briefly and then give you a second or third flush. You typically get the biggest harvest in the first one or two flushes, especially with oysters and lion’s mane. I like to move “tired” blocks into a bigger tote or even a shady outdoor corner to see if they’ll surprise me with a bonus crop.
If you’re brand new to growing anything indoors and feel overwhelmed by humidity and airflow talk, think of a mushroom kit as your “training wheels.” Once you’ve grown a couple of kits—for example, an oyster and then a lion’s mane—you’ll have the confidence to explore slightly more DIY options. If you’re also just starting with plants, you might enjoy pairing this with a simple herb container from our indoor herbs guide.
Everyday Care: Water, Fresh Air, and Light for Indoor Mushrooms
Once your block is in place, daily care comes down to three main levers: how moist the surface is, how stale the air is, and whether the mushrooms can “tell” which way is up via light.
Humidity & moisture. Many edible mushrooms like very humid air when they’re forming pins and fruiting—often in the 70–90% range in a fruiting chamber, depending on species and setup. At home, that usually means either:
- Keeping the block inside a ventilated tent or tote that holds moisture, or
- Growing in a naturally humid room (like a bathroom) and misting frequently.
A simple rule of thumb: the surface of the block should look slightly moist but not shiny with standing water. If droplets are pooling, ease up. If it looks dry or cracked, increase misting or improve your tent.
Fresh air. Fungi breathe oxygen and exhale CO₂, just like we do. When CO₂ builds up, mushrooms often grow long stems with tiny caps or stop fruiting. Utah State University notes that good fresh air exchange (often called “FAE”) is as important as humidity in home setups.
I like to:
- Open the tent or tote briefly 1–3 times a day to fan in fresh air.
- Make sure the room itself has decent airflow—windows that open, or a low fan across the room.
Light. Mushrooms don’t need intense light. Most home guides suggest diffuse light for 8–12 hours a day, similar to a bright but not sun-blasted corner. I often place kits near, but not directly under, my plant lights, or in a room that naturally gets daylight.
The rhythm feels a bit like caring for a sourdough starter: small, regular check-ins rather than big weekly chores. A quick morning and evening look—“Is the surface dry? Are caps cracking? Are stems too long?”—will tell you what to tweak.
Common Mistakes to Avoid When Growing Mushrooms Indoors
I’ve made almost every mushroom mistake it’s possible to make at home—including cooking my poor block under a bathroom heater vent. The good news is that most errors are easy to avoid once you know the patterns. Here are a few that show up over and over for new indoor mushroom growers:
- Letting the block dry out: a dry, cracked surface and tiny, stalled pins are classic signs. Fix it by improving your humidity: add a tent, increase misting, or move to a more humid room.
- Too much direct spray or standing water: constantly soaking the mushrooms can cause bacterial slime or rot. Aim to mist the air and tent walls more than the mushrooms themselves.
- Stale air: if your mushrooms have long, skinny stems and small caps, they probably need more fresh air, not just more water.
- Hot, dry locations: placing blocks on top of a fridge, next to a radiator, or in strong sun usually ends badly; most common species prefer cooler, stable conditions.
- Not harvesting in time: mushrooms often double in size in a day; overmature caps can flatten, dump spores everywhere, and lose texture.
As Penn State and other mushroom programs point out, good environmental control prevents far more problems than any “fix” afterward. I learned this the hard way by trying to revive a badly dried block for a week; it never really recovered. Now if I notice a block has gotten too stressed or contaminated, I compost it quickly and put my energy into the next one.
Staying Safe: Contamination, Mold, and When to Toss a Block
Any time you grow fungi indoors, you’re also inviting other fungi and bacteria to the party. That’s normal, but you don’t want your mushroom project turning into a mold farm. Public health agencies like the CDC, EPA, and Health Canada all point out that heavy indoor mold growth can worsen asthma, allergies, and other respiratory issues, especially in sensitive people.
A few safety rules I follow in my own apartment:
- Trust your nose and eyes. A fresh, healthy block smells pleasantly earthy or mushroomy. If you see thick green, black, or fuzzy colorful patches, or notice a sharp, unpleasant smell, treat that block as contaminated.
- Don’t try to “salvage” a heavily moldy block indoors. Scraping off the surface just releases more spores. Bag it, seal it, and dispose of it, or move it outside if local regulations allow composting.
- Protect pets and kids. Store-bought edible mushrooms used for human food are generally safe for pets, but wild or unknown fungi can be dangerous. The ASPCA notes that some wild mushrooms can cause severe illness or even be life-threatening for dogs and cats. Keep grow blocks out of reach and don’t let pets chew them.
- Keep your grow area clean and contained. Wipe surfaces regularly, ventilate the room, and avoid running humidifiers so hard that walls or windows stay wet.
If anyone in your home is immunocompromised or has serious mold allergies, talk with their healthcare provider before starting indoor mushroom projects; it may be safer to keep grows outdoors or skip them entirely.

Can You Grow Morel Mushrooms Indoors?
Morels have a kind of mythic status, and it’s no wonder people search “how to grow morel mushrooms indoors.” The honest answer: you can find morel cultivation methods, but they’re much closer to commercial research projects than casual apartment hobbies.
For decades, attempts to reliably cultivate morels stalled at the “mycelium but no mushrooms” stage. Only in recent years have research groups such as the Danish Morel Project reported stable indoor production using carefully engineered climate-controlled systems and specific companion plants. Extension and sustainable agriculture programs also note that morel cultivation is complex and still being actively studied.
At the home scale, morel kits and indoor methods have mixed reviews and low success rates. If you adore morels, I’d suggest:
- Starting with easier indoor species (oyster, lion’s mane, shiitake) to learn the basics.
- Trying a reputable outdoor morel bed kit only after research and with realistic expectations.
- Buying morels from trusted local foragers or markets until you’re ready for deep-dive experimentation.
In my own space, I treat morels as a “someday” experiment and reserve my limited indoor humidity and shelf space for reliable gourmet mushrooms I know will fruit in a predictable way.
From Kits to Indoor Mushroom Cultivation Projects
Once you’ve had a couple of successful kits, you might be tempted to level up. This is where “indoor mushroom cultivation” starts to feel more like a hobby than a single project. Resources from Cornell and various extension programs describe more advanced setups: dedicated fruiting tents, monotub systems, or small grow rooms with separate spaces for incubation and fruiting.
As a small-space grower, you can scale gradually:
- Move from kits to buying colonized blocks from local growers.
- Experiment with basic grain spawn and pasteurized straw for oysters (outside or in a well-ventilated area).
- Set up a simple fruiting tent with a shelving unit, clear plastic sheeting, and a small ultrasonic humidifier controlled by a timer or humidity controller.
What I don’t recommend indoors in a typical apartment is heavy DIY sterilization with big pressure cookers running constantly in unventilated kitchens. It’s noisy, energy-intensive, and increases moisture and heat in small spaces. If you get hooked enough to go that far, you might be ready for a dedicated workspace or community lab.
However far you go, keep food safety in mind. The Mushroom Good Agricultural Practices program, developed with Penn State, emphasizes clean working spaces, proper handling, and rapid cooling of harvested mushrooms if you’re not cooking them right away. Treat your mushrooms like any fresh produce: wash hands, clean knives and cutting boards, refrigerate what you don’t use within an hour or two.
Growing mushrooms at home turns a forgotten corner of your apartment into something quietly magical. You open a bag, adjust a few simple conditions, and a week or two later you’re cutting clusters of fresh mushrooms straight into the pan. Once you understand the basics—moderate temperatures, high but controlled humidity, steady fresh air, and clean handling—indoor mushroom cultivation becomes much less mysterious and much more like tending pots on a balcony, just with a different kind of green (or rather, white) life.
If you’re just starting out, my suggestion is simple: pick one oyster or lion’s mane kit, set up the best little mushroom corner you can manage, and treat the first run as a friendly experiment. Take notes on what worked, what dried out, what molded, and adjust for your second kit. Keep an eye on safety, especially mold and pet access, and remember that tossing a troubled block early is better than letting it become a problem.
From there, you can branch out into other edible species, play with small fruiting tents, or pair your mushrooms with pots of herbs and salad greens. Whether you stop at one kit a year or gradually build a mini indoor mushroom “farm,” you’ll be stacking fresh food, practical skills, and a bit of quiet wonder into the same few square feet of your urban home.